• Welcome
  • Entertain
  • Decorate
  • Food & Drink
  • About
  • Contact
Menu

Redefining Domestics

Street Address
Washington, DC
Phone Number

Practical applications for turning your house into a home.   

Redefining Domestics

  • Welcome
  • Entertain
  • Decorate
  • Food & Drink
  • About
  • Contact

Making Cheese Markers

July 29, 2016 Callie Cagney
IMG_8001.jpg

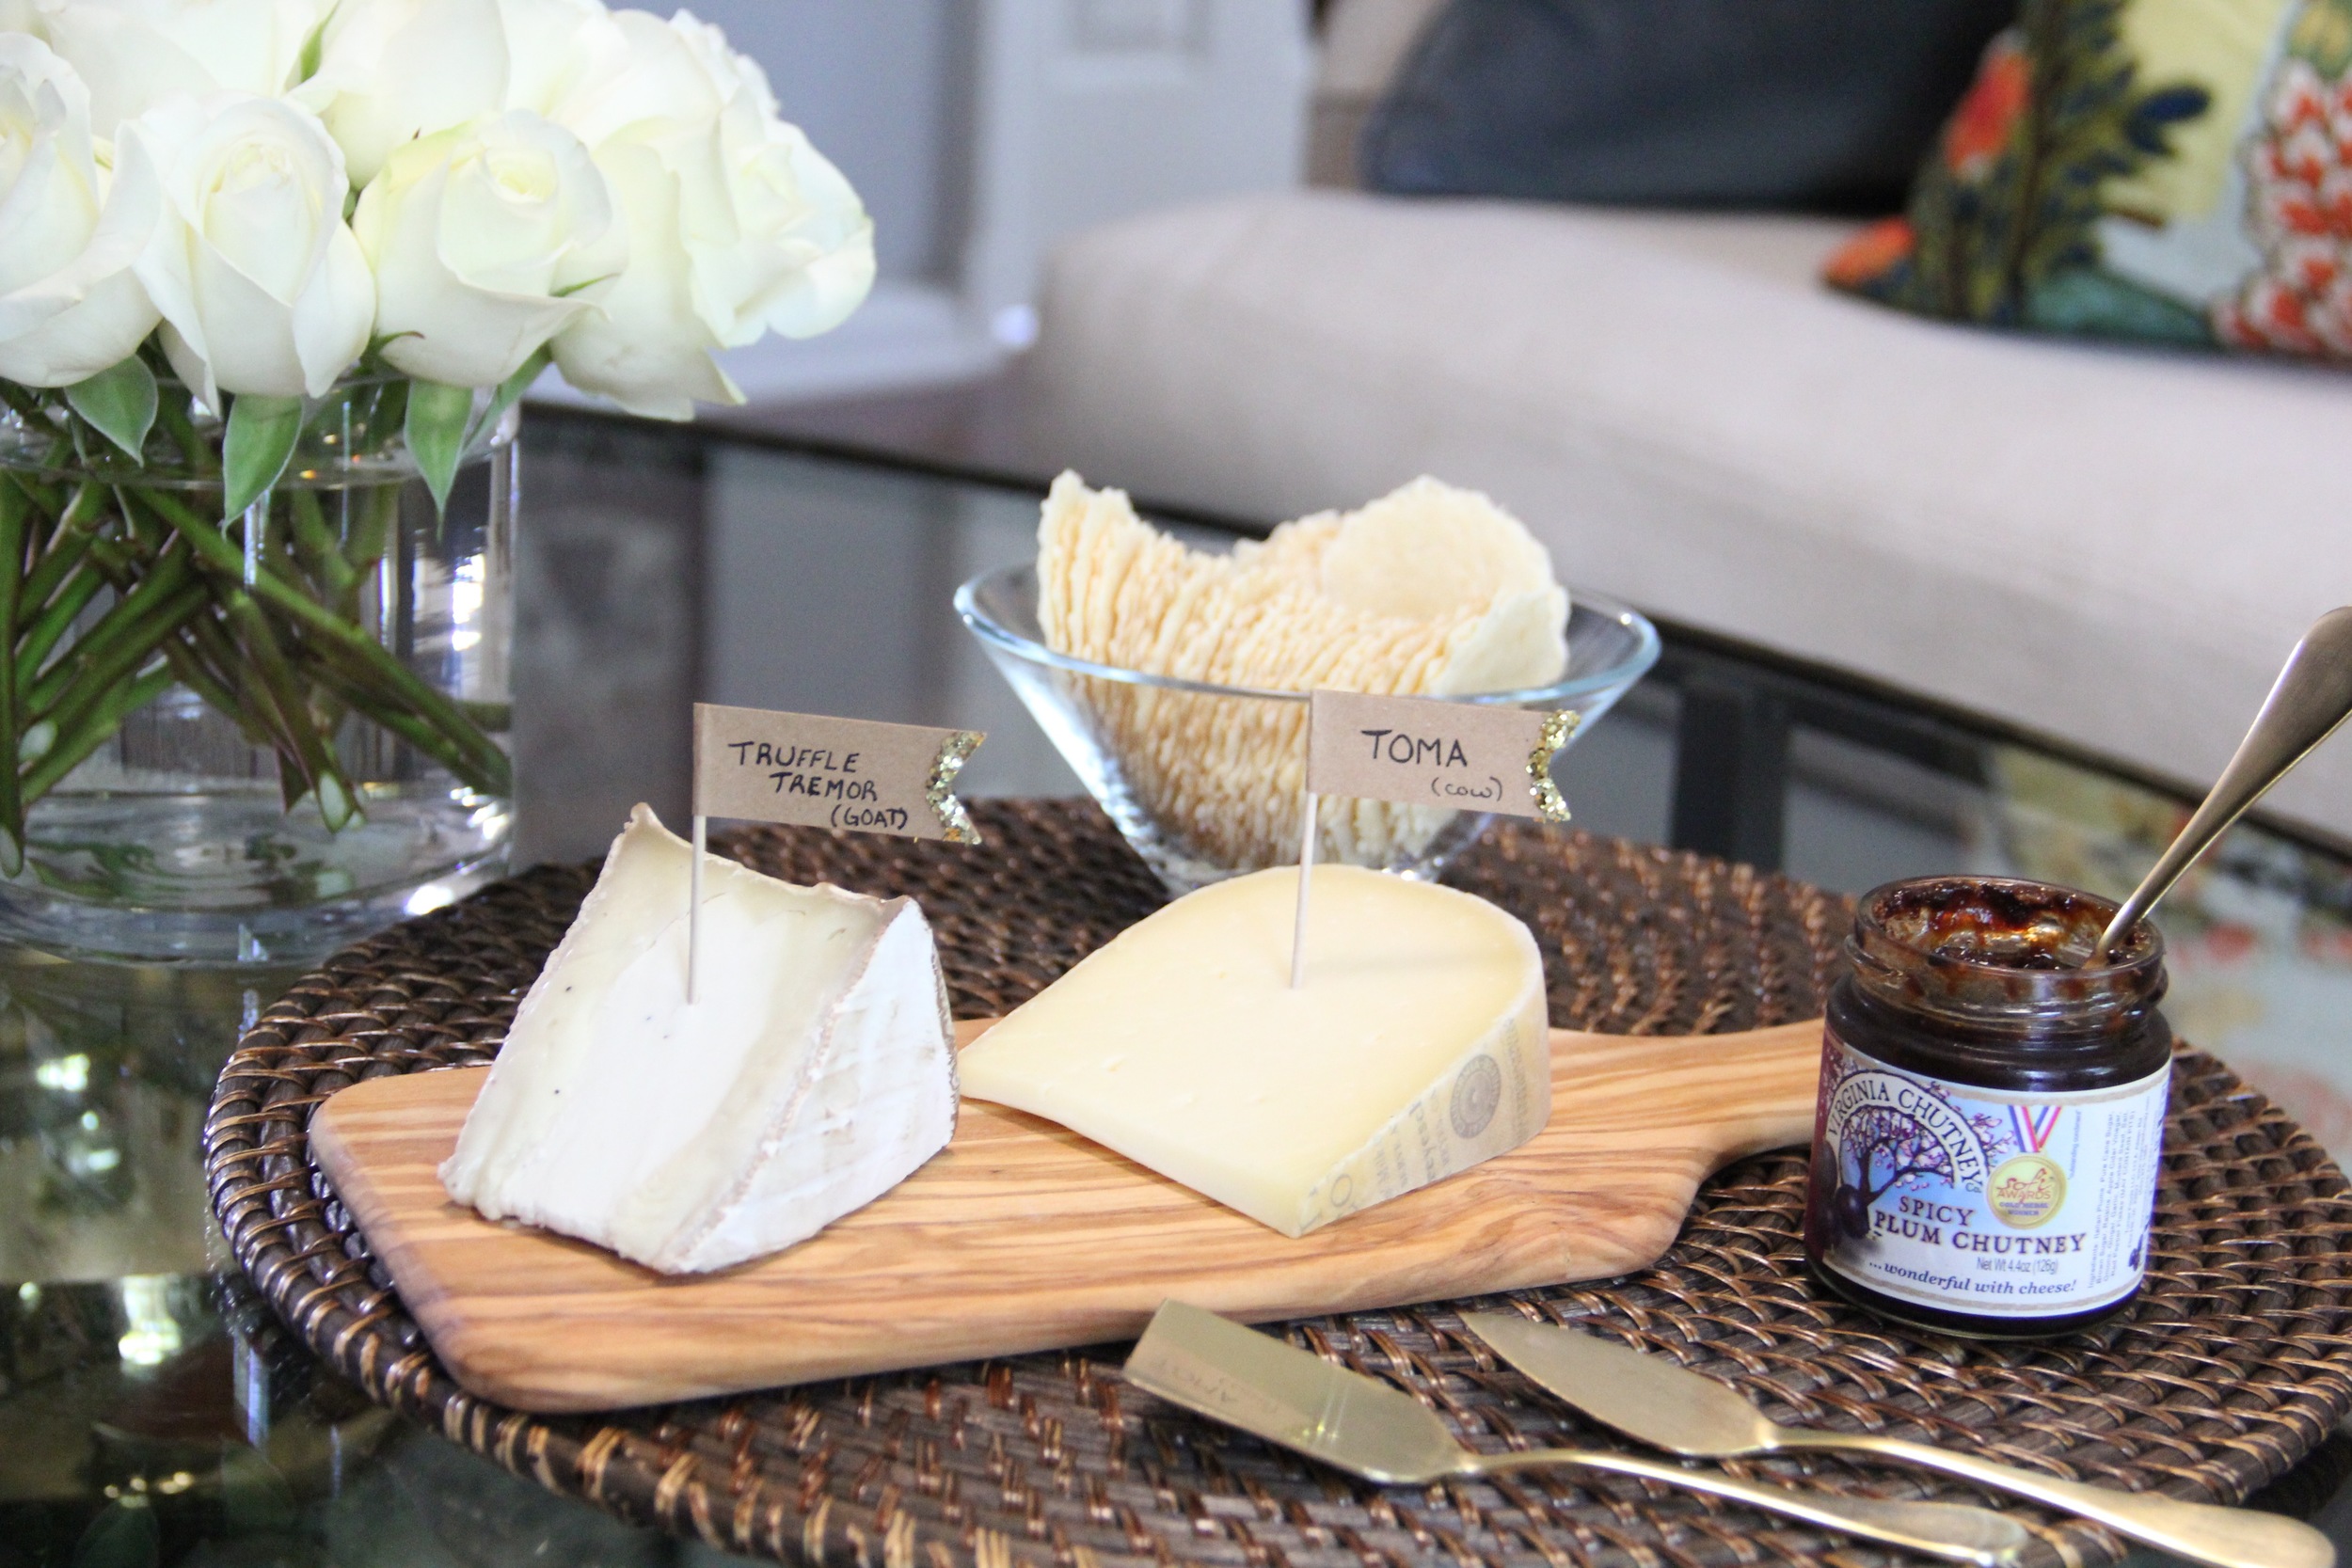
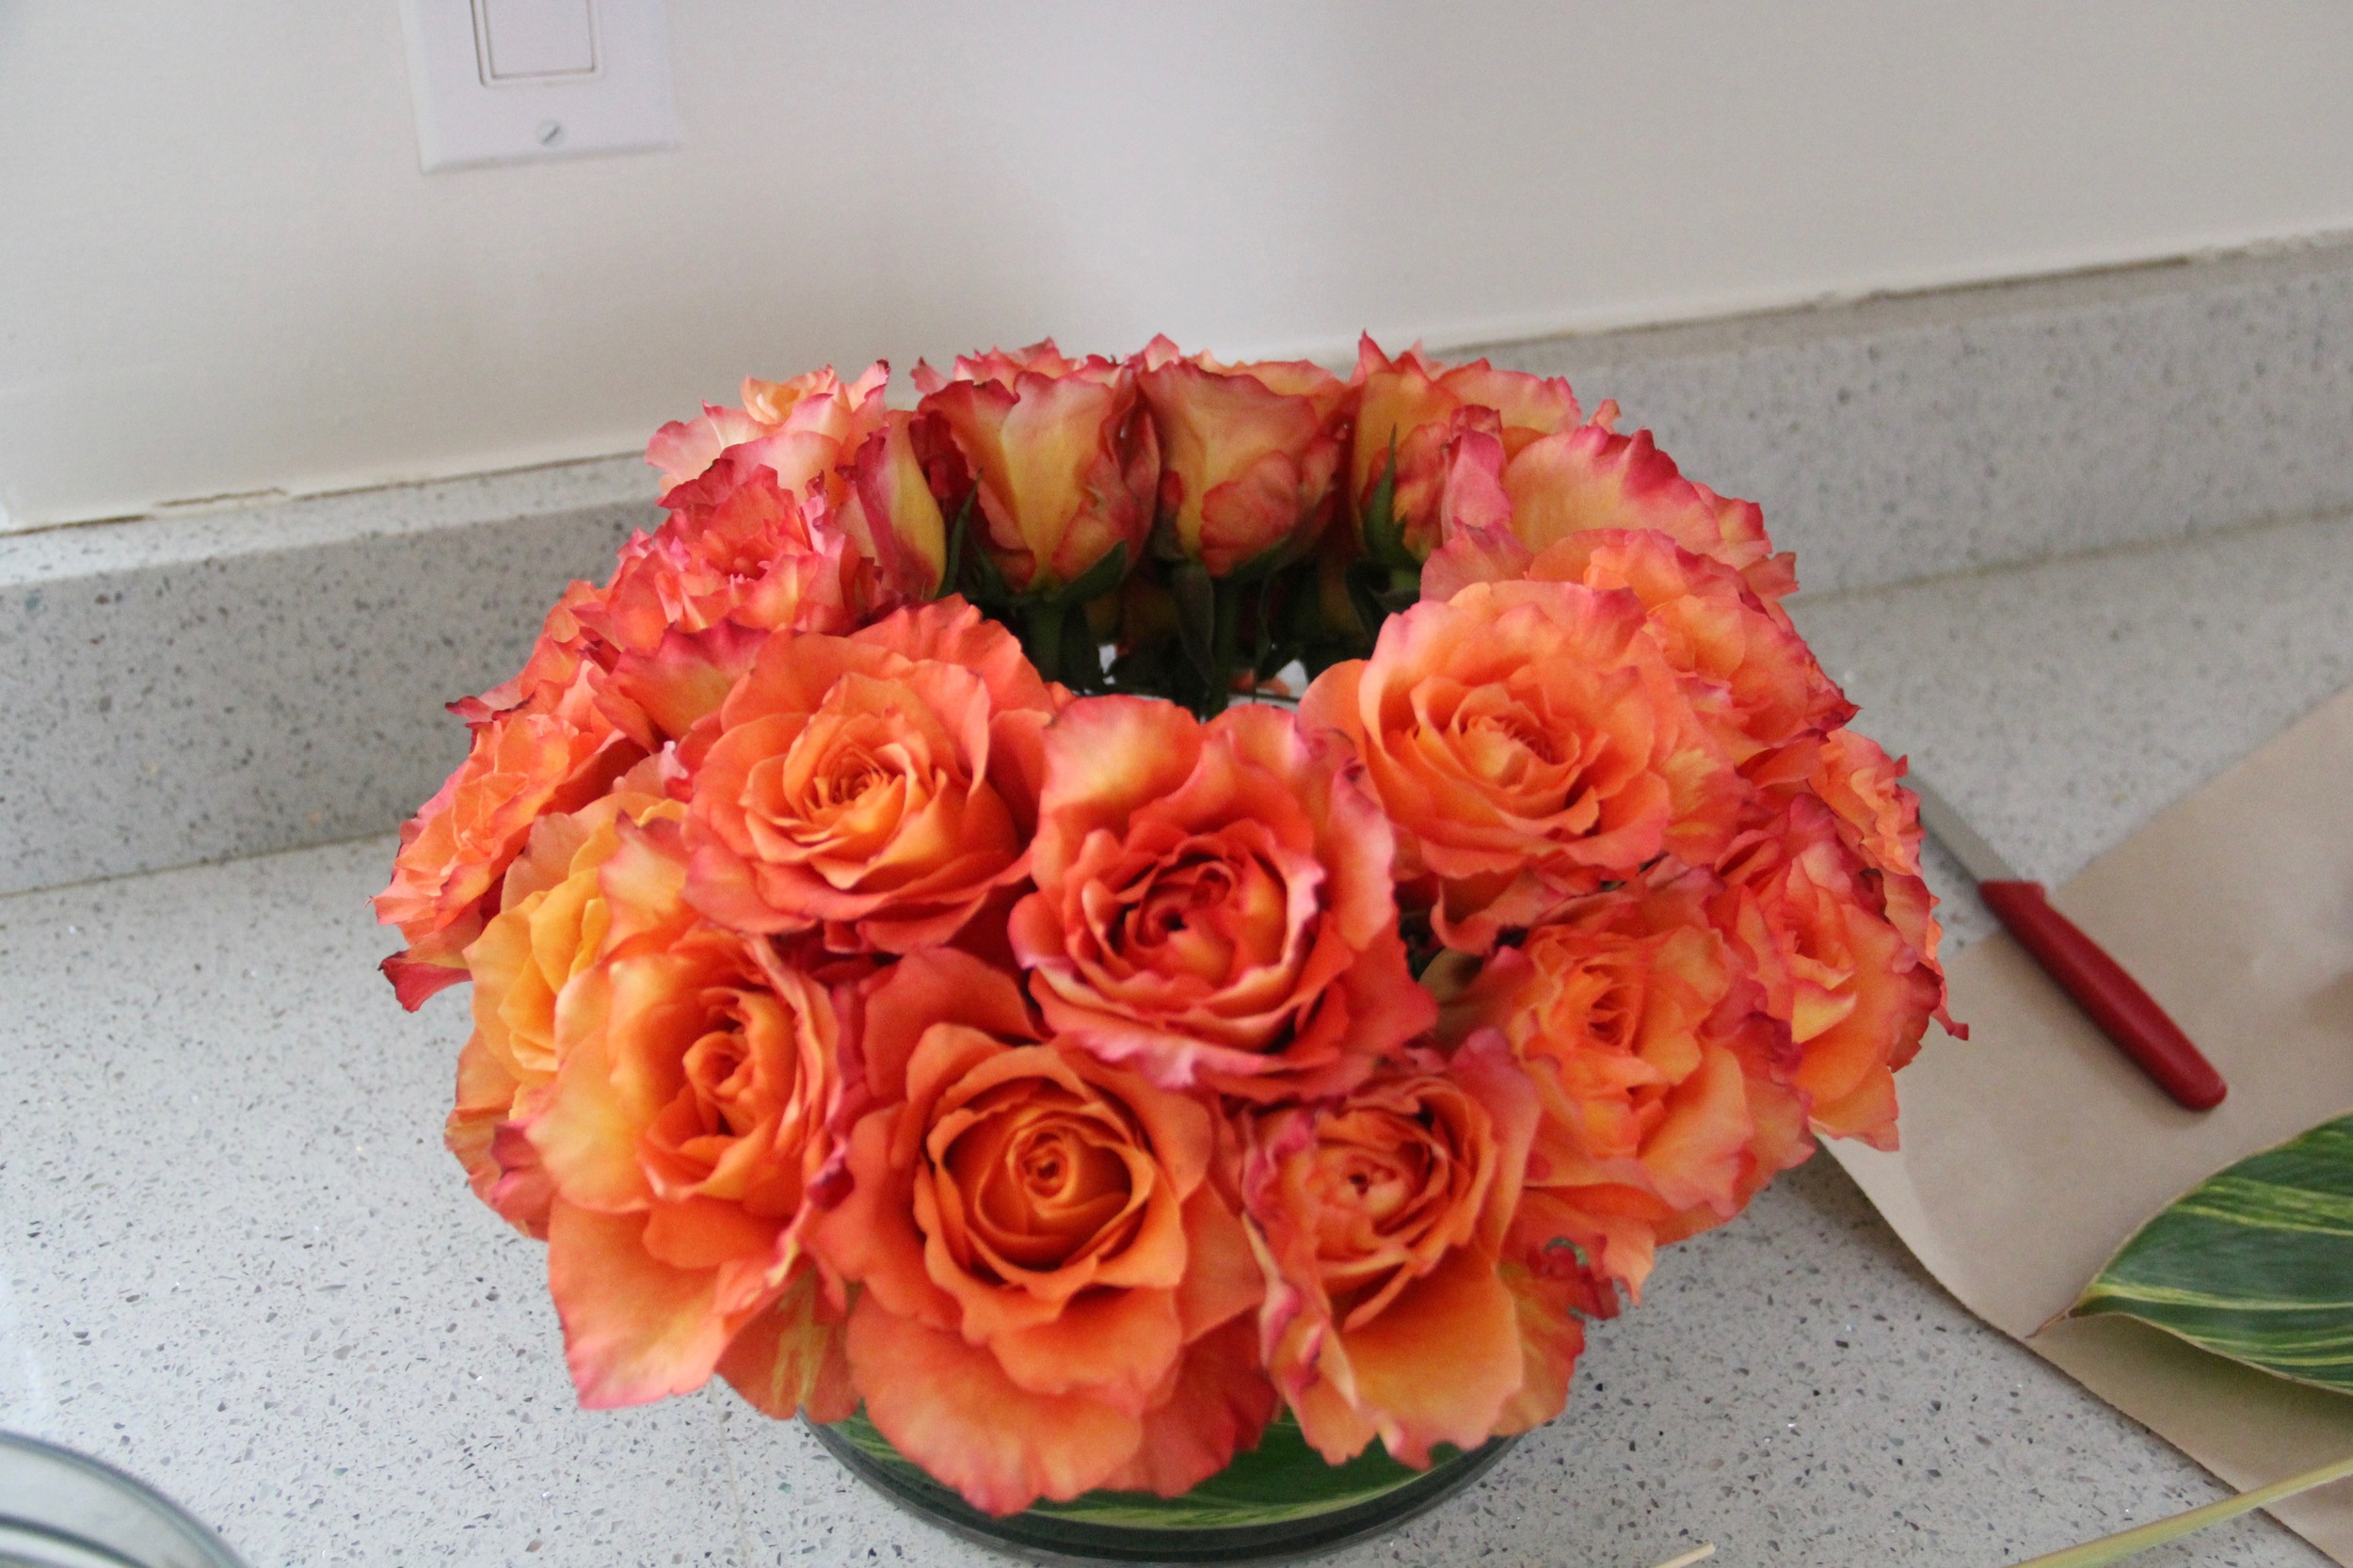
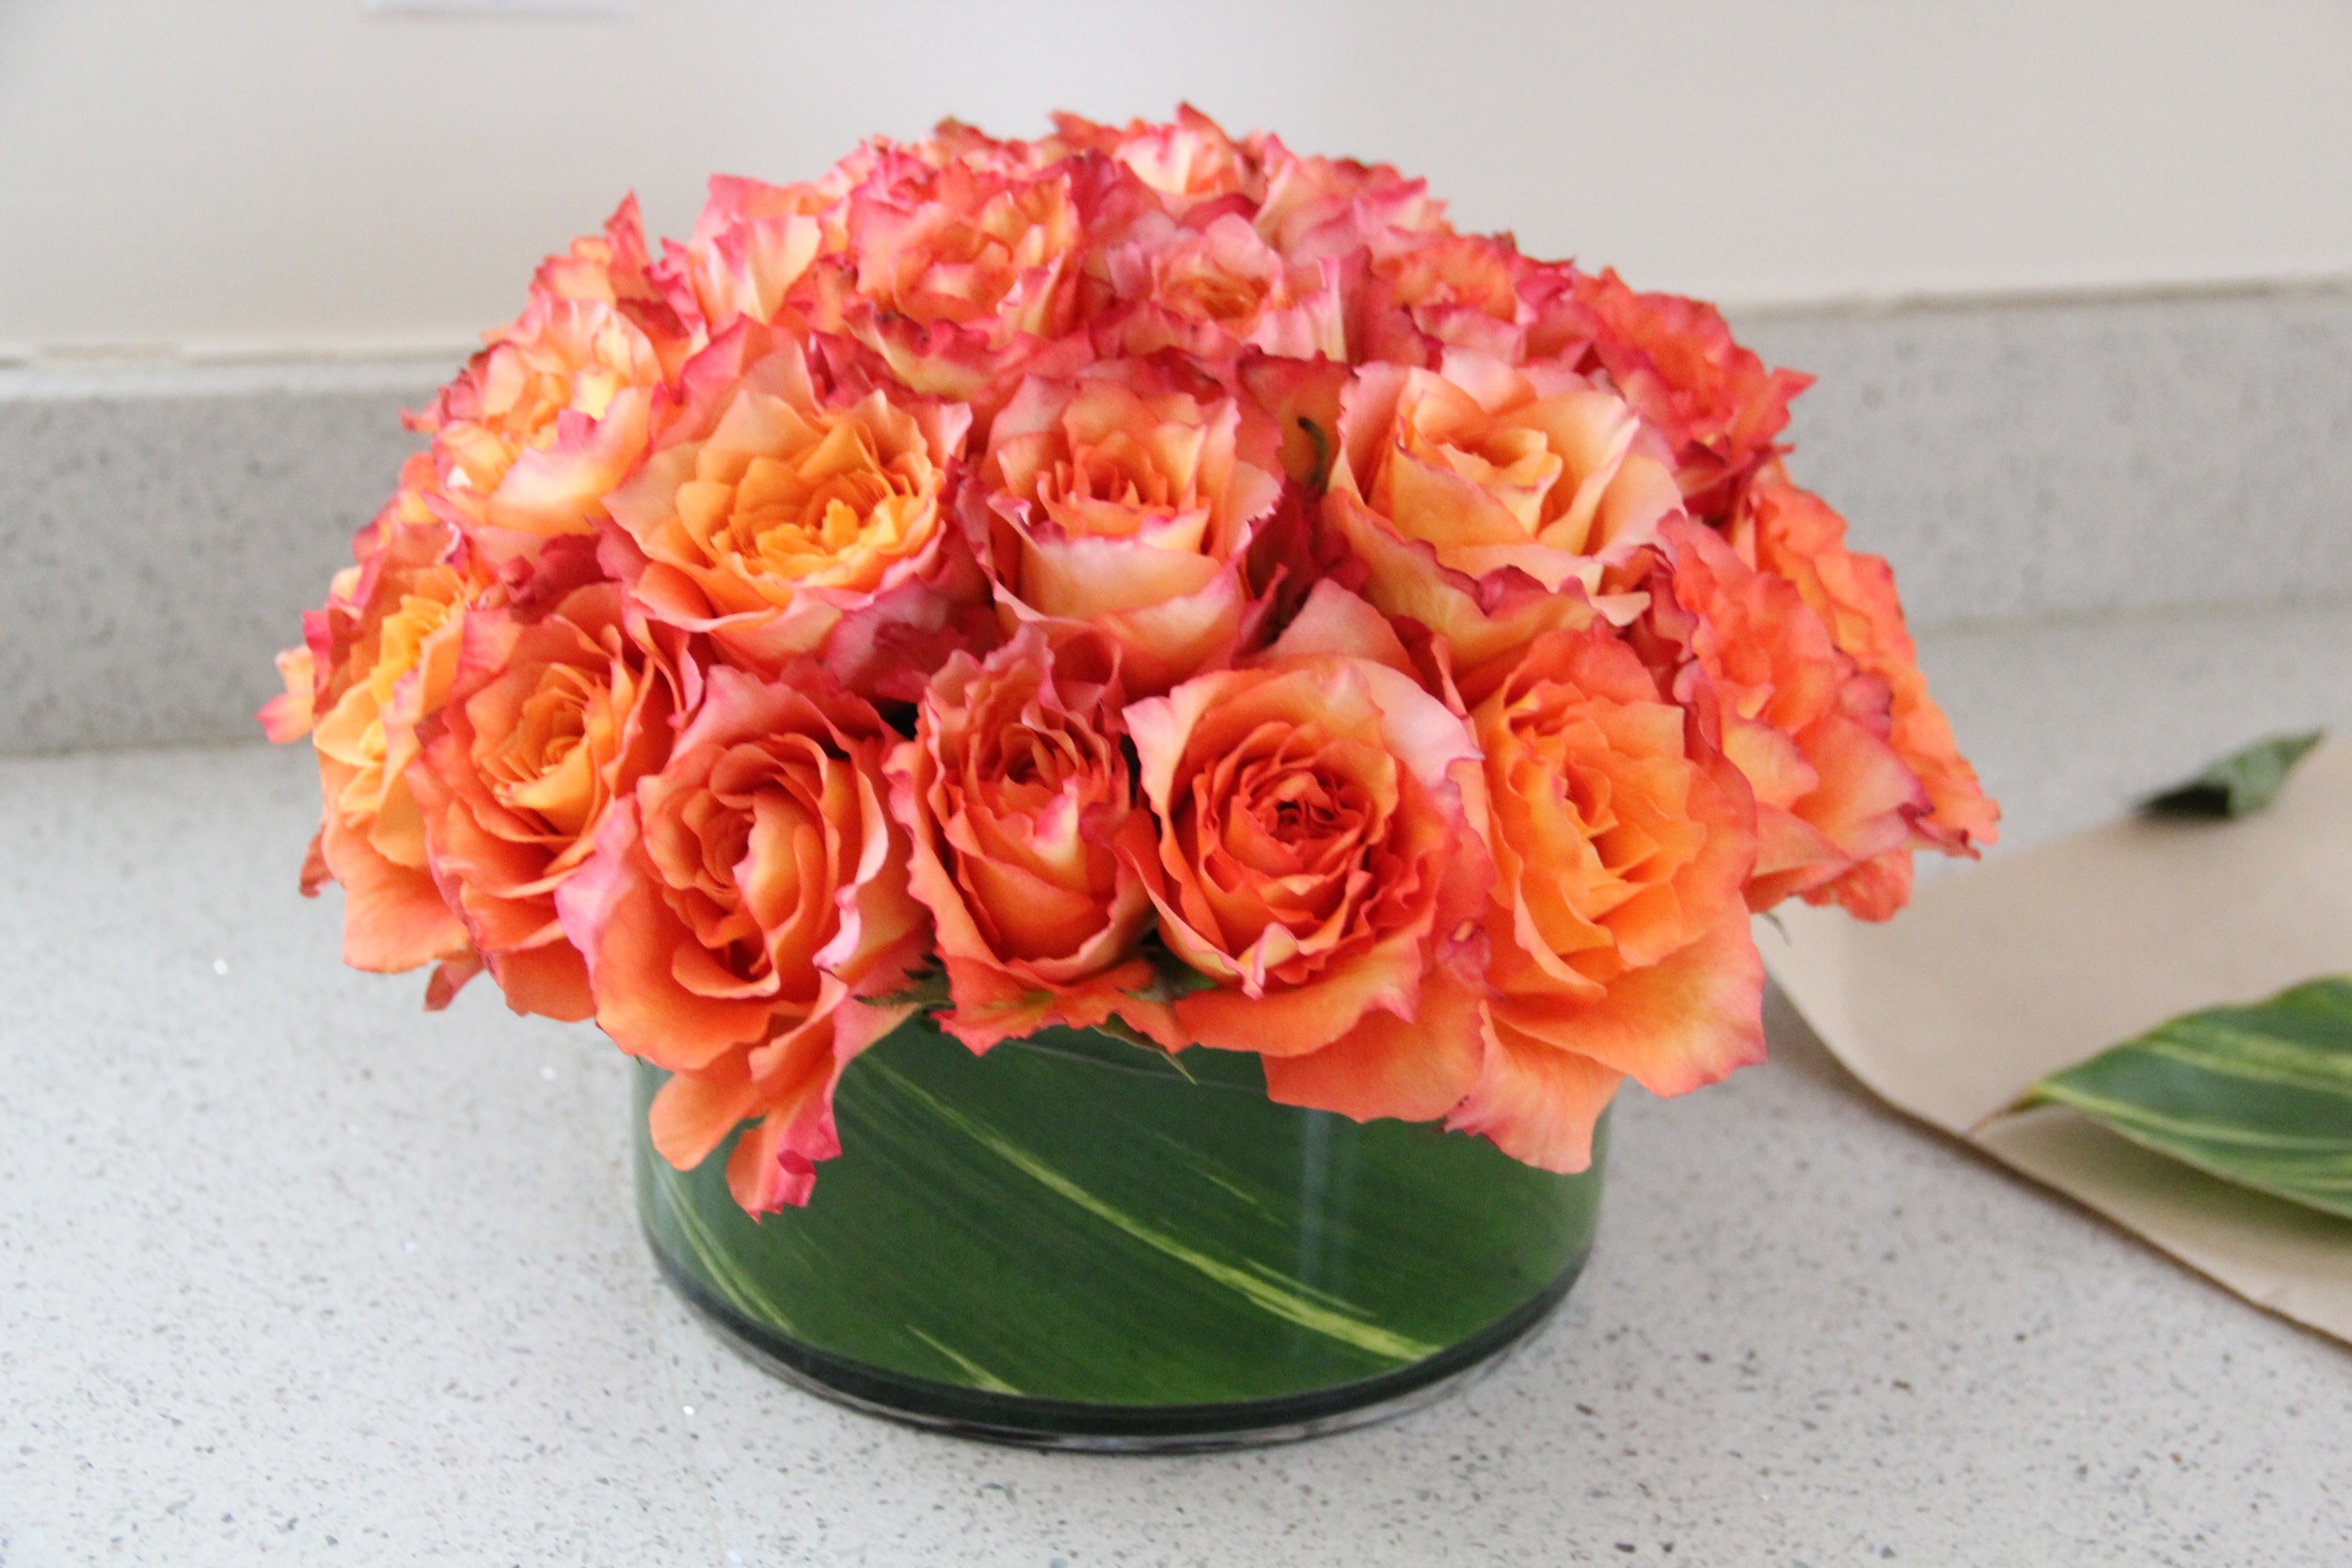
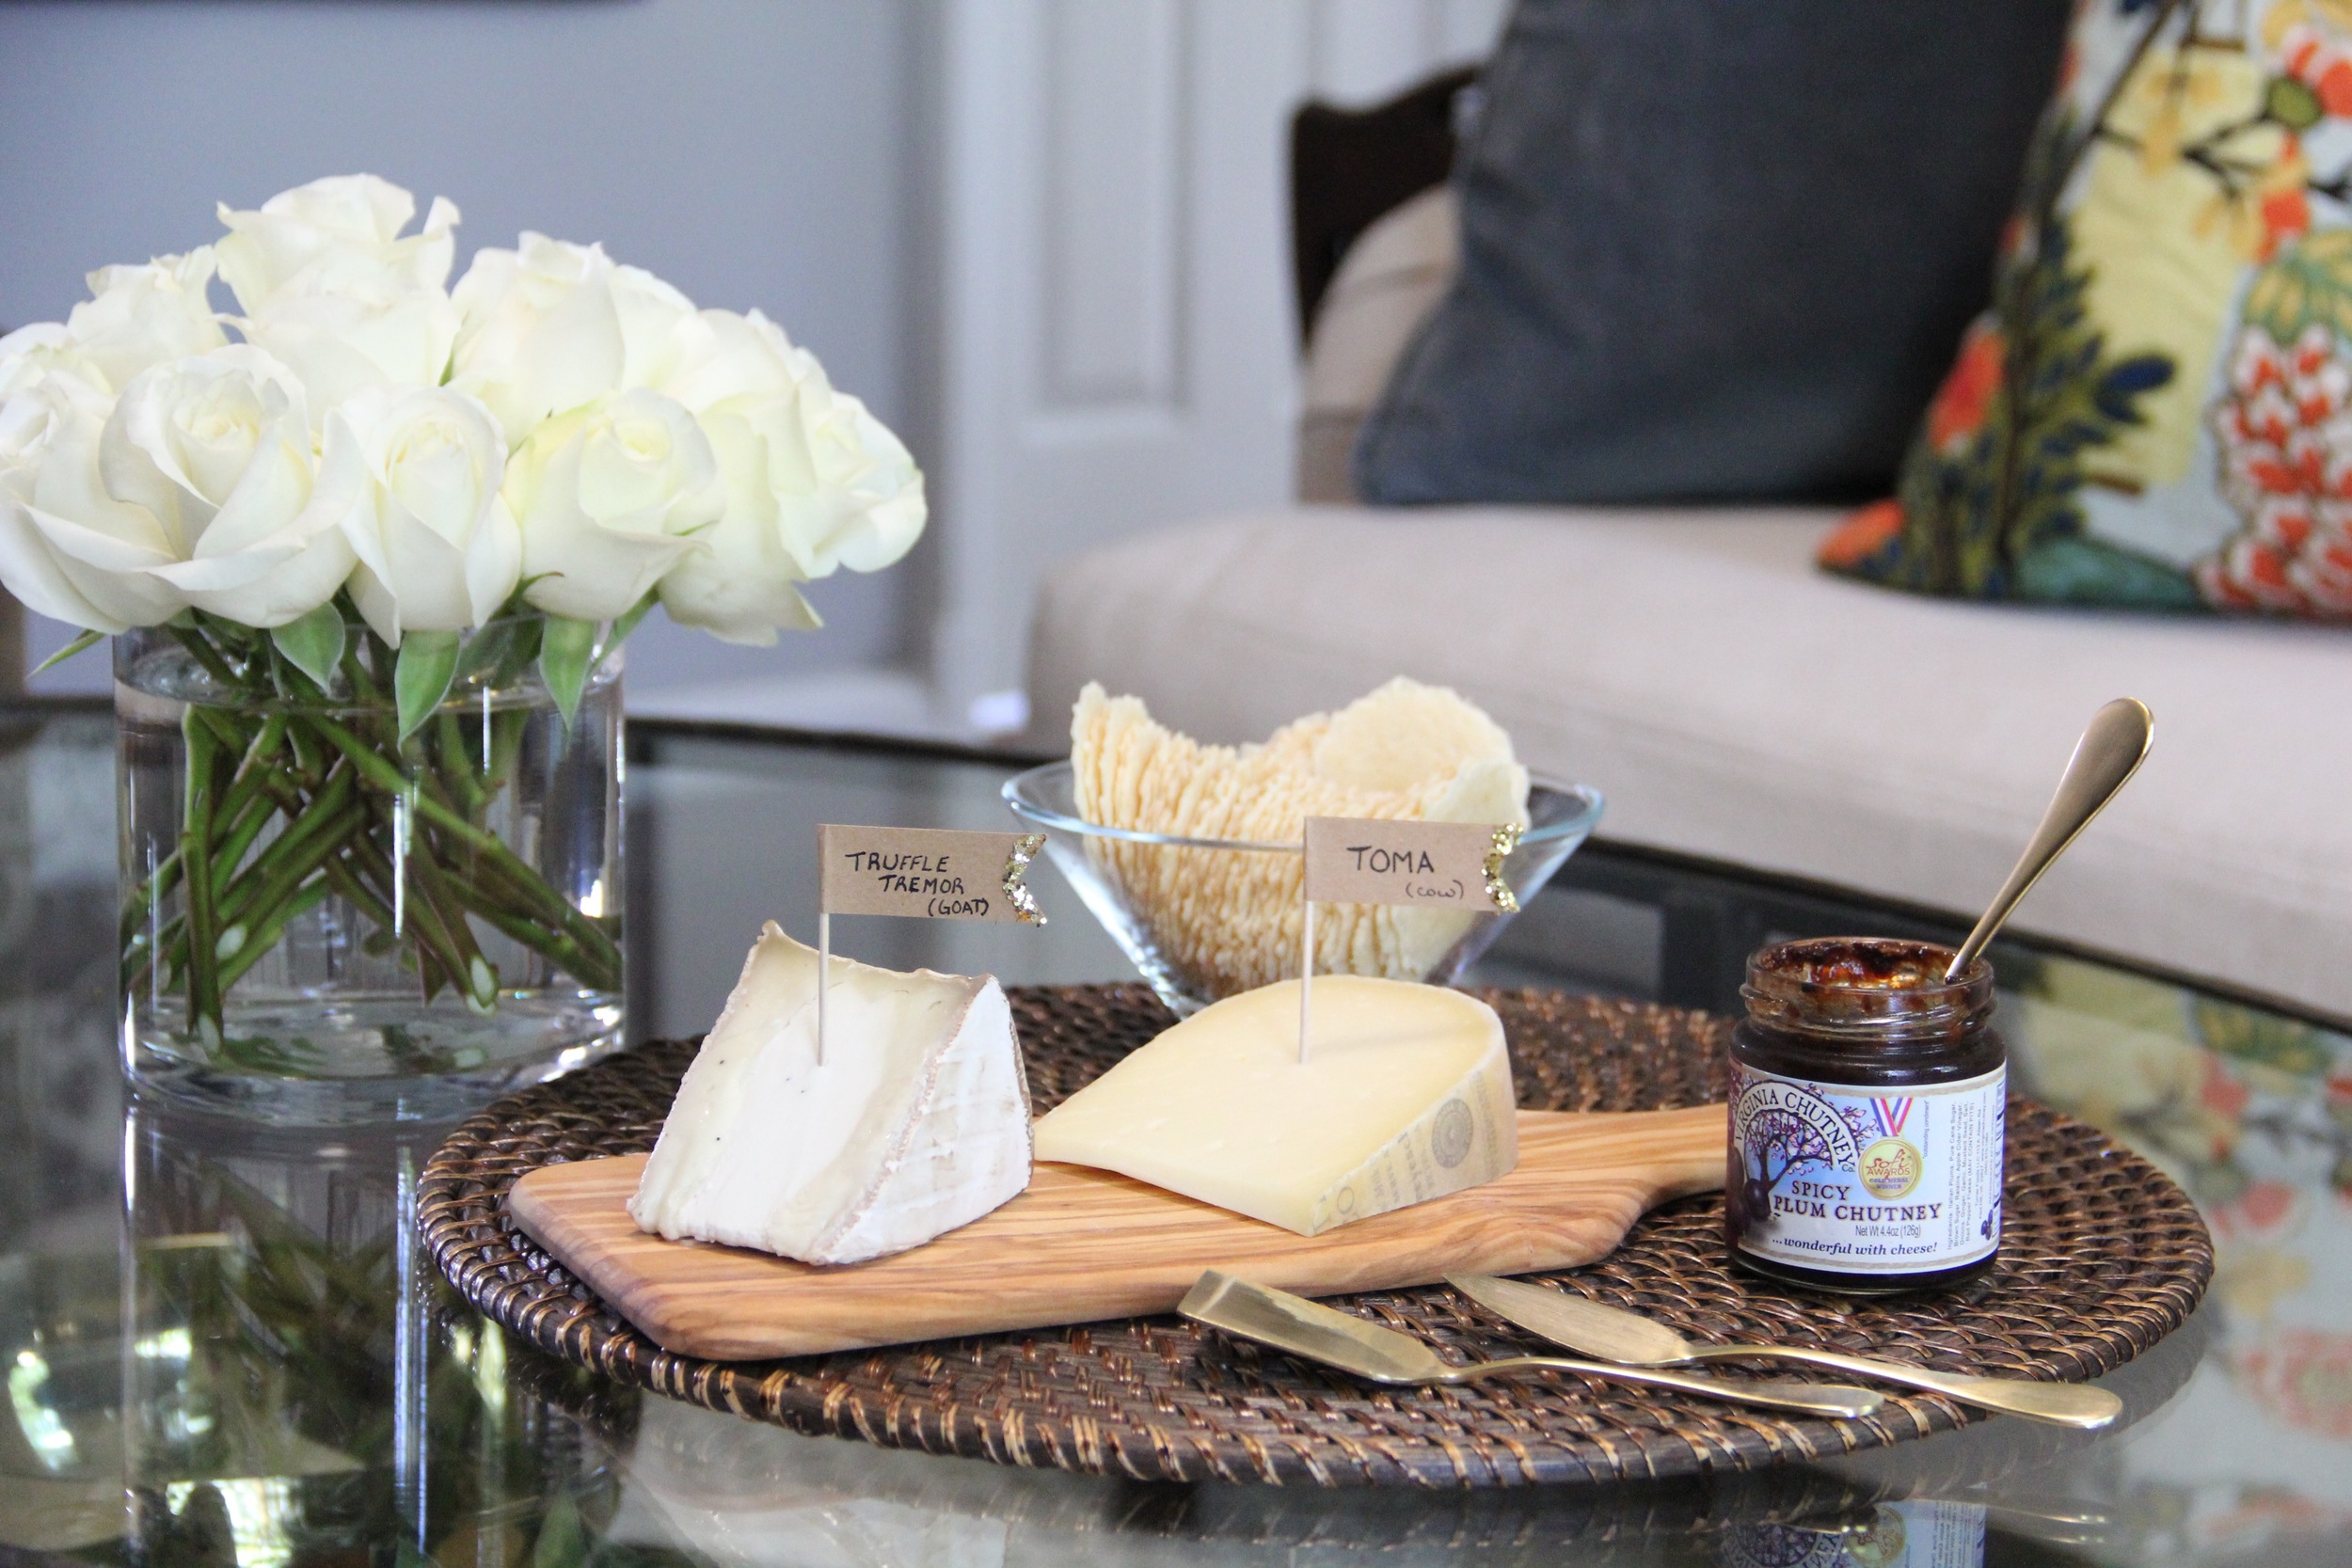
Cheesescapes are a fabulous no-fuss menu item for any cocktail party.  There are endless ways to assemble and serve a delicious cheese platter and you can always count on a cheeseboard to be a crowd pleaser.  

While there is no doubt that I love to serve and enjoy a good cheesescape from time to time, my one frustration would be the constant need for explaining a cheeseboard to guests before dining.  Sure there are the obvious cheeses like blue, brie and classic cheddar, that a guest can usually identify.  However, for the majority of cheeses, I find myself giving multiple explanations in a given evening to my guests, which can be extremely challenging to keep up with while hosting a party.  

I know that there are all sorts of cheese markers available for purchase, however my issue with store bought cheese markers is that most come pre-labeled with the four most common cheese types (ex. gouda, brie, etc.) since they are mass produced.  After spending some time researching on both Etsy and Pinterest, I realized that it wouldn't be so hard to make my own cheese markers and it would give me the ability to more accurately label the cheeses I serve to guests.  

This is an inexpensive and extremely easy DIY that I absolutely adore!  Here is how I went about creating my own custom cheese markers:  

IMG_7972.jpg

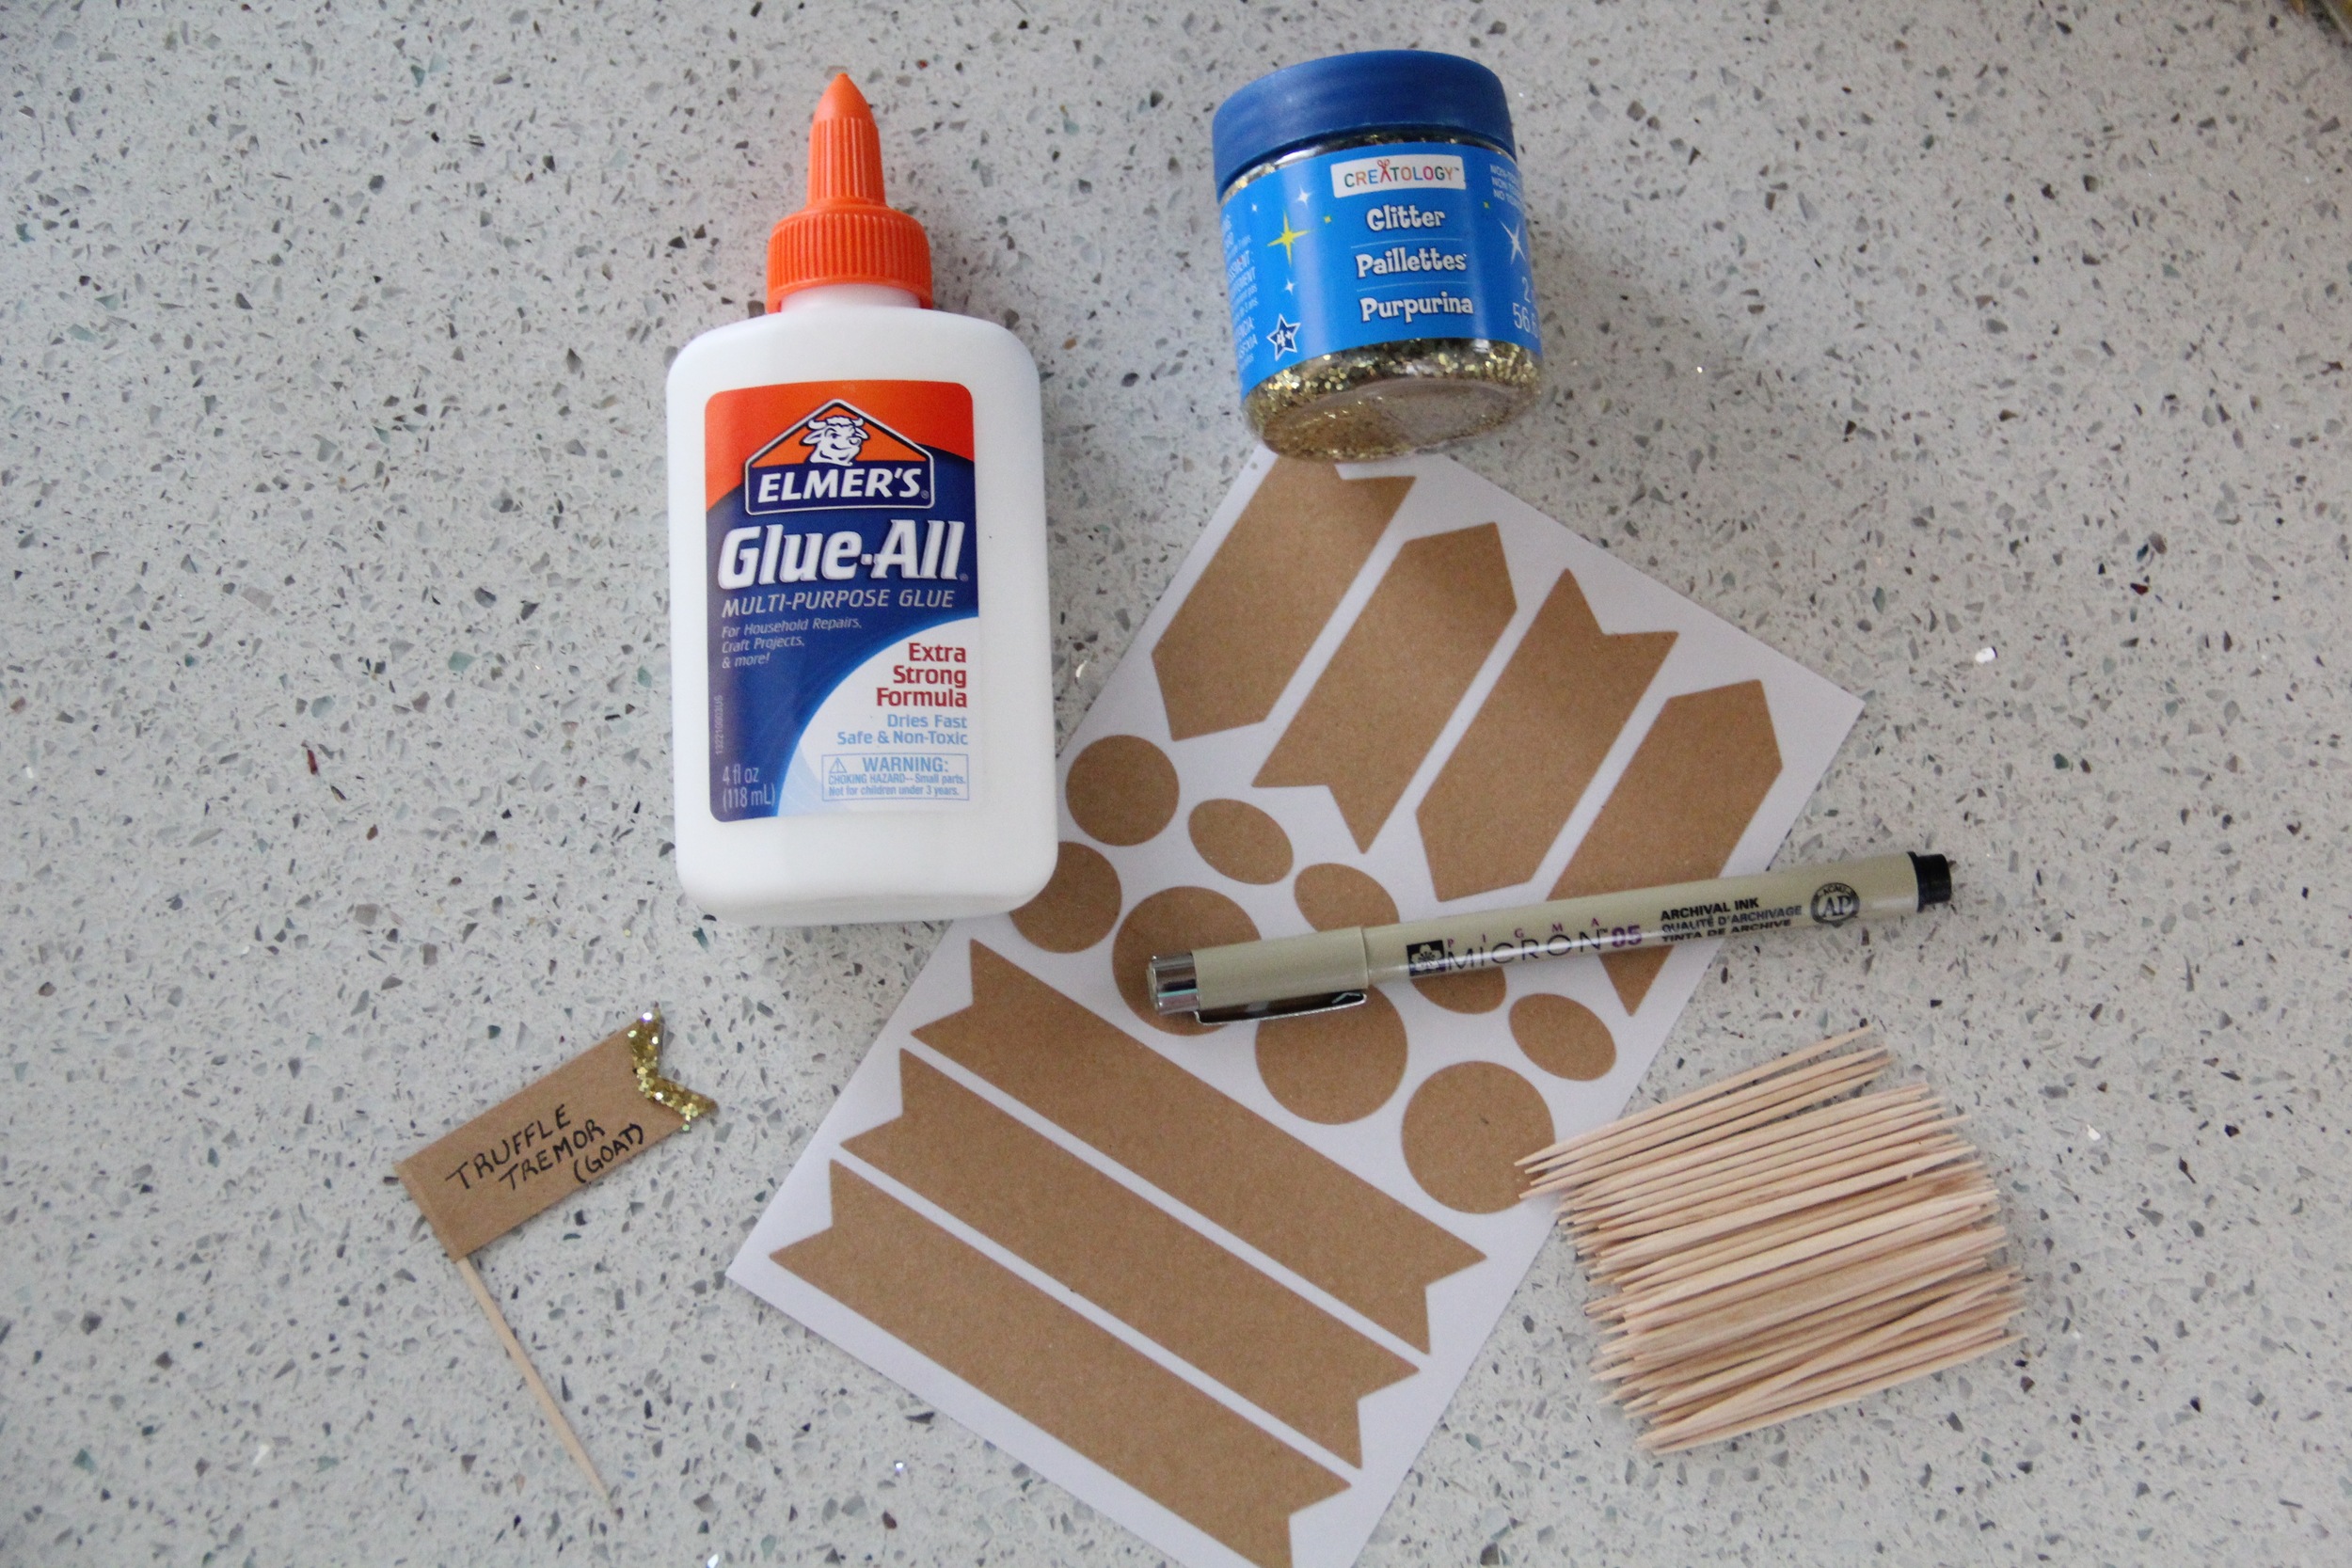
Here is what you will need:

  • Toothpicks
  • Glue
  • Adhesive Kraft Banner Labels (like these)
  • Glitter
  • Metallic Pens and/or Fine-Tipped Markers
  • Fine-Tipped Pen
IMG_7958.jpg
IMG_7960.jpg
IMG_7963.jpg
IMG_0897.JPG
IMG_7965.jpg
IMG_7998.jpg

Instructions

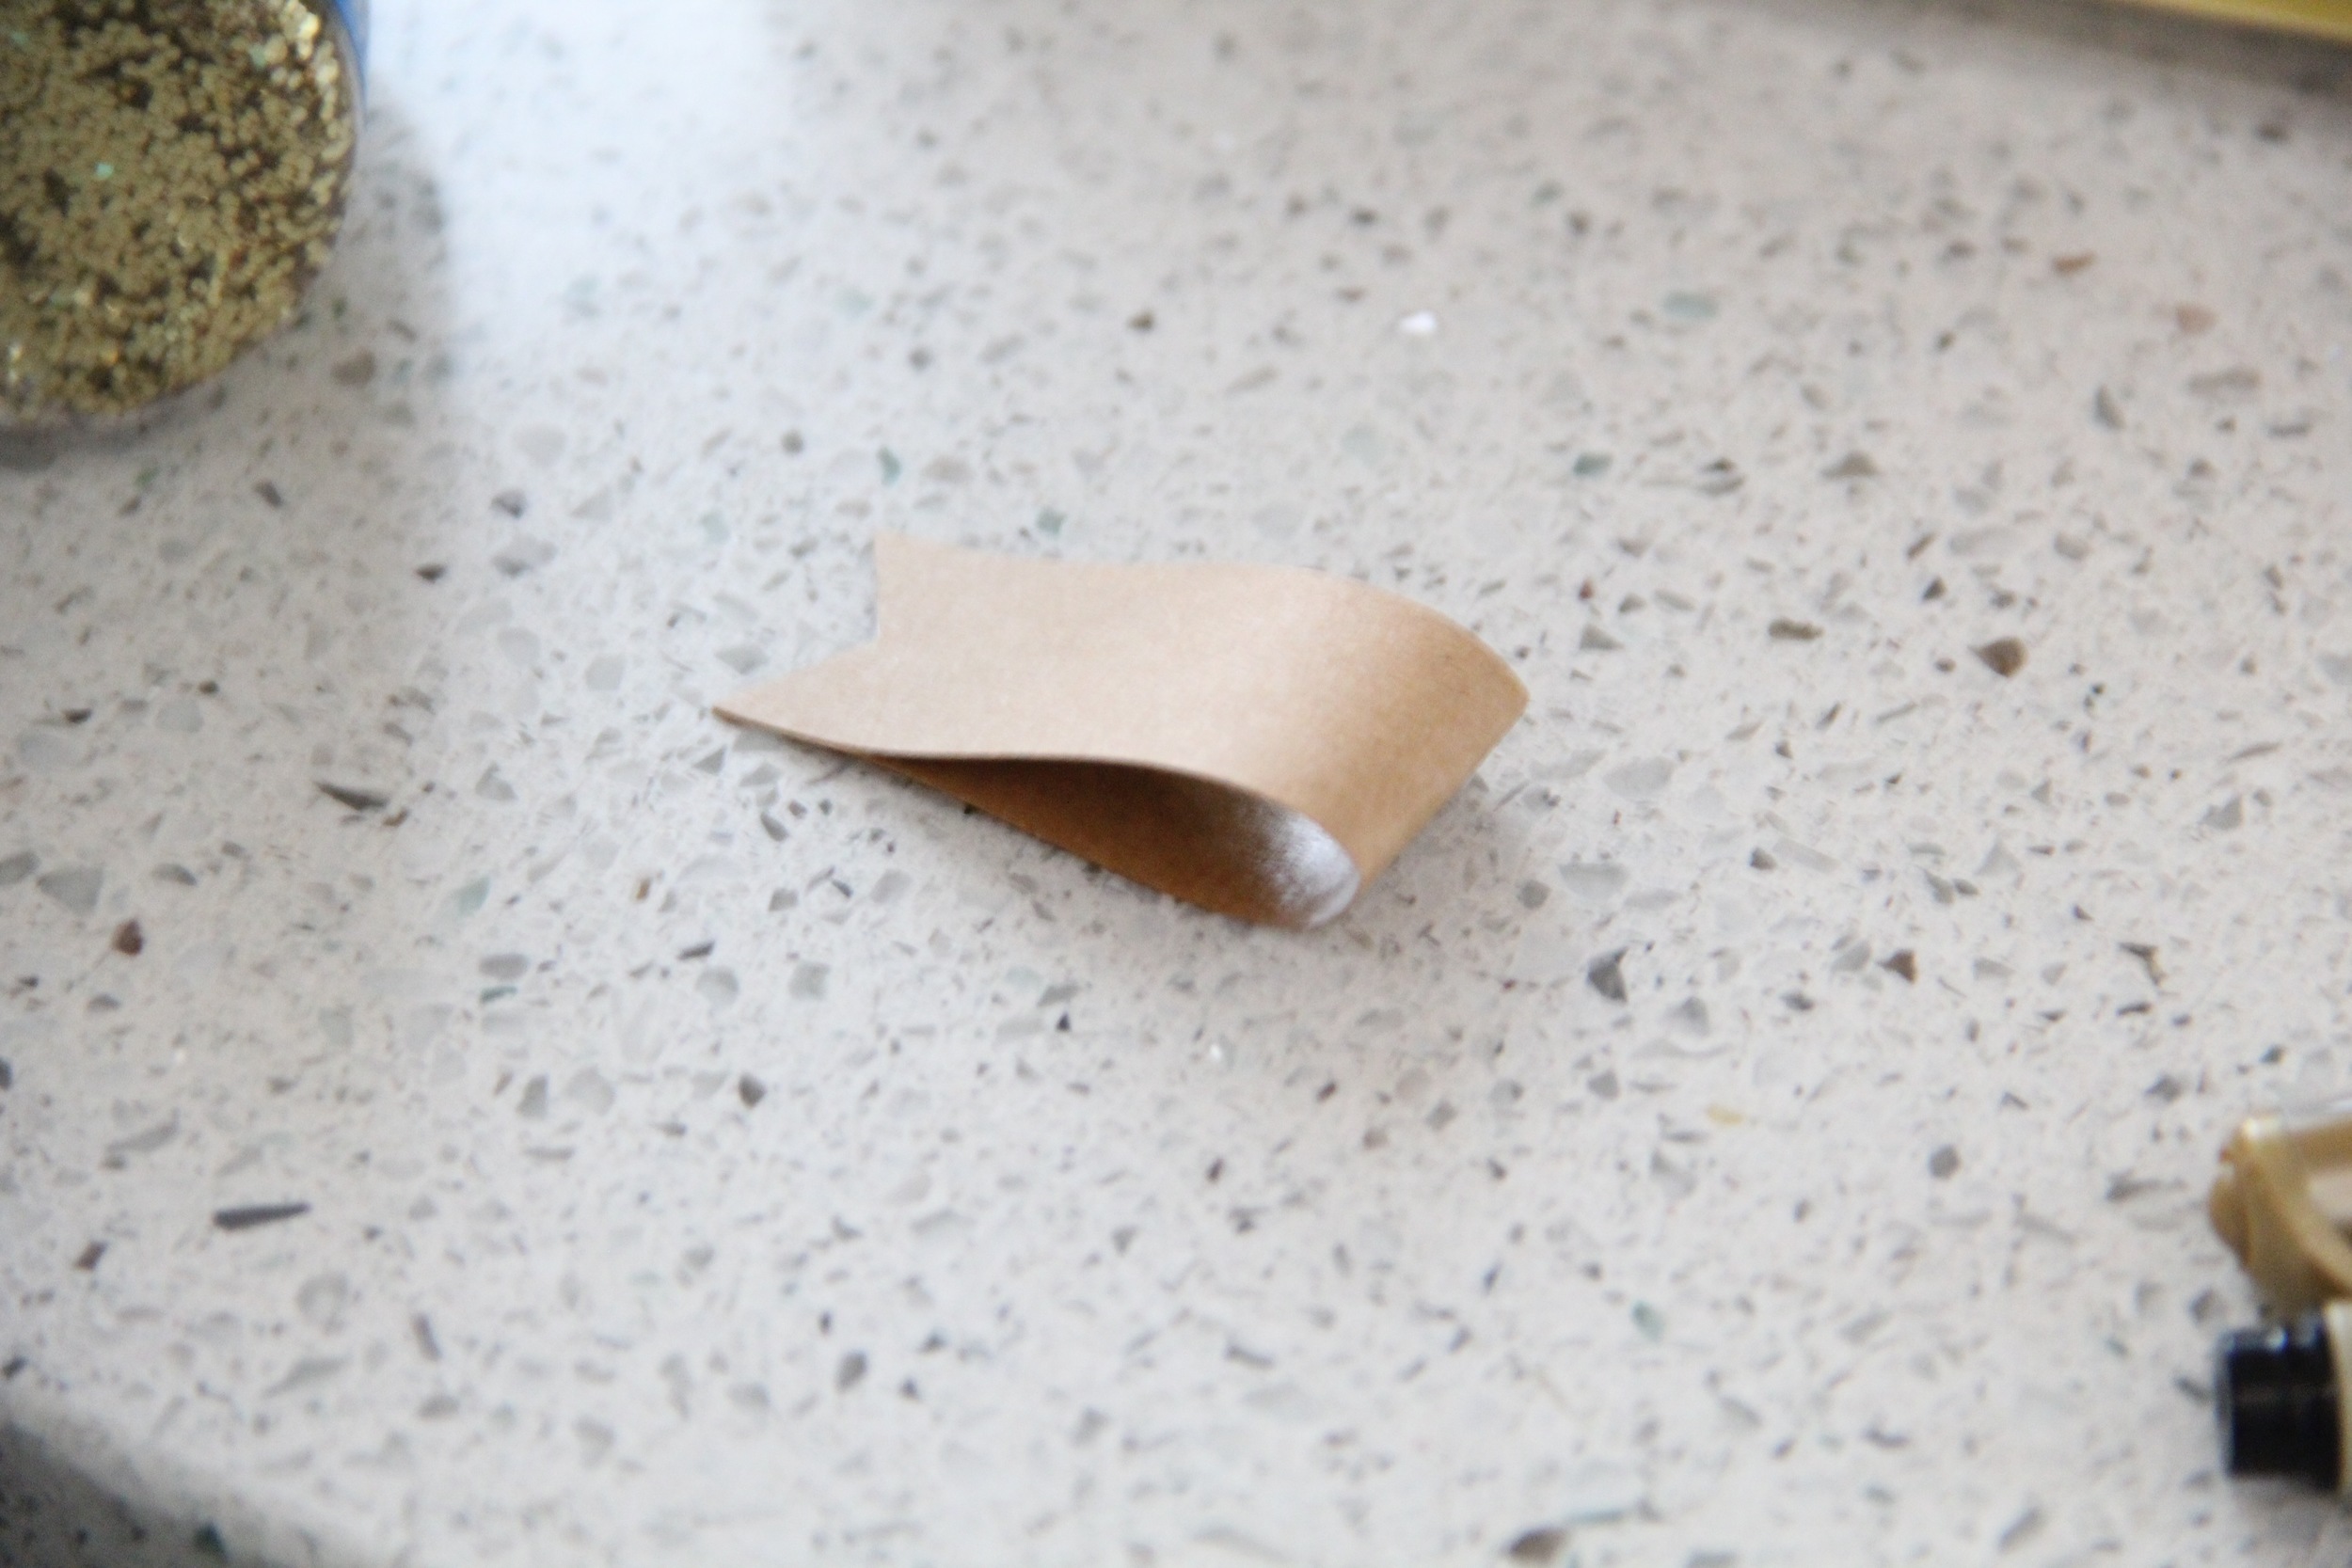
  1. Peel off an adhesive banner sticker from the sticker sheet 
  2. Fold the banner sticker in half matching and sticking only the two ends of the sticker together
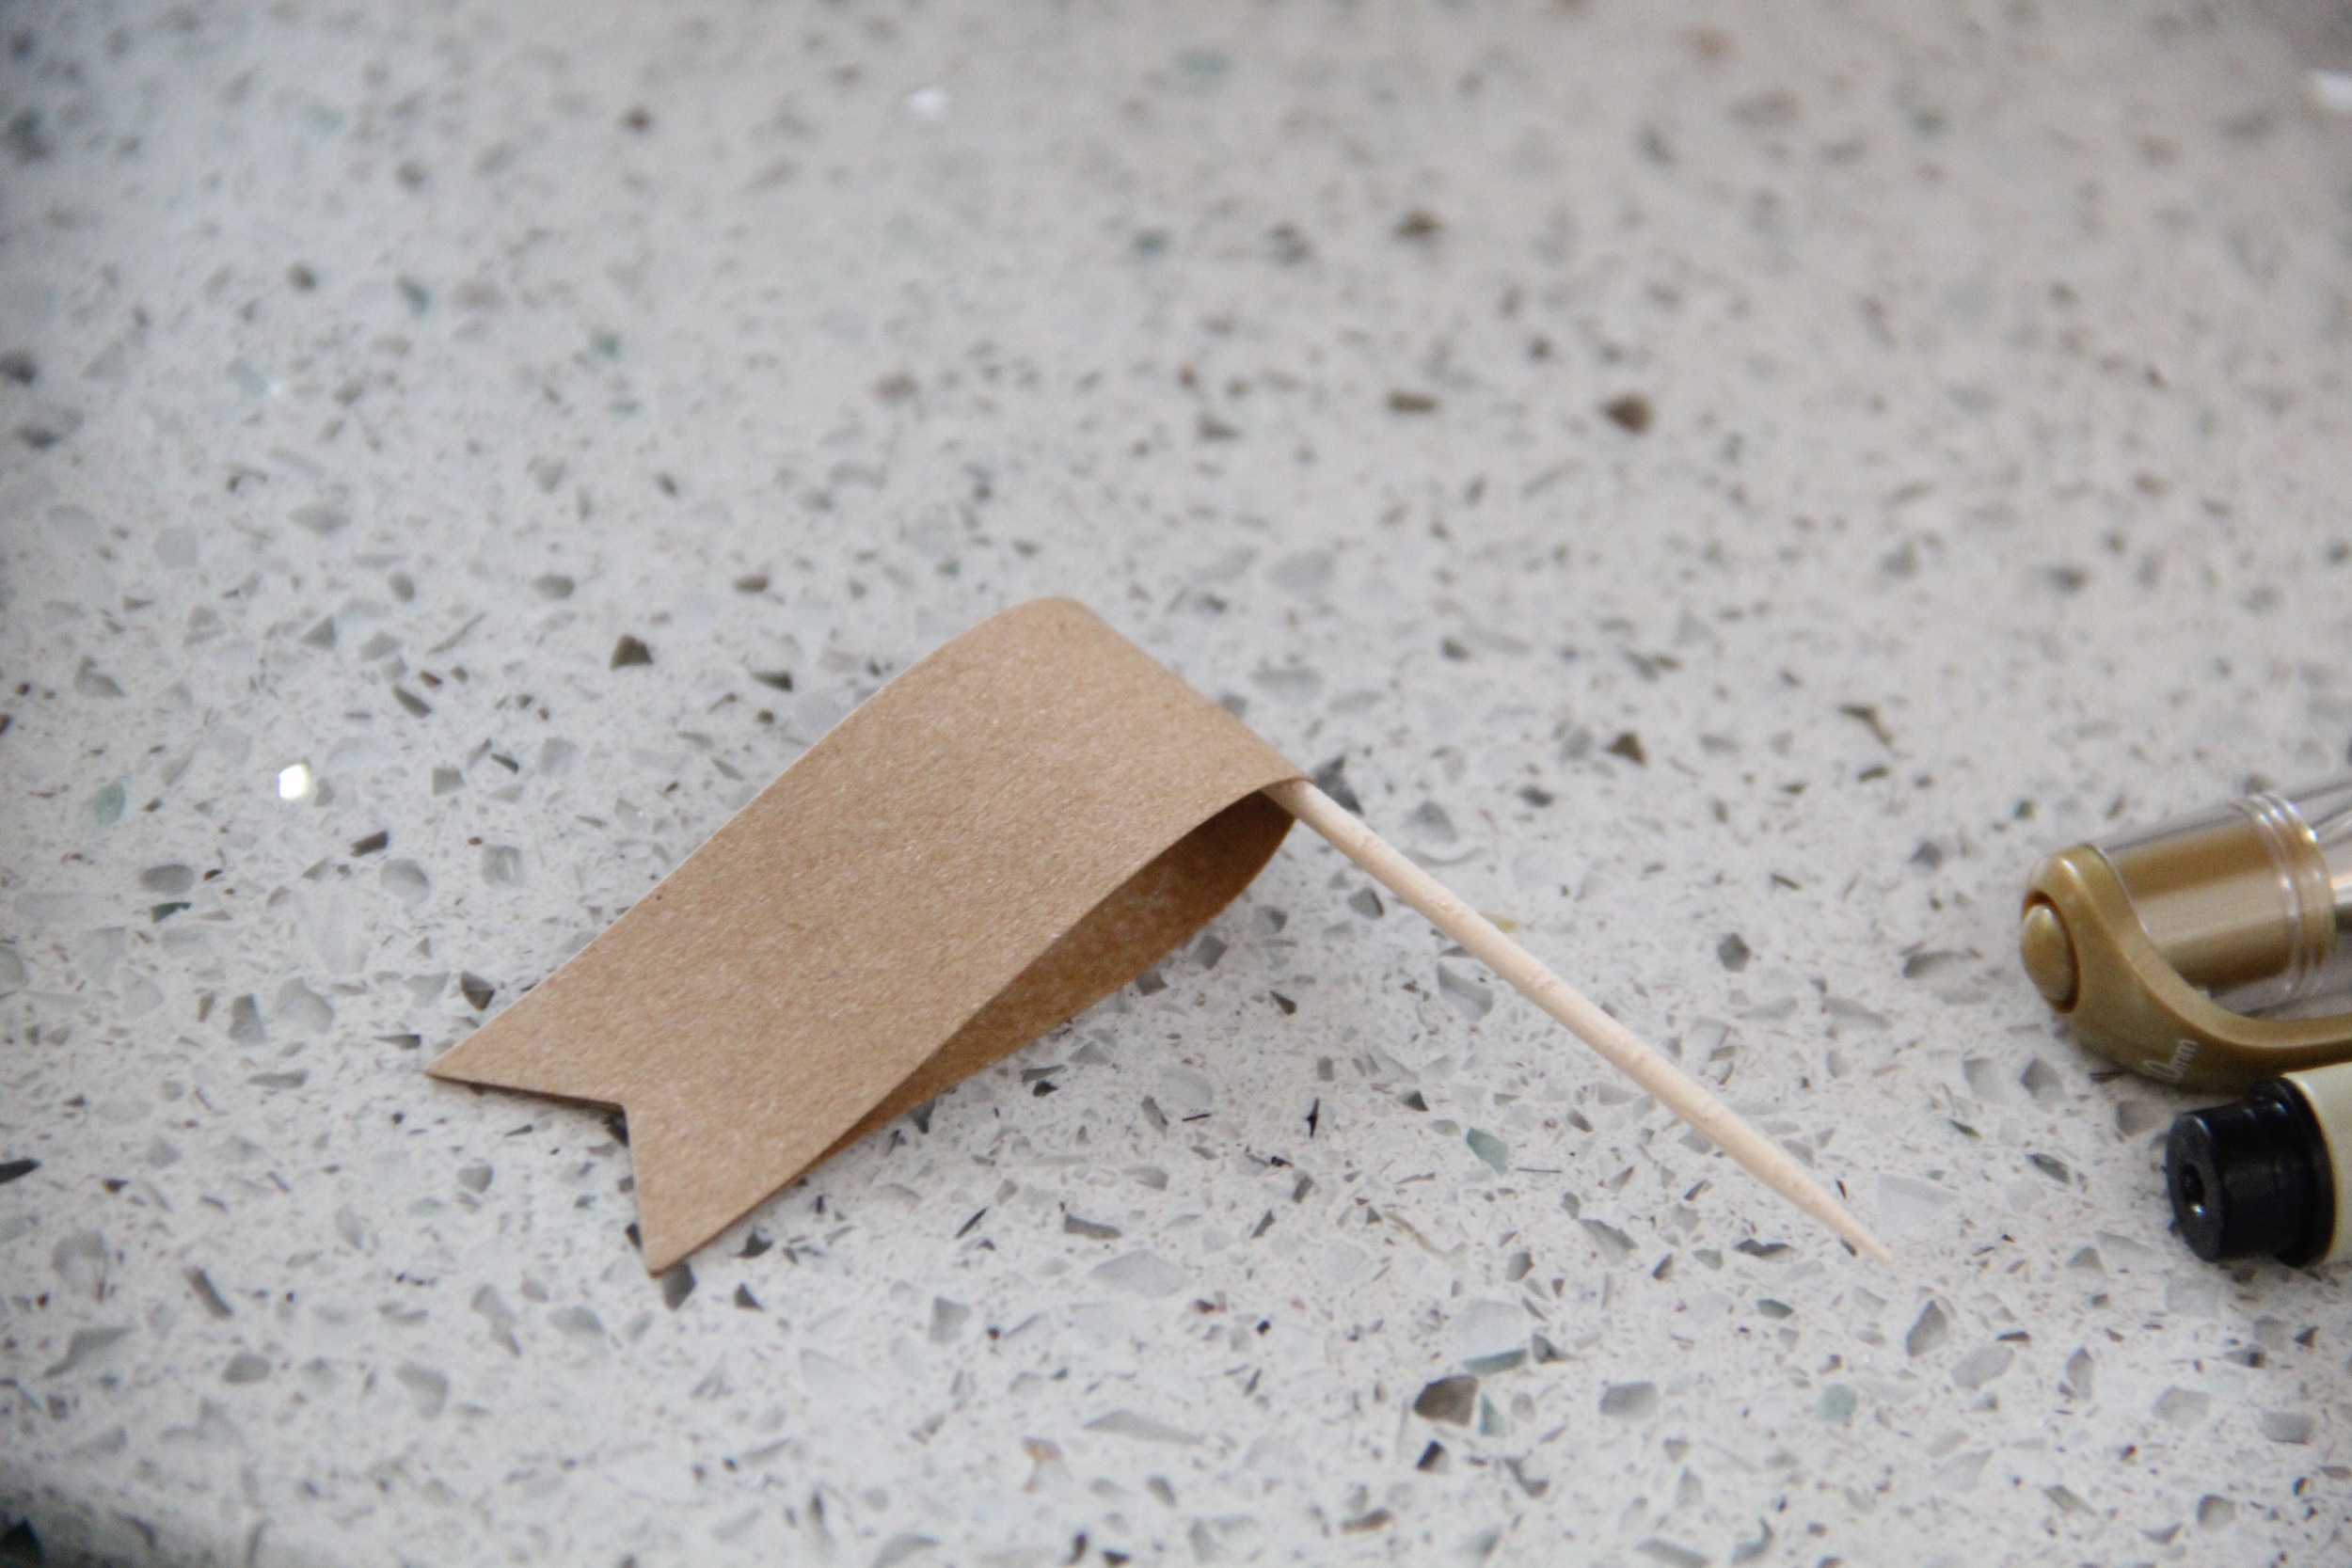
  3. Place the end of the toothpick (about 1/4 inch) through the center loop of the banner sticker and press it against the center most point of the sticker 
  4. Press the remainder of the sticker opening together to create the cheese flag
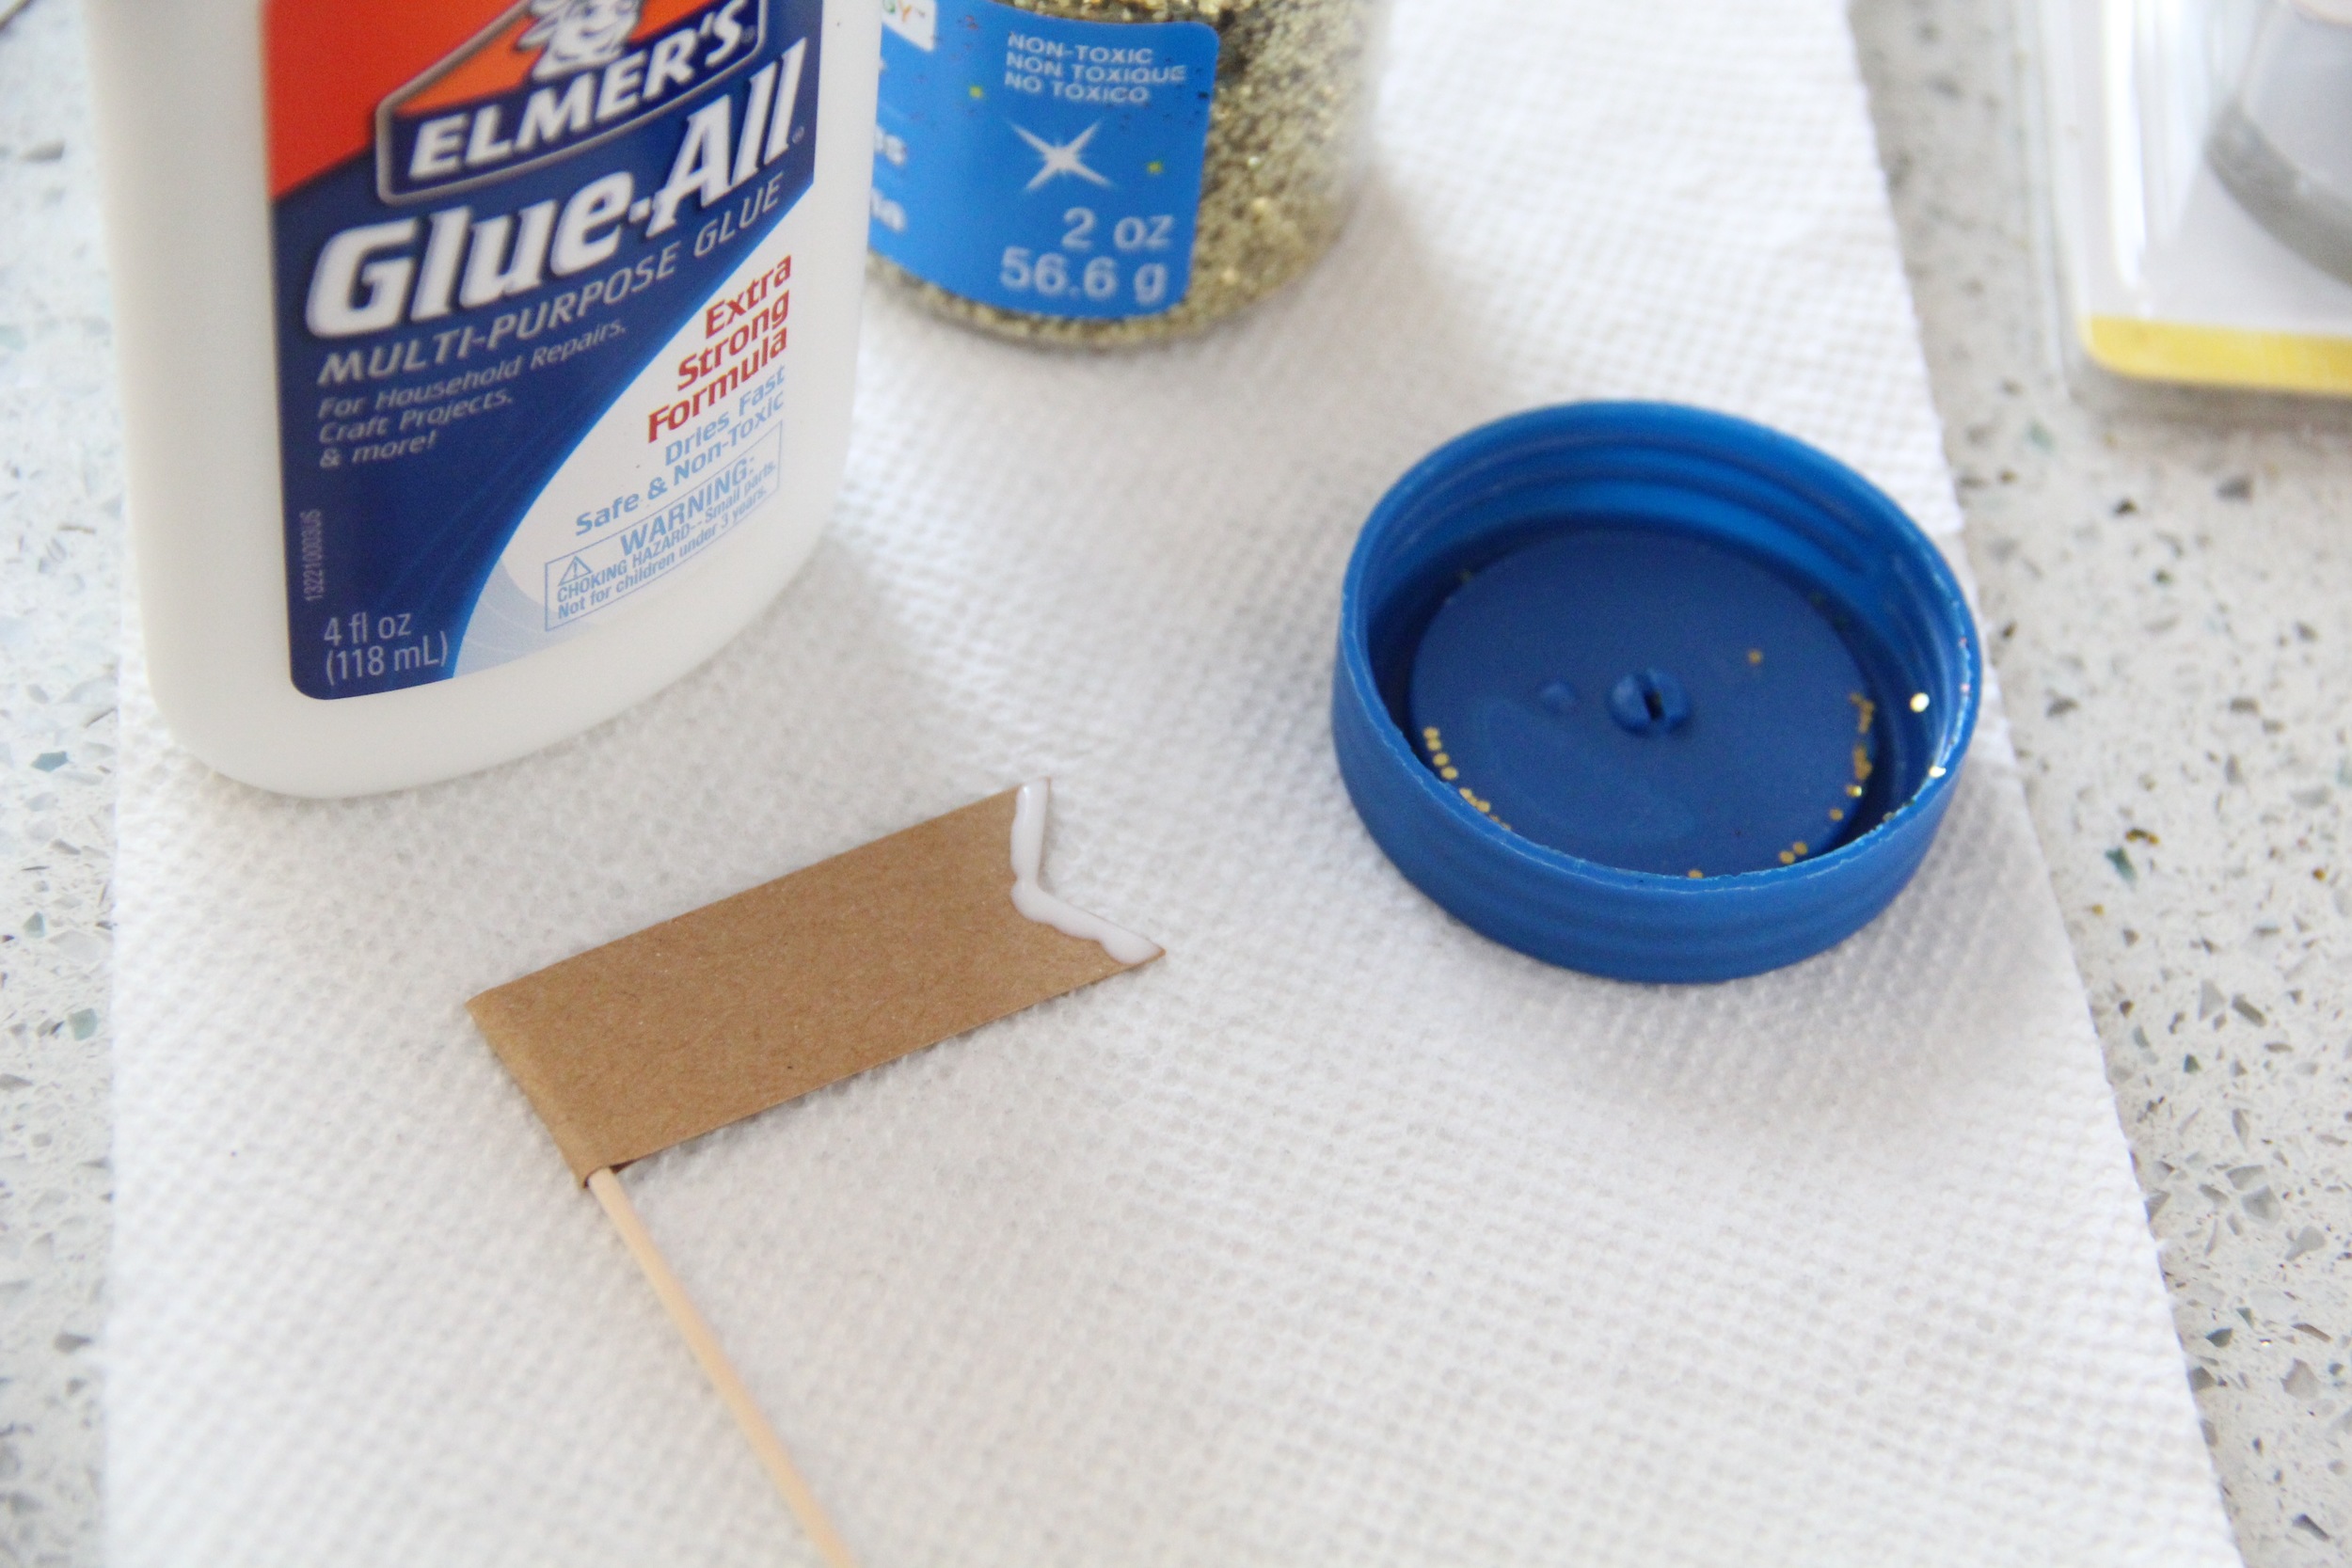
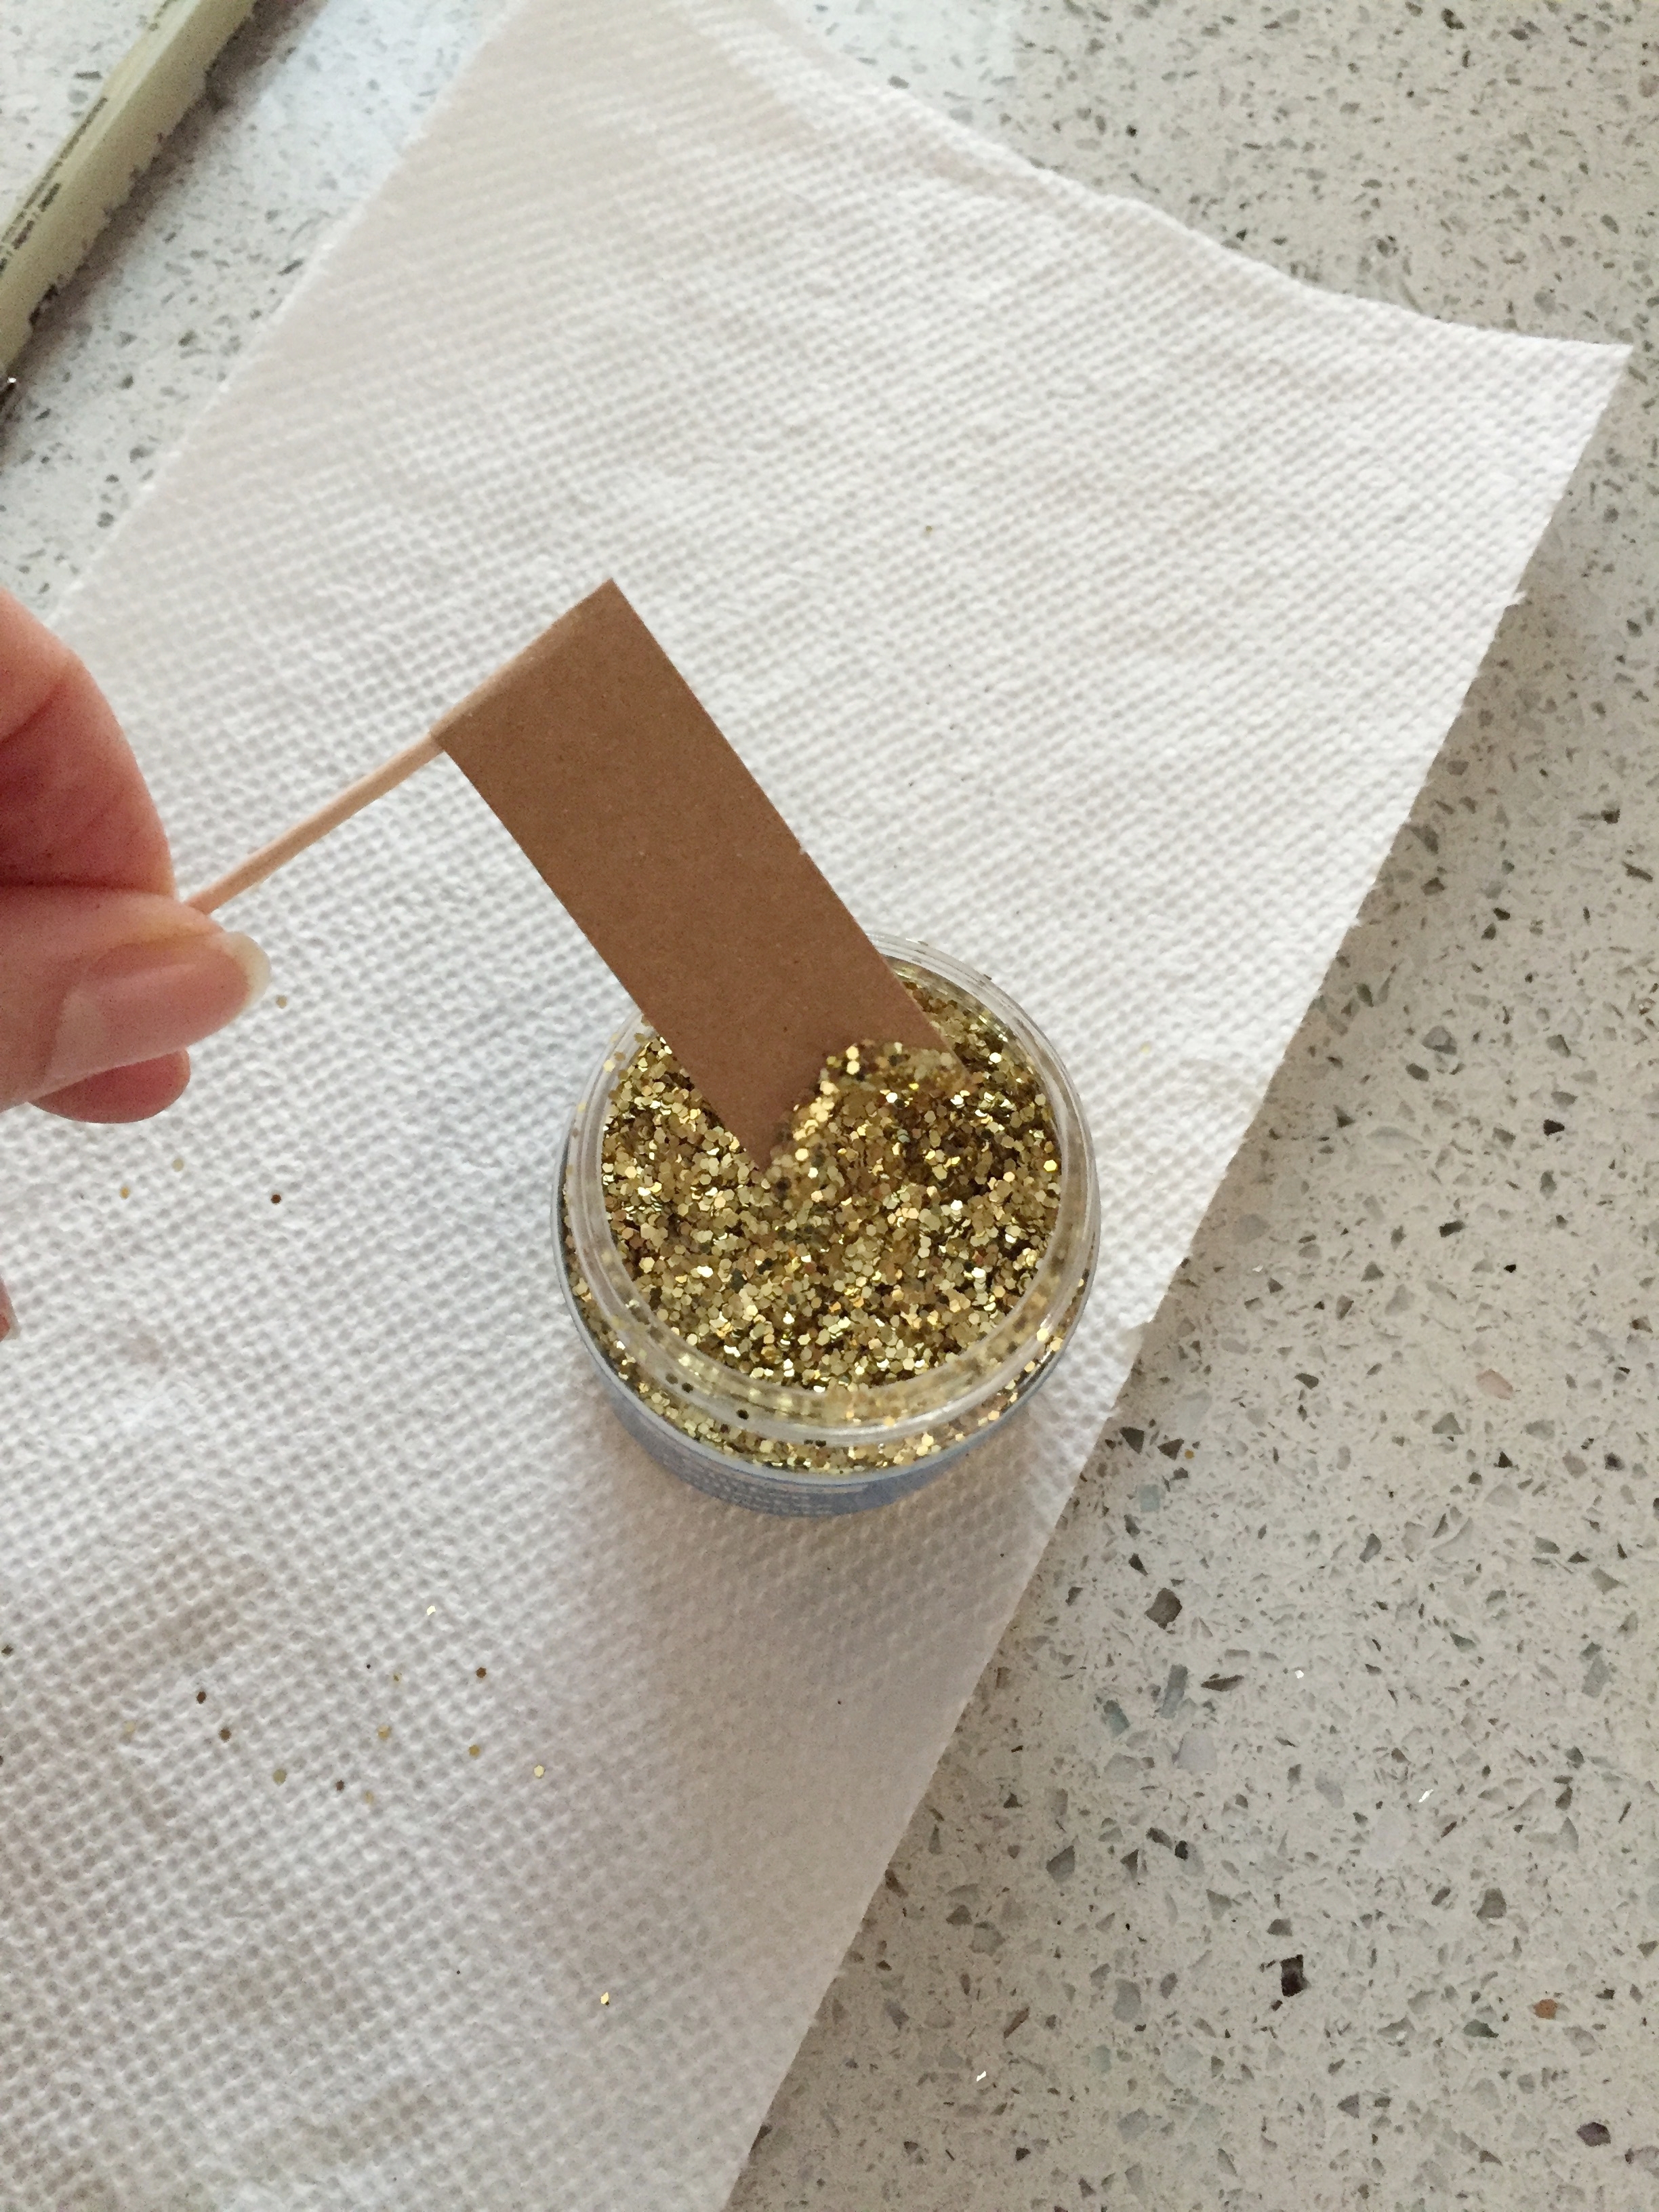
  5. Apply a thin line of craft glue along the cut side of the sticker
  6. Gently dip the glue-lined end of the cheese flag into the jar of glitter, making sure to gently tap off any excess glitter before placing the flag down to dry on a paper towel
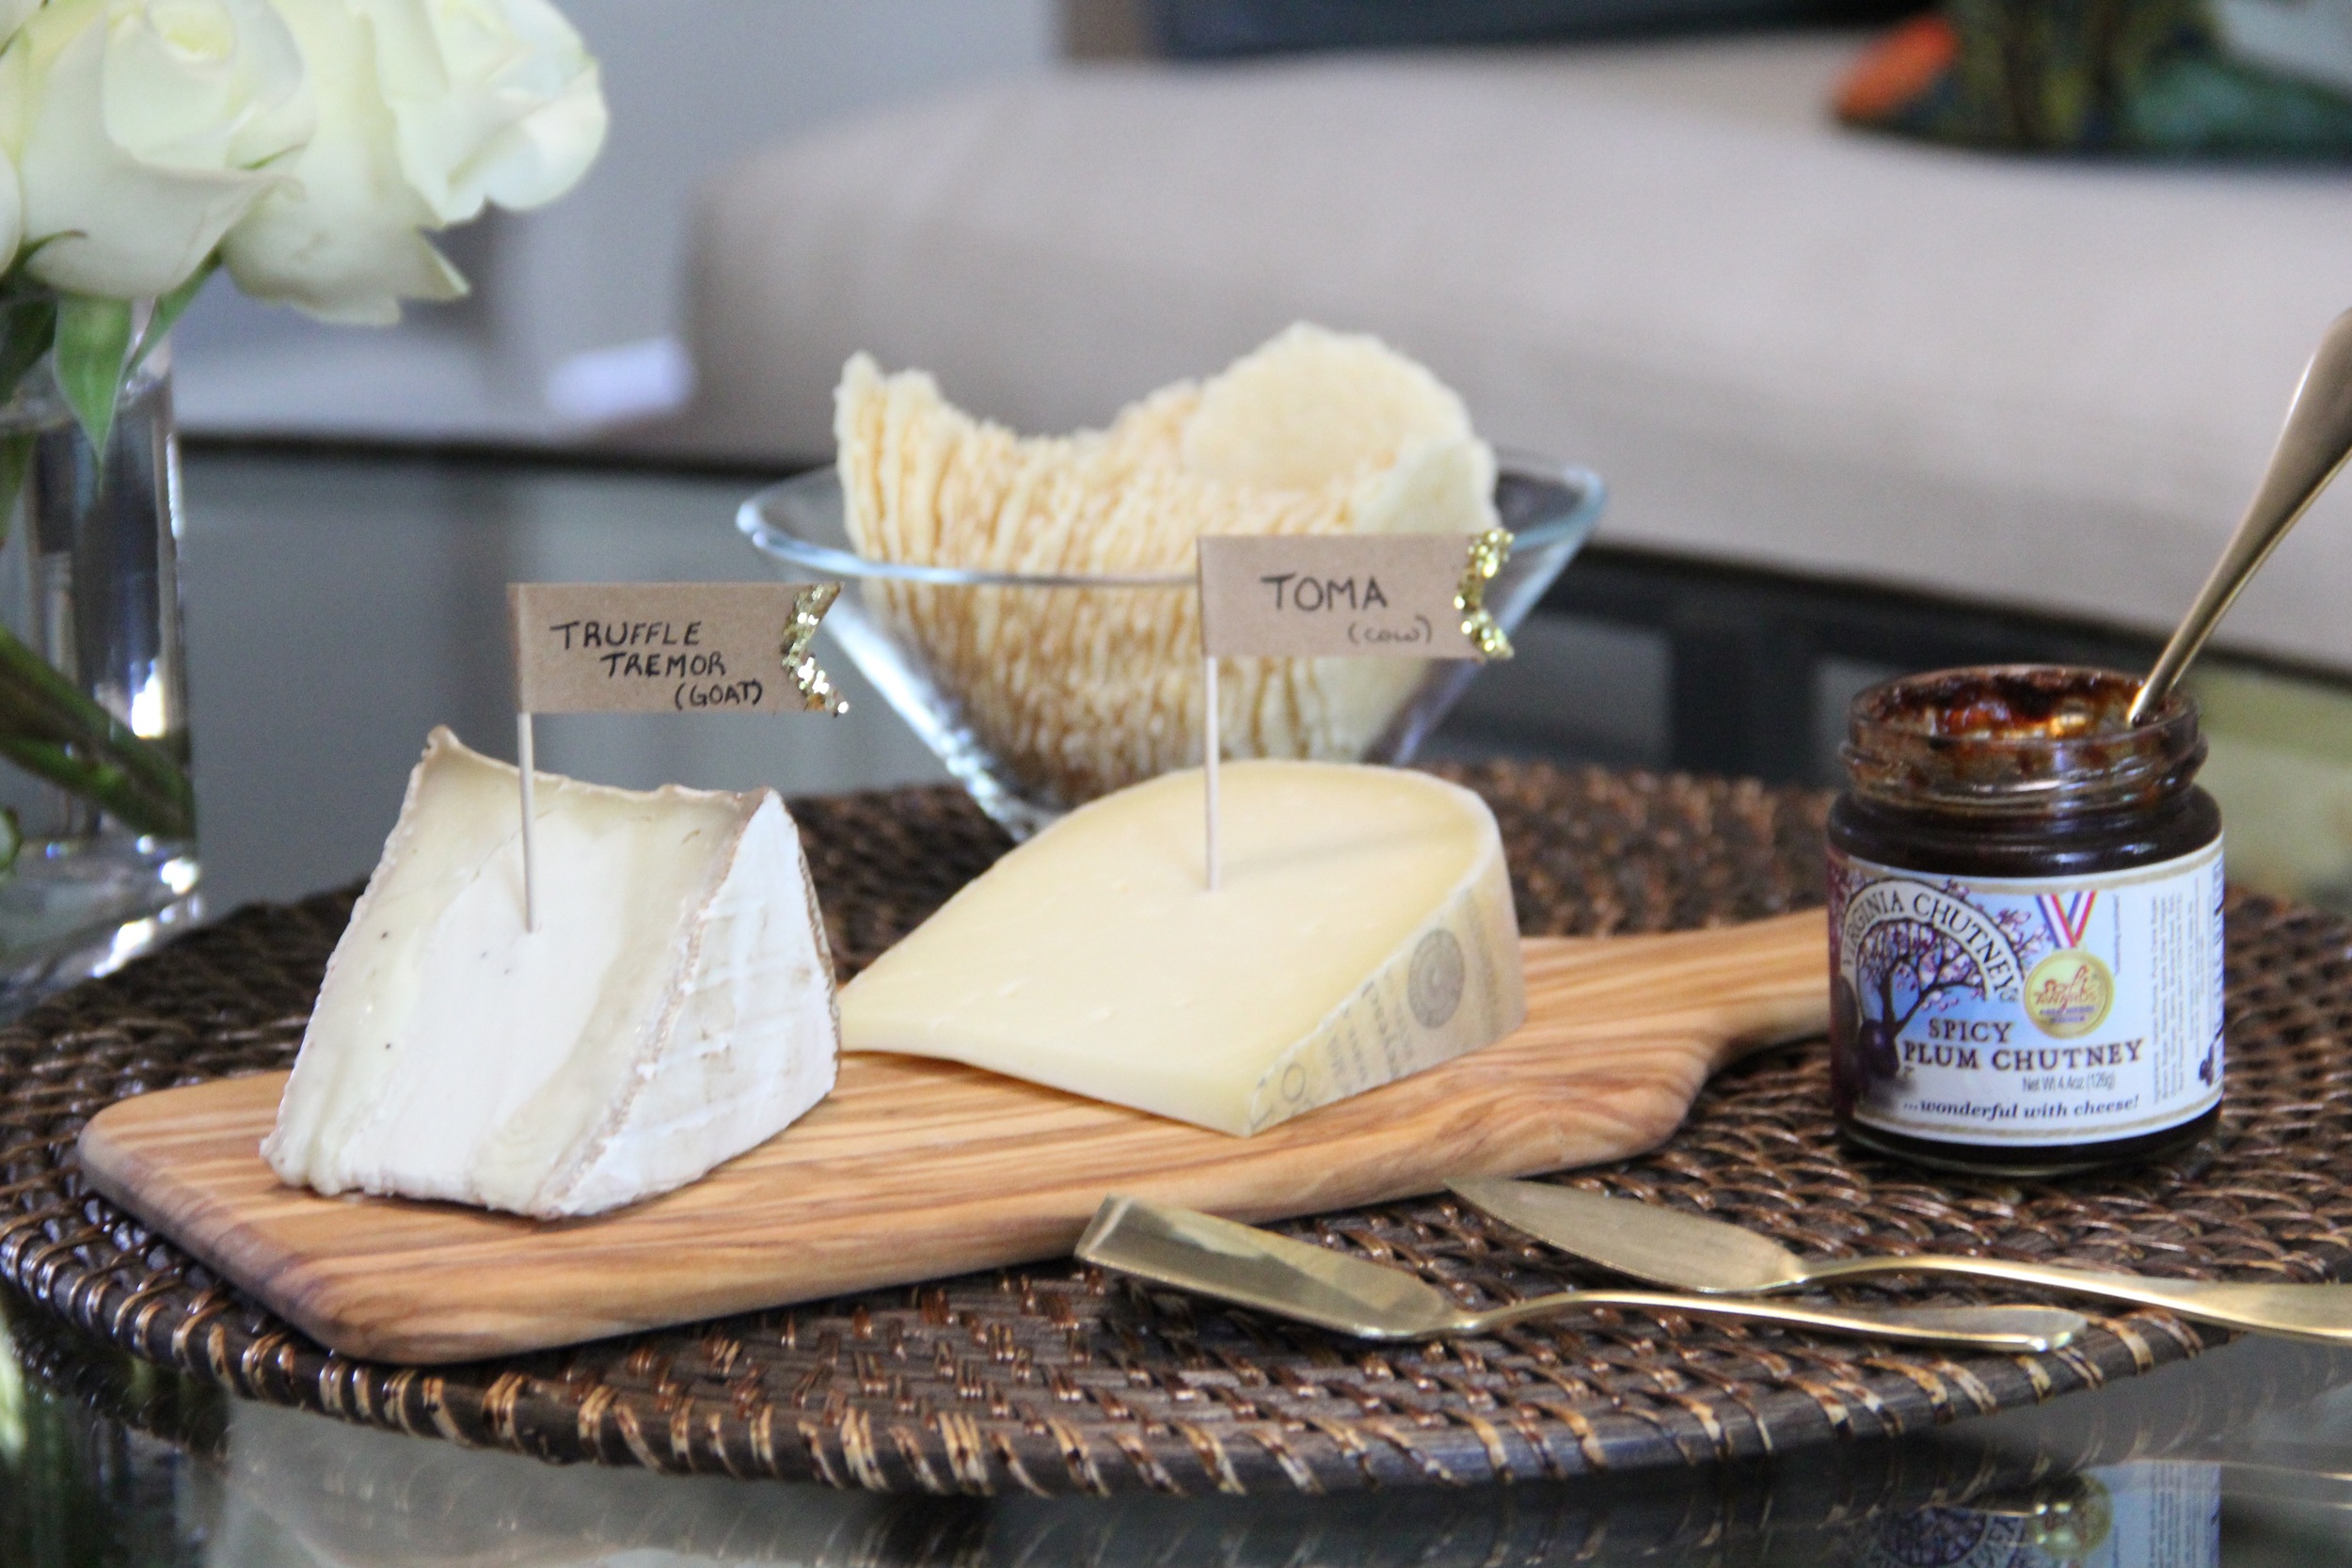
  7. Once dry, write the name of the cheese and milk type on the flag using a fine tipped pen
  8. Place flag into its designated cheese and serve
IMG_7989.jpg
In Entertain Tags DIY, Cheesescape, Cheeseboard, Cypress Grove, Virginia Chutney Co., 34 Degrees, Cocktail Party Decor, Cocktail Party Ideas
Comment

Blackberry and Lemon White Wine Spritzer

July 22, 2016 Callie Cagney
IMG_7942.jpg
IMG_7949.jpg

According to the weather channel, a good portion of the country is in for a seriously oppressive heat wave this weekend (woof!).  While it would be great to make the most of this super sunshine and hit the beach, I'm stuck in the city this weekend figuring out different ways to keep cool.  While there are certainly plenty of other ways to beat the mega heat this weekend, a cold and refreshing cocktail certainly makes the list!  Specifically, my latest go-to cocktail creation - a blackberry and lemon white wine spritzer!  

Beer is too filling in my opinion and while I am a major red wine enthusiast, this weather is just way too hot for red wine drinking.  Instead, this weekend I am opting for a cool and refreshing white wine spritzer with a fabulous new twist!  Combining two of my favorite things (Napa Cellars Wine and Spindrift Blackberry Seltzer) with a little hint of lemon and a few frozen blackberries has resulted in a drink that is not too sweet and a most delicious flavor profile.  If you are in the market for a new cocktail recipe this weekend, I highly recommend trying this recipe. 

IMG_7927.jpg
IMG_7950.jpg

Ingredients

  • 1 Bottle Sauvignon Blanc
  • 4 Cans Blackberry Spindrift Seltzer
  • 12-18 Frozen Blackberries
  • 4 Ice Spheres
  • 2-3 Lemons
IMG_7897.jpg
IMG_7911.jpg
IMG_7887.jpg
IMG_7935.jpg

Instructions

  1. Place one sphere ice cube into each tumbler or glass
  2. Pour 4oz of wine into each glass
  3. Fill the remainder of the glass with Spindrift Blackberry Seltzer
  4. Squeeze the juice of 1/4 of a lemon into each glass
  5. Garnish with 3-4 frozen blackberries and a slice of fresh lemon
  6. Serve and enjoy!
IMG_7945.jpg
IMG_7938.jpg
In Food and Drink Tags Napa Cellars, Spindrift Seltzer, Cocktail Recipe, Summer Entertaining, White Wine Spritzer, Blackberry Spindrift, Napa Cellars Sauvignon Blanc, Recipe
Comment

Creating a Professional Looking Floral Centerpiece at Home

July 15, 2016 Callie Cagney
IMG_7841.jpg

One thing I absolutely love and cannot live without is my morning routine.  I wake up, have coffee/breakfast, tidy the house and hit the gym for a long run while watching none other than my fave Good Morning America anchor, Robin Roberts.  While my husband is adamant about tracking the major world issues in the morning on FOX and Bloomberg, I really have no interest in being all serious news all the time.  I need more of a mix when starting my day, which is probably why I love watching shows like Good Morning America where you can get a rundown of the major world events, local weather, sports highlights (at a really high level), health news, recipes and lighter bits of information (ex. Steals and Deals with Tori and even a heads up on holidays like National Selfie Day).  

So why am I rambling on about Good Morning America?  Well it just so happens that the show was the inspiration for today's blog post!  We all know that I have a serious flower habit and I find myself swooning over the floral arrangements on Good Morning America pretty much every morning.  Fortunately, it recently occurred to me that I could probably replicate those gorgeous centerpieces myself!  I spent some time studying the flowers in the show's footage and then paid a visit to my local flower supply store.  Lo and behold!  All of the pieces for creating those gorgeous arrangements were pretty easy to track down and fairly inexpensive.  I am sure you are thinking I'm crazy for saying that as you're looking at an arrangement filled with 36 roses.  My secret to affordable roses??  Safeway (my local grocery store)!  Currently they are selling 18 roses for $12.99, so I paid around $26 for the 36 stems, which is a pretty incredible deal.  

My attempt at replicating a gorgeous Good Morning America worthy arrangement was a huge success and I am so excited to share this super easy and oh so beautiful DIY with you all today!  See below for all of the details on how I went about creating this floral stunner. 

IMG_7848.jpg
IMG_7802.jpg

Here's what you will need...

  • 8in x 4in Glass Cylinder Vase
  • Oasis/Floral Foam
  • 1-2 Long and Malleable Jungle Leaves
  • 36 Roses or Similar Flower (ex. Carnations)
  • Sheers (I use clean kitchen scissors)
IMG_7805.jpg
IMG_7811.jpg
IMG_7818.jpg
IMG_7828.jpg
IMG_7822.jpg
IMG_7830.jpg

Instructions

  1. Make sure you have washed and dried your flower vase before starting
  2. Take your jungle leaf and cut it lengthwise along the spine of the leave on both sides to create two leave strips
  3. Line the interior of your vase with each leaf half, making sure to place the freshly cut side down 
  4. Place a 6.5-7inch long piece of oasis in the center of the bowl and fill the bowl with tap water, making sure to have the water saturating the entire piece of oasis as it fills the vase to about the halfway mark.  
  5. I also like to poke holes in my oasis with a bamboo skewer to ensure that water saturates the oasis all the way to the center and also to reduce the level of resistance when inserting the flower stems.
  6. Remove leaves from roses and cut the stems under standing water and on a diagonal.  I would recommend trimming and arranging each flower one at a time to reduce the freshly cut stem's exposure to air.  **Stems that are overexposed to air will die faster, so going one at a time will help to increase the overall longevity of your blooms.   
  7. Start arranging the bottom perimeter first.  These stems can be cut the shortest as they are being placed closest to the water.
  8. Once you have completed arranging a row of flowers along the perimeter, repeat the process for the next level up.  Noting that with each tier, your stems should be cut slightly longer.  
  9. When all flowers have been arranged, you can tweak the layers to ensure that they are even and no holes have been missed.   
  10. This arrangement is great for a dining table, because the low profile of the arrangement won't obstruct your view of fellow dinner guests. 
IMG_7837.jpg
In Decorate Tags Flower Arranging, DIY, Oasis, Jungle Leaves, Dining Room Centerpiece, Centerpiece
Comment

Design Tips for Any Room

July 8, 2016 Callie Cagney
Decorating Tips.JPG

Over the past couple of months, my close friends and family have been soliciting my help and ideas for decorating a variety of spaces.  First off, let me just say that I am both flattered and humbled to have so many people asking for my input when it comes to decorating.  I am by no means a professional and really don't have any training in this area, I am just a lover of pretty aesthetics and constantly reading/researching to keep my finger on the pulse when it comes to interior design.  

When thinking about my method for going about designing a space, it's really a combination of both process and tips to keep in mind.  I know it can seem daunting when faced with designing a space, so for today's post, I wanted to share a few of my best practices for going about designing a space.  These tips have helped me to tackle decorating projects of various sizes and specifications, so I thought it might be a good idea to document these tips for you all and of course my own reference!    

IMG_7162.JPG

Start with the Rug 

The floor is literally the foundation of a room, which is why I find it to be a natural starting point.  I know that some people have tile or wall to wall carpet, so selecting an area rug is not really applicable in those instances.  However, the majority of individuals are faced with at least one room in their home where it's necessary to buy a rug.  So this tip is geared towards those individuals with an area rug room or rooms (like myself).  

When decorating a room, I like to start with selecting the rug.  Whether I'm looking to add a neutral area rug or a colorful oushak, it's so much easier to lay the rug down prior to furnishing.  Doing so will prevent you from having to deal with moving furniture in and out of a room unnecessarily.  In addition, the color and style selection for your rug will also serve as a guide for selecting additional colors to incorporate into the room. Ex. Should you opt to have a colorful oriental rug, you can use the colors of the rug as a guide for selecting additional fabrics.  

Sun Bleached Chair.JPG
IMG_0280.JPG

Furniture Positioning

Furniture placement in a room is really a balancing act between practicality and achieving a pleasing aesthetic.  Placement of a chair or side table for instance, should serve a purpose and fit the space (not look crammed or block a walkway).  With that being said, I think it's important to note that you also should consider the safety of the furniture piece when deciding on its placement.  I am imparting these words of wisdom because I have recently dealt with a serious case of furniture sun bleaching.  Sun bleaching is exactly what you are probably thinking it is, excessive exposure of fabric to direct sunlight will cause the colors to fade and the fabric to tatter/fray.  I had placed a blue arm chair by a window in my bedroom so that we could have a place to sit while getting dressed.  Unfortunately the window has incredibly strong afternoon sunlight that ended up bleaching the fabric on the arm of my chair (see before and after photos above--chair victim is the closer of the two in the second photo).  

IMG_7077.JPG

Measuring

I would have to say that measuring is probably the most important part of designing a room.  Measuring the space will help you to determine what pieces will fit based on the dimensions of the room and ultimately create a room that is properly scaled.  Length, depth, width, height, etc... all super important measurements to consider when constructing a space.  I really cannot stress enough how important it is to take the time to measure out your room and furniture when designing a space.  Furniture is a major investment and the last thing you want is to spend all of this money purchasing a piece that isn't the correct size for the space.  For more information on this topic, see this post on my before and after for redesigning my living room space to fit the scale of the room.  

Lighting.JPG
Lighting 3.JPG
Lighting 2.JPG

Lighting

Another aspect of the room design that can really elevate your space is lighting.  I am a major advocate for investing in quality room lighting.  Whether it's lamps, ceiling fixtures and/or sconces, installing the right lighting fixture that complements the aesthetic of your space will help you achieve a beautiful finished look.  

Here's the scoop on a few favorite lighting fixtures installed in my home: 

Since we live in a loft, our living room has wonderfully high ceilings that could support a show stopping fixture.  I adore the Focault's Orb fixture from Restoration Hardware and it has really given my living room the most perfect ambient lighting.  For the bedroom, I opted for Pottery Barn's Hundi Flushmount mini lantern in our dressing area (which I installed myself--super easy to do) and the hardware on the lantern paired perfectly with black iron hardware used for the window treatments.  Lastly, our most recent addition was the 20th Century Filament Sconce installed on our stairway wall.  I opted for a more minimalist look when it came to this fixture because I didn't want it to distract from the beautiful artwork.  These bubble glass style lighting fixtures are really popular at the moment and I can totally understand why!  Modern, sleek, elegant, unique and really versatile.  

IMG_0597.JPG
IMG_0173.JPG
IMG_7208.JPG

Finishing Touches

In my mind finishing touches include knick knacks on side tables, ginger jars on window ledges, coffee table tray decor, wall hangings and even throw pillows and blankets in certain instances.  These are the easy and often interchangeable add-ons that you should wait to purchase until after the bulk of the furnishing is done in a space.  Reason being, you never know how a room will end up coming together.  Maybe you see a chair on one wall one day and then decide that it would actually look better on the opposite wall the next day.  Finishing touches are just that, the very last things that you should be concerning yourself with when decorating a space.  You'll have the best idea of what final finishes you need to fill in spaces once the bulk of the furnishing is complete, so I strongly encourage you to hold off on the tchotchke purchasing until the furnishing portion of your decorating project is complete.  

IMG_0576.JPG
In Decorate Tags Restoration Hardware, Pottery Barn, Room Decorating Tips
Comment

Summer Poached Pear Recipe

July 1, 2016 Callie Cagney
IMG_7737.jpg

Fourth of July is without a doubt one of my favorite holidays for picnicking.  Warmer weather, a long holiday weekend and enjoying a spectacular fireworks show on the national mall are just a few of the many reasons why I find picnicking to be an absolute must!  When trying to come up with a delicious menu that suits the time of year and is easy to transport, the one go-to that always makes the cut is my summer poached pear recipe.

IMG_7697.jpg

My summer poached pear recipe is a fabulous addition to any picnic and/or summer meal.  It's easy to create, has a wonderful flavor profile and serving it cold makes for an absolutely refreshing and delicious conclusion to any summer meal.  Here is how I went about creating this recipe.  

IMG_7684.jpg

Ingredients

  • 4 - 6 D'Anjou Pears
  • 1 Bottle Sauvignon Blanc (ex. Napa Cellars Sauvignon Blanc)
  • Juice of 5 Lemons
  • Peel of Half of a Lemon
  • 1 Vanilla Bean (cut in half)
  • 1/2 cup Sugar
  • 2c Water
  • 1 Star of Anise
  • Heavy Whipping Cream
  • 2 Tbs Powdered Sugar
  • 1 tsp Vanilla Extract
  • Fresh Summer Berries
IMG_7705.jpg
IMG_7709.jpg
IMG_7715.jpg
IMG_7726.jpg

Instructions

  1. In a medium sized dutch oven, combine the juice of a lemon, bottle of wine, sugar, vanilla bean, lemon peel, water and anise.  
  2. Cover with a lid and begin to heat on a medium/high setting 
  3. Meanwhile, pour the juice of remaining lemons into a large bowl
  4. Peel pears and place in the bowl with lemon juice making sure to thoroughly coat each pear to prevent browning
  5. When the liquid in the dutch oven reaches a boil, gently place the pears in the boiling liquid, cover and allow contents to boil for 25 minutes. *Note- When the pear is cooked, you should be able to pierce through the pear without any resistance. 
  6. While the pears are cooking, in a separate bowl combine 1 cup of heavy whipping cream, vanilla extract and powdered sugar
  7. Use a hand mixer on a high setting to whip the cream until semi stiff peaks are achieved
  8. When pears are finished cooking, gently remove them from the boiling liquid and set aside on a plate to cool.  
  9. Continue cooking the liquid for another 45 minutes (roughly) until the liquid reduces down into a syrup that can coat the back of a spoon.  
  10. Serve pears with a mix of seasonal fresh berries, a dollop of whipped cream, sprig of fresh mint and drizzle of the poaching syrup.  
IMG_7759.jpg
IMG_7744.jpg
In Food and Drink Tags Fourth of July, July 4th, Napa Cellars, Dessert, Summer Recipe, Picnic Food
Comment
← Newer Posts Older Posts →

Subscribe to the Redefining Domestics Blog:

Thank you!

Categories:

  • Decorate (64)
  • Entertain (71)
  • Food and Drink (103)


Latest Posts by Category:

Featured
IMG_1993.JPG
Entertain
Pinterest Worthy Halloween DIYs
Entertain
Entertain
Featured
IMG_8787.jpg
Decorate
How to Hang a Lighting Fixture
Decorate
Decorate
Featured
IMG_1694.JPG
Food and Drink
A Healthy Recipe for Homemade Granola
Food and Drink
Food and Drink

Instagram 

http://instagram.com/calliecagney

View fullsize We are lucky to have you in our sphere Chris Kalna!❤️ #happyfathersday #girldad #cookiebaking #suttonbutton #lovethem
View fullsize National Puppy Day with my two toddlers❤️ #suttonbutton #jolene #nationalpuppyday #jojosbathtubfomo😂
View fullsize Bibbidi Bobbidi Boo, she’s 2! Happy Birthday Sweet Girl💙 #suttonbutton #halloween #cinderella #happybirthday #shestwo!
View fullsize Fourth of July Vacay is already off to a fun start❤️💙⛱ #fourthofjuly #mountains #thesetwo #ggccsummer2019
View fullsize This little girl turned 1 on Halloween! Sutton, you are pure joy! Happy Birthday sweet girl! #suttonbutton #happybirthday #halloweenbaby #birthdaycake #diy #beaufortbonnet
View fullsize Our first 4th of July as a trio❤️💙 #happyfourth #familyphoto #skr #suttonbutton #vacation #northcarolina
View fullsize First day of vacation with these two loves💙 #thecutest #vacation #july4th #mountains #sKr #suttonbutton #beachingit #waterbaby
View fullsize Happy First Father’s Day to this stud muffin! You bring a lot of joy and sports watching to our lives. The Ladies Kalna are lucky to have you!❤️ #Fathersday2018 #chrissums #sKr #socute #luckyus #moreusopenplease
View fullsize Girlfriends kicking off MDW together💕🐳🛁 #suttonandmadden #mdw #littlebesties #bathtime #toocute
View fullsize Baby’s first Christmas tree 🎄 #deckthehalls #sKr #christmastree #happysunday
View fullsize Baby sKr’s jammie game is on point🙌🏻❤️ #thingstodo #retailtherapy #stillpregnant #petiteplume #potterybarnkids #babyclothes #toocute #babygirl #pajamaparty
View fullsize My husband and I joke about Baby K’s “master suite.” Clearly we’re both struggling with a case of bedroom envy😂 #stillpregnant #babynursery #iviebaby #glitterguide #mypotterybarn #serenaandlily #babygirl #skr #projectnursery

Pinterest

http://www.pinterest.com/calliecagney/

Follow Callie Cagney's board Home Decorating on Pinterest.
Welcome RSS

© 2016 Redefining Domestics. All Rights Reserved.