• Welcome
  • Entertain
  • Decorate
  • Food & Drink
  • About
  • Contact
Menu

Redefining Domestics

Street Address
Washington, DC
Phone Number

Practical applications for turning your house into a home.   

Redefining Domestics

  • Welcome
  • Entertain
  • Decorate
  • Food & Drink
  • About
  • Contact

Chocolate Coconut Waffled Ice Cream Sandwiches

May 17, 2016 Callie Cagney
Waffle Ice Cream Sandwich 1.jpg

I have been itching to test out an unusual idea that came to me a while back and this past Sunday (thanks to National Chocolate Chip Day) I finally had my golden opportunity.  Everyone talks about all of the crazy things you can cook in a waffle iron (ex. cinnamon rolls, french toast, grilled cheese, etc...) so my thought was, why not cookie dough?!  It seemed like a concept that would definitely work, and who doesn't love a crispy chocolate chip cookie every once in a while?

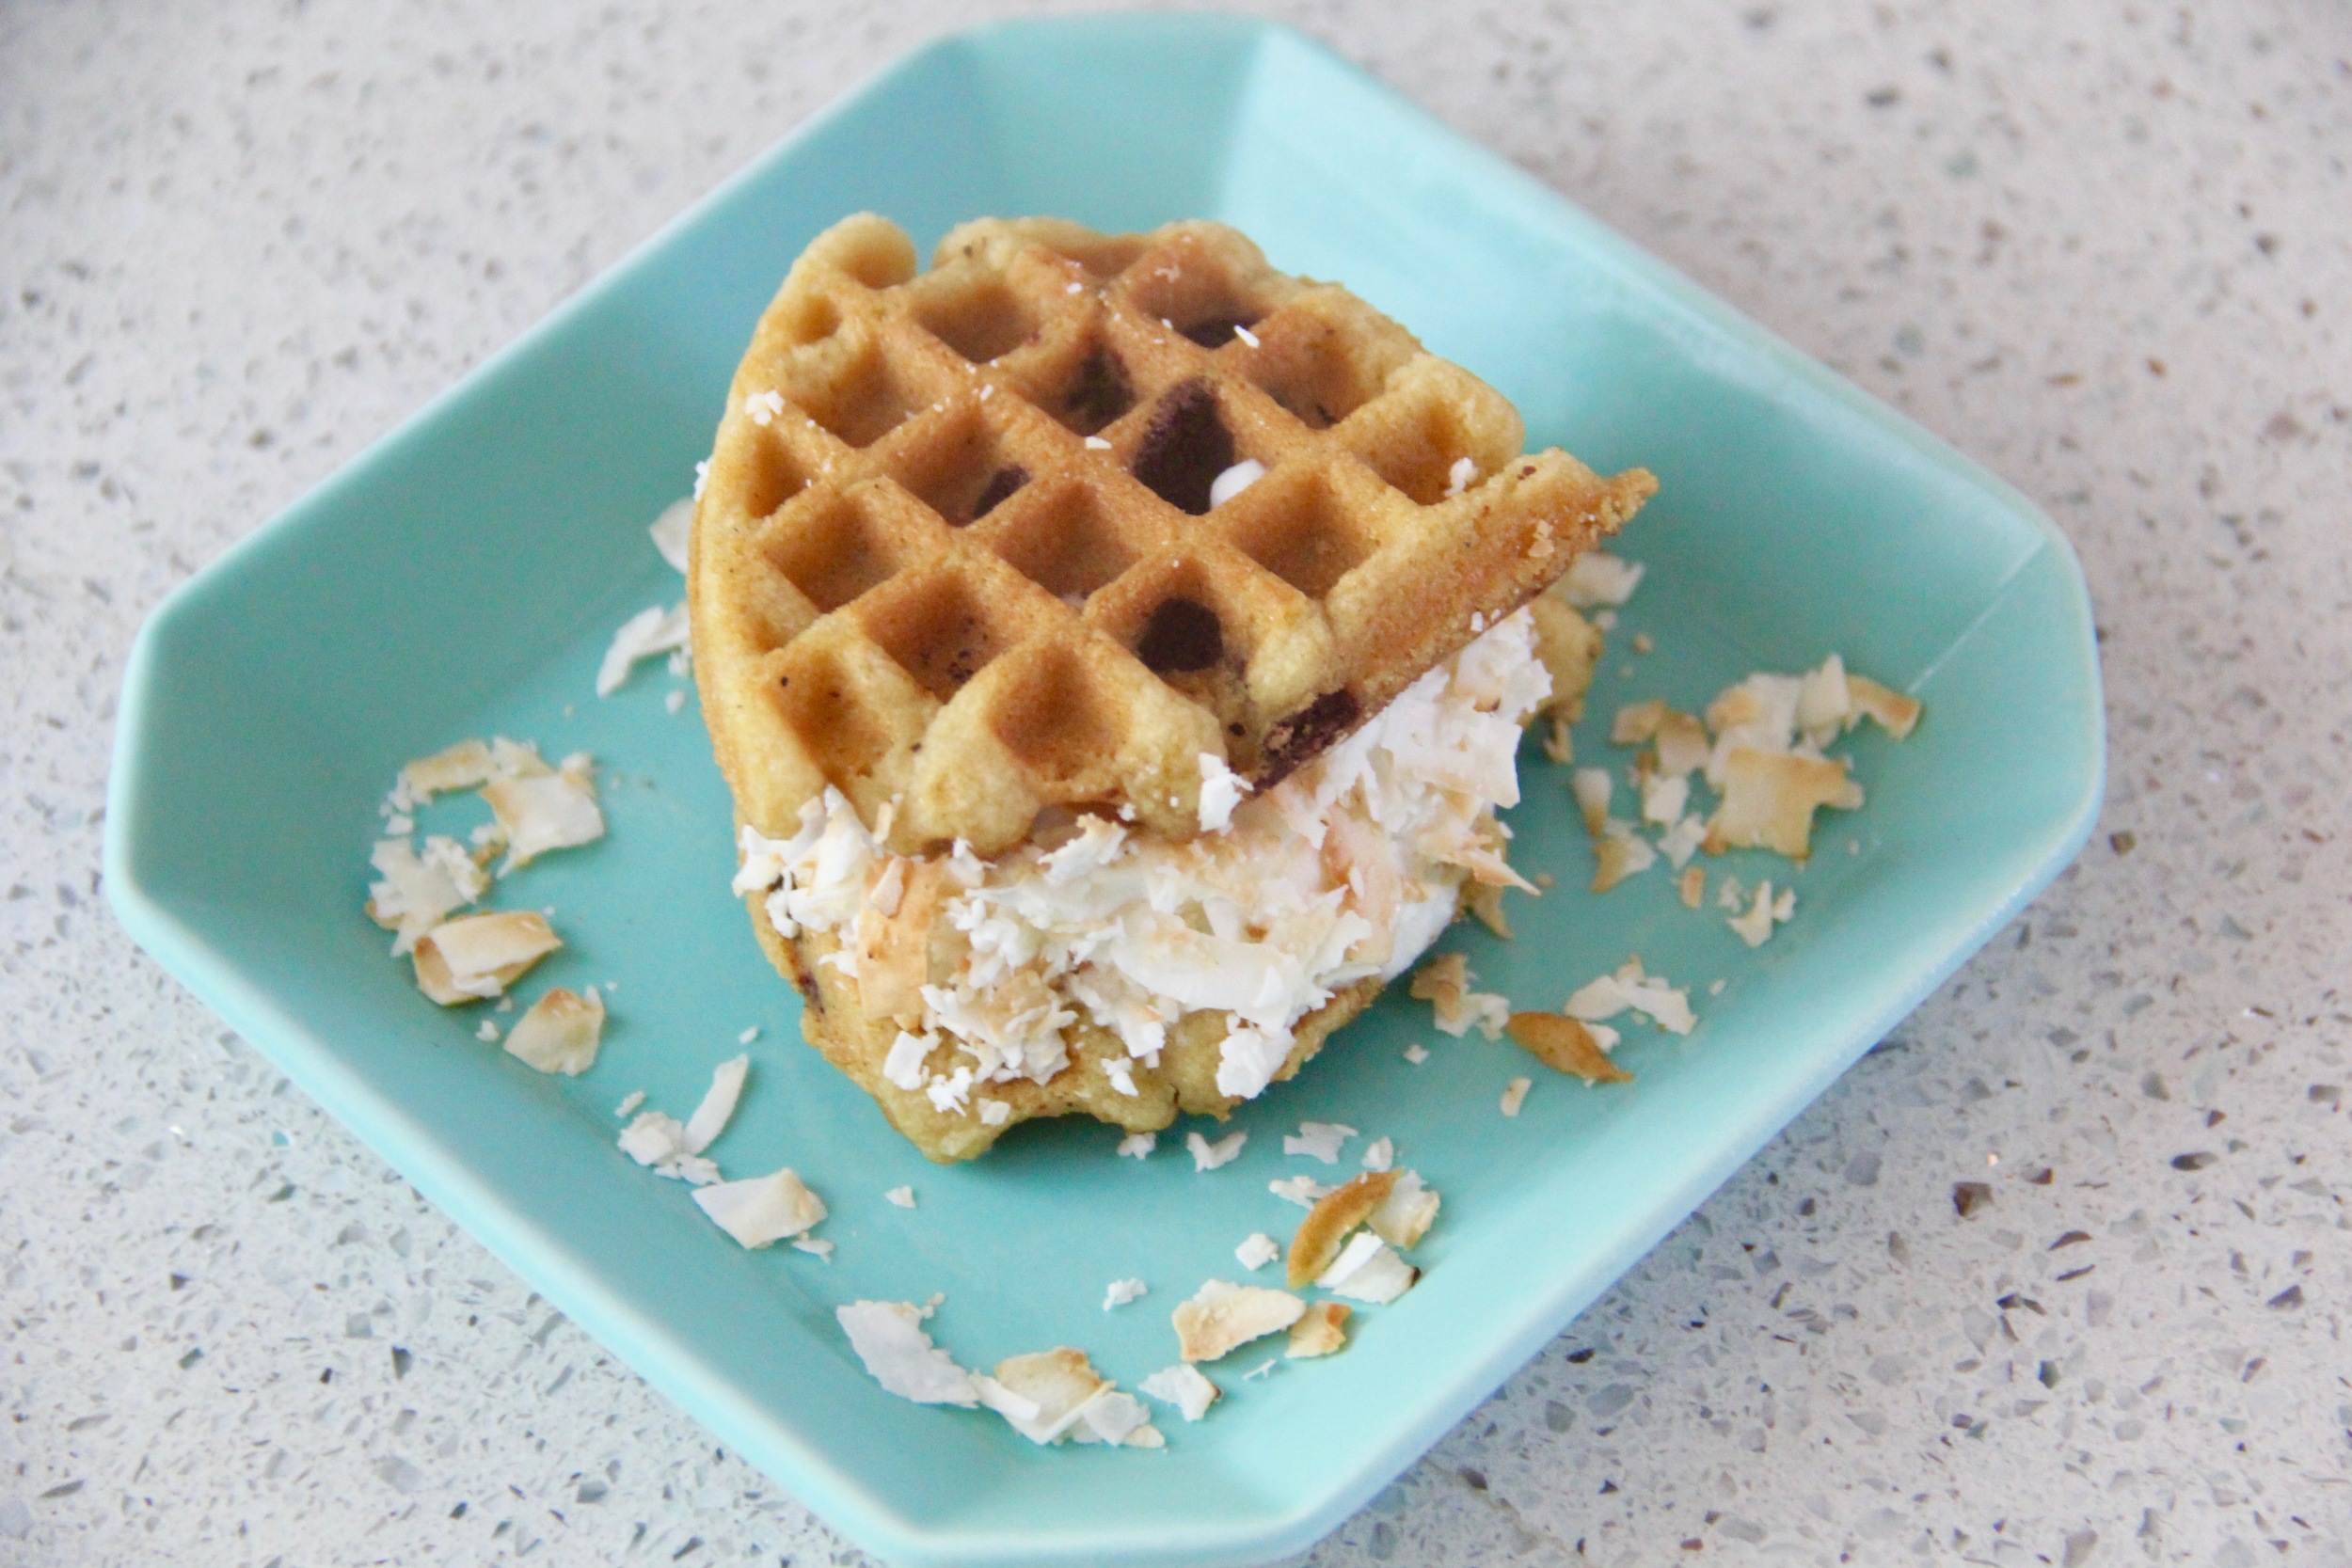
After a few rounds of trial and error, I finally figured out how to successfully waffle chocolate chip cookie dough (which of course had me jumping for joy!).  To take these delicious cookies to the next level, I decided to sandwich them with a scoop of my new favorite coconut sorbet and then finish them with a little toasted coconut.   The result?  A dangerously delicious and highly addictive dessert that I can't seem to get enough of!  These ice cream sandwiches are not only great to make for an impromptu single serving sweet treat, they also make for a fabulous summer party dessert idea.  You can customize the flavor pairings to fit your palette and who doesn't love a cool treat on a hot summer day? 

Below are the details for making these most delicious ice cream sandwiches. 

Waffled Cookies 1.jpg
Waffle Icecream Sandwiches Step 3a.jpg

Ingredients

  • 1 Bag Nestle Toll House Semi-Sweet Chocolate Chips
  • Recipe for Nestle Toll House Classic Chocolate Chip Cookies
  • Coconut Gelato or Sorbet (*I recommend Sharon's Coconut Sorbet)
  • Unsweetened Large Flaked Coconut (Toasted)
  • Pam Non-Stick Cooking Spray (or similar)
Waffle Icecream Sandwiches Step 1.jpg
Waffle Icecream Sandwiches Step 2.jpg
Waffle Icecream Sandwiches Step 3.jpg
Waffle Icecream Sandwiches Step 4.jpg

Instructions

  1. Make cookie dough according to the Nestle Toll House recipe
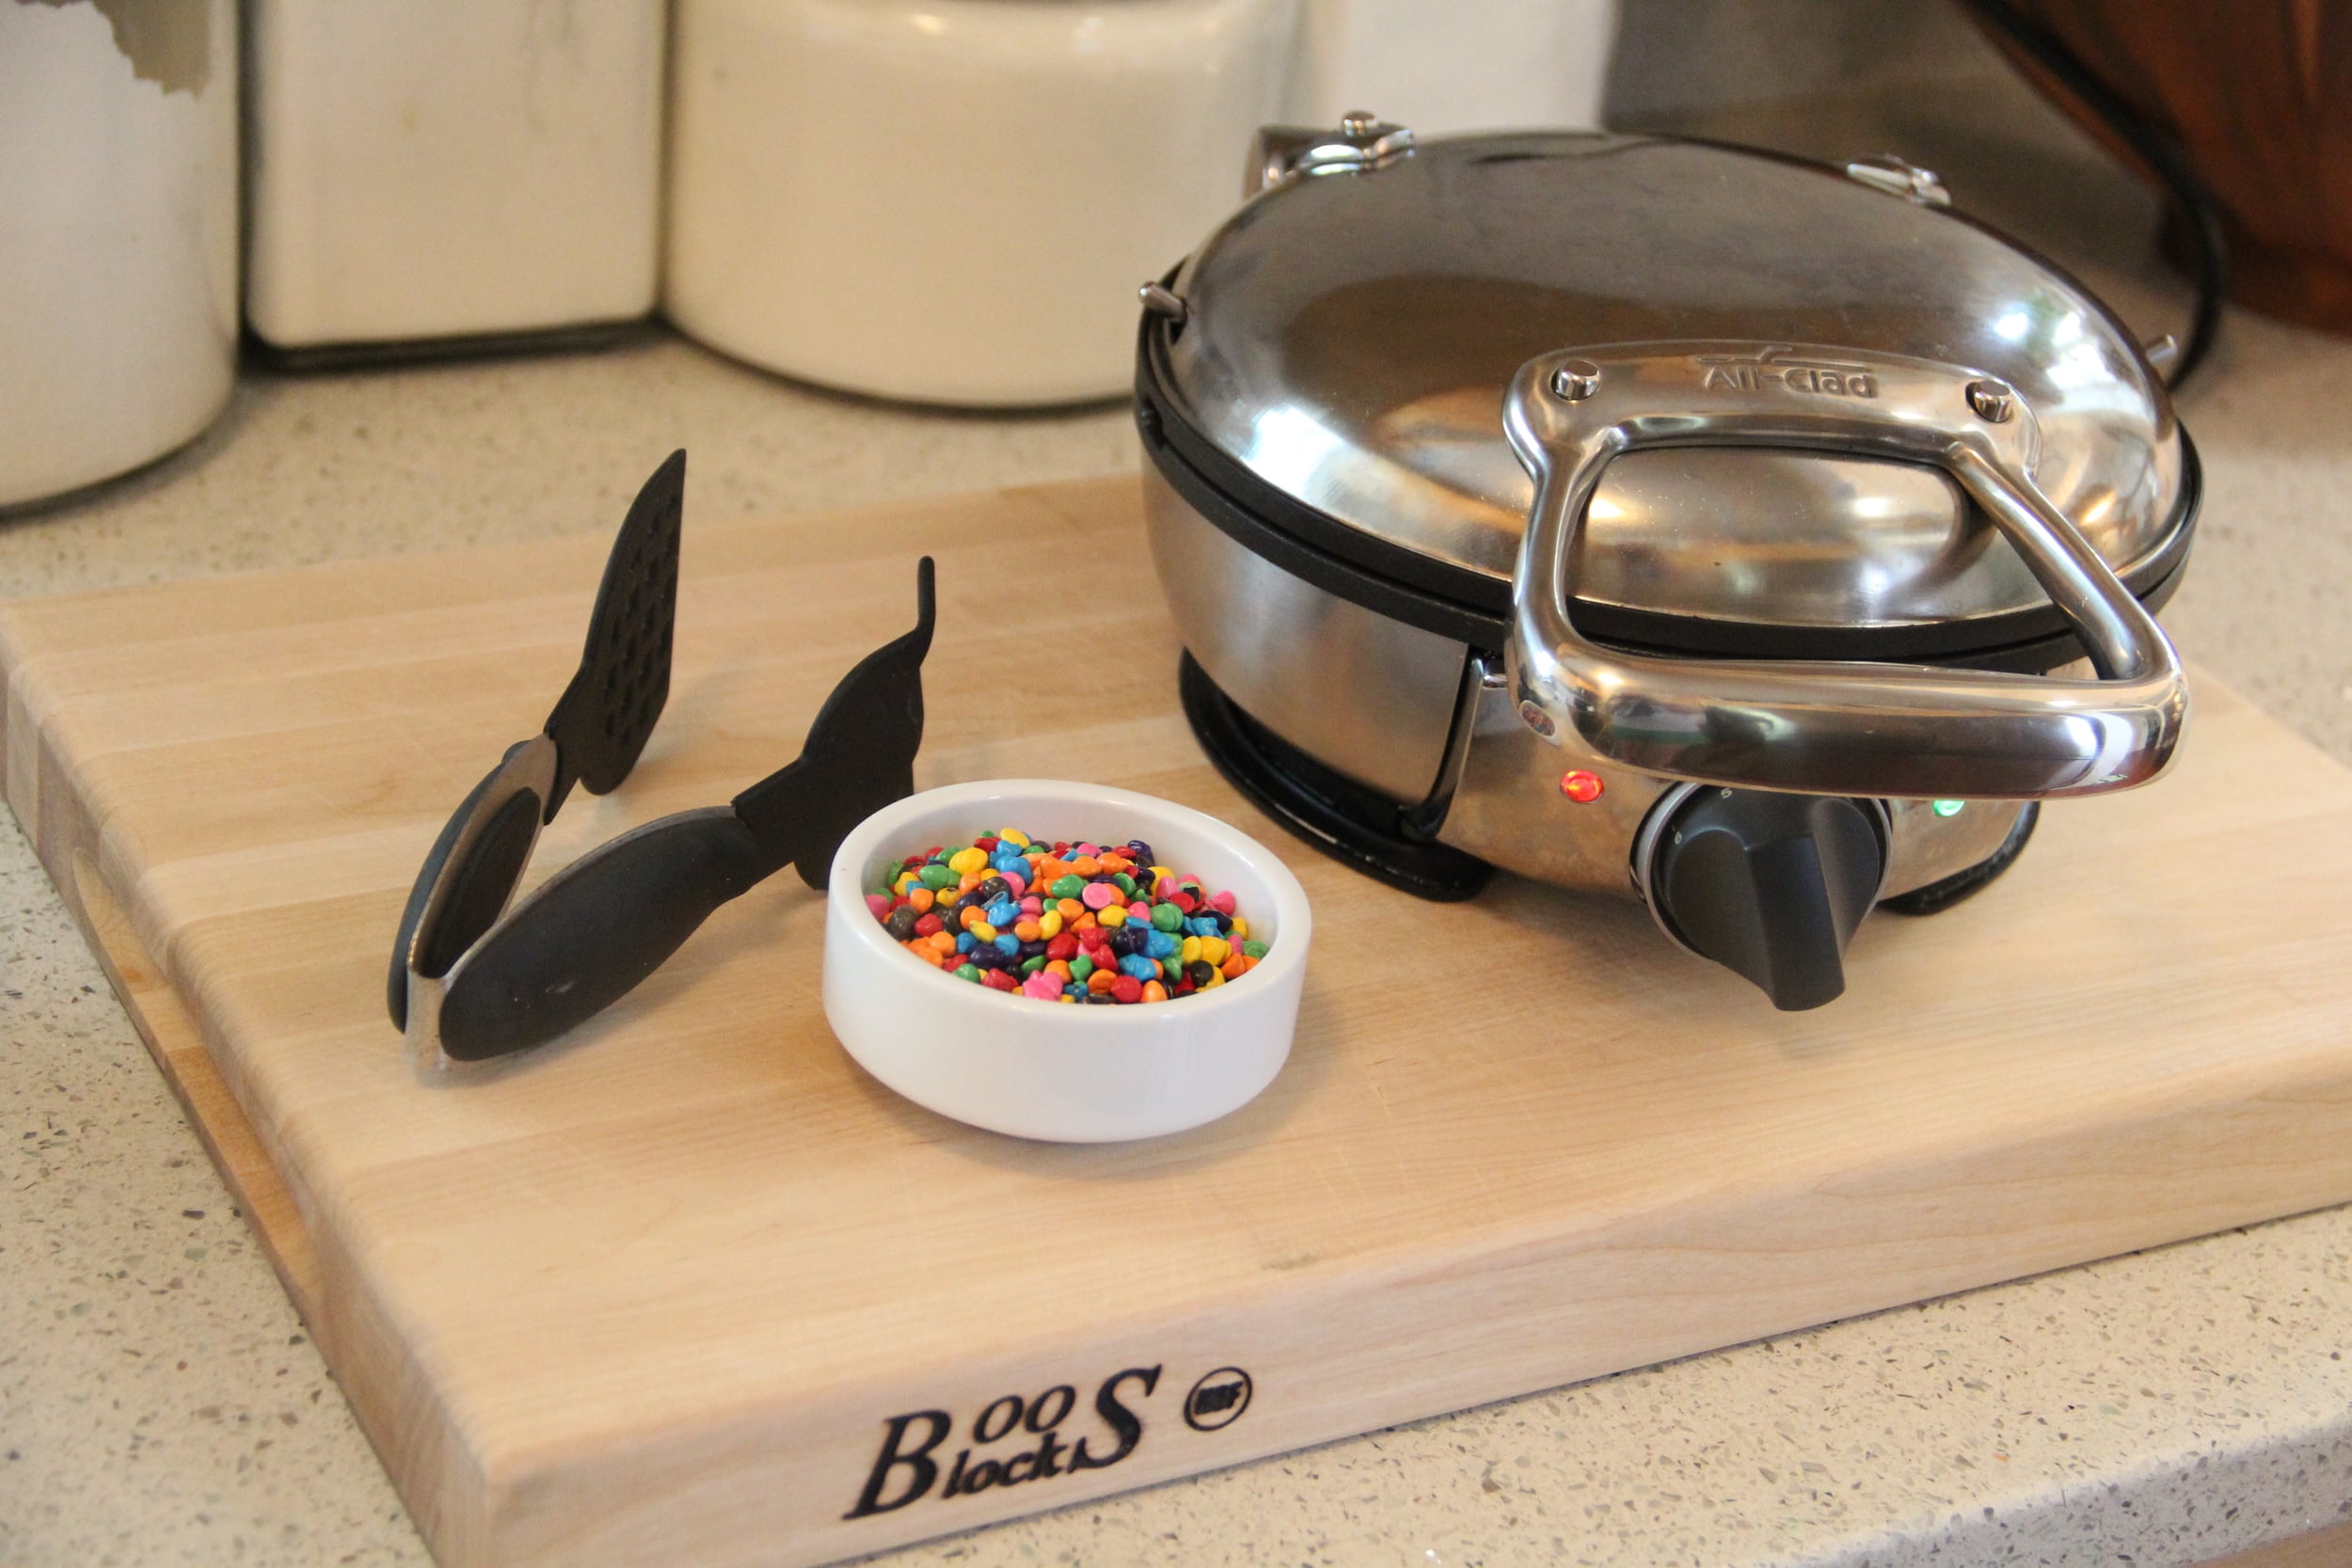
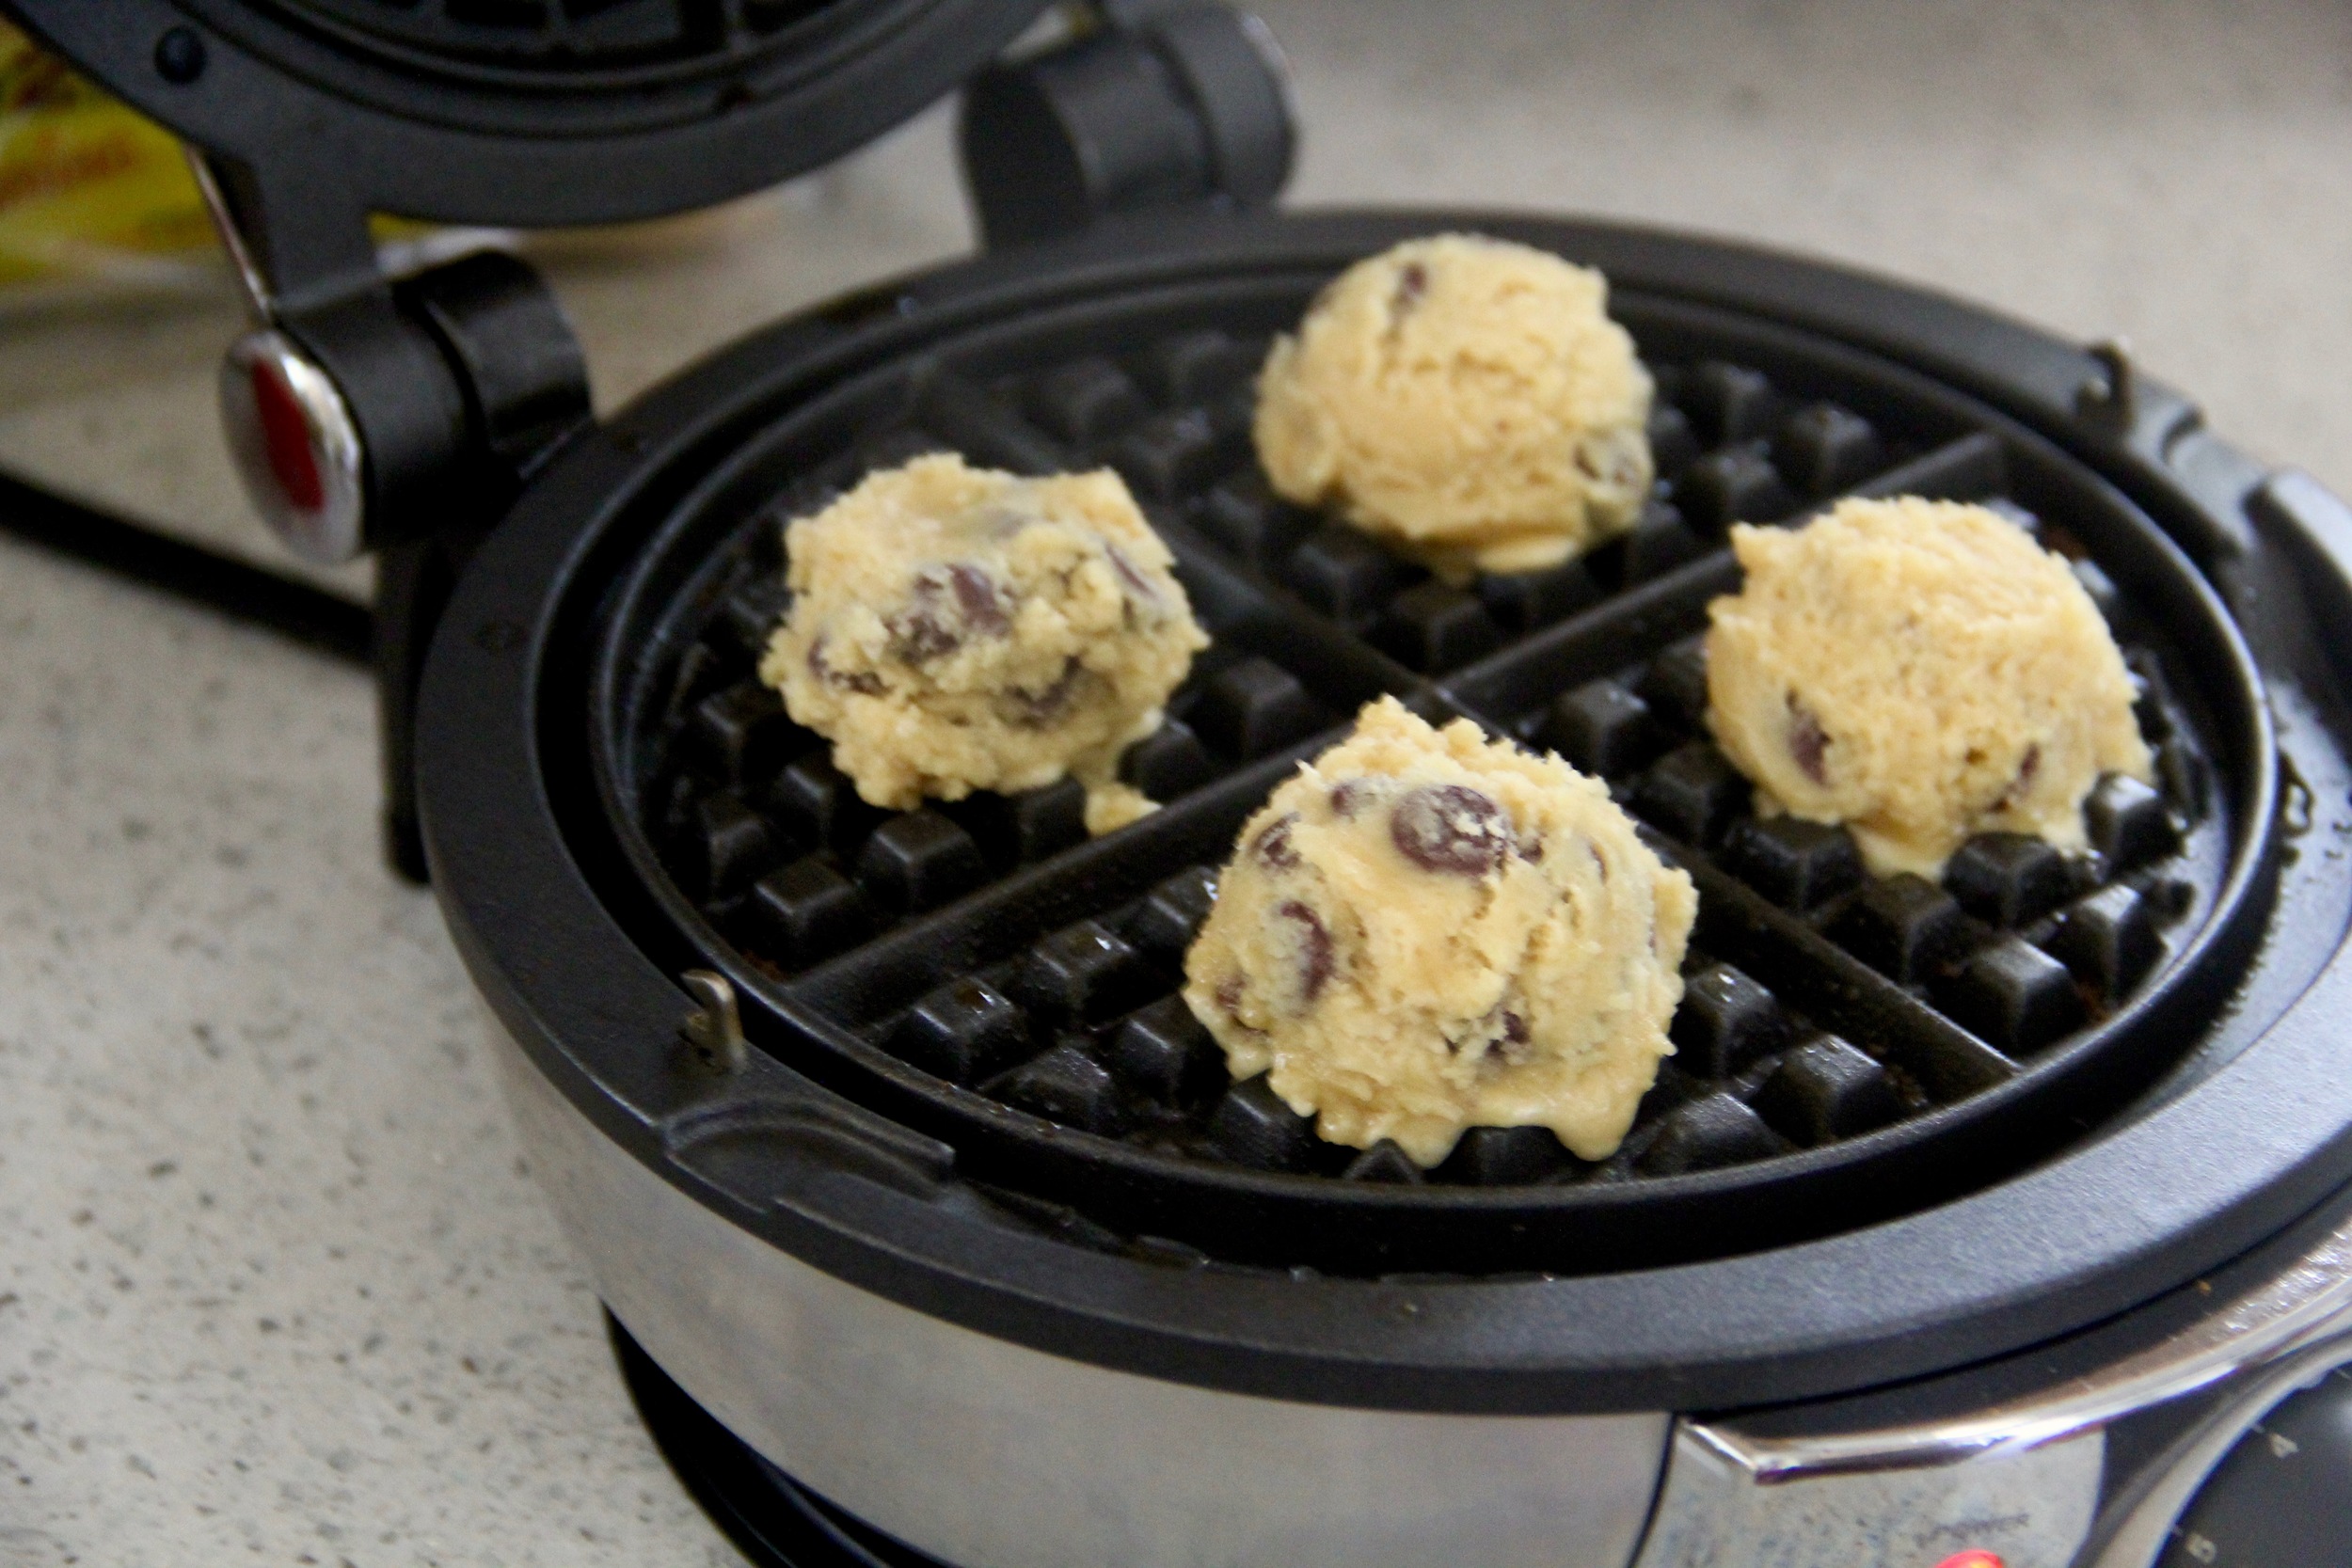
  2. Heat Waffle Iron (*note- if you have temperature settings on your waffle iron, set it to Medium-Low)
  3. When the waffle iron is ready, give each quadrant a quick mist of non-stick cooking spray on both the top and bottom plates
  4. Apply a small scoop of cookie dough to each quadrant (I like to use this cookie scoop) and then close the iron so that the cookies can bake.
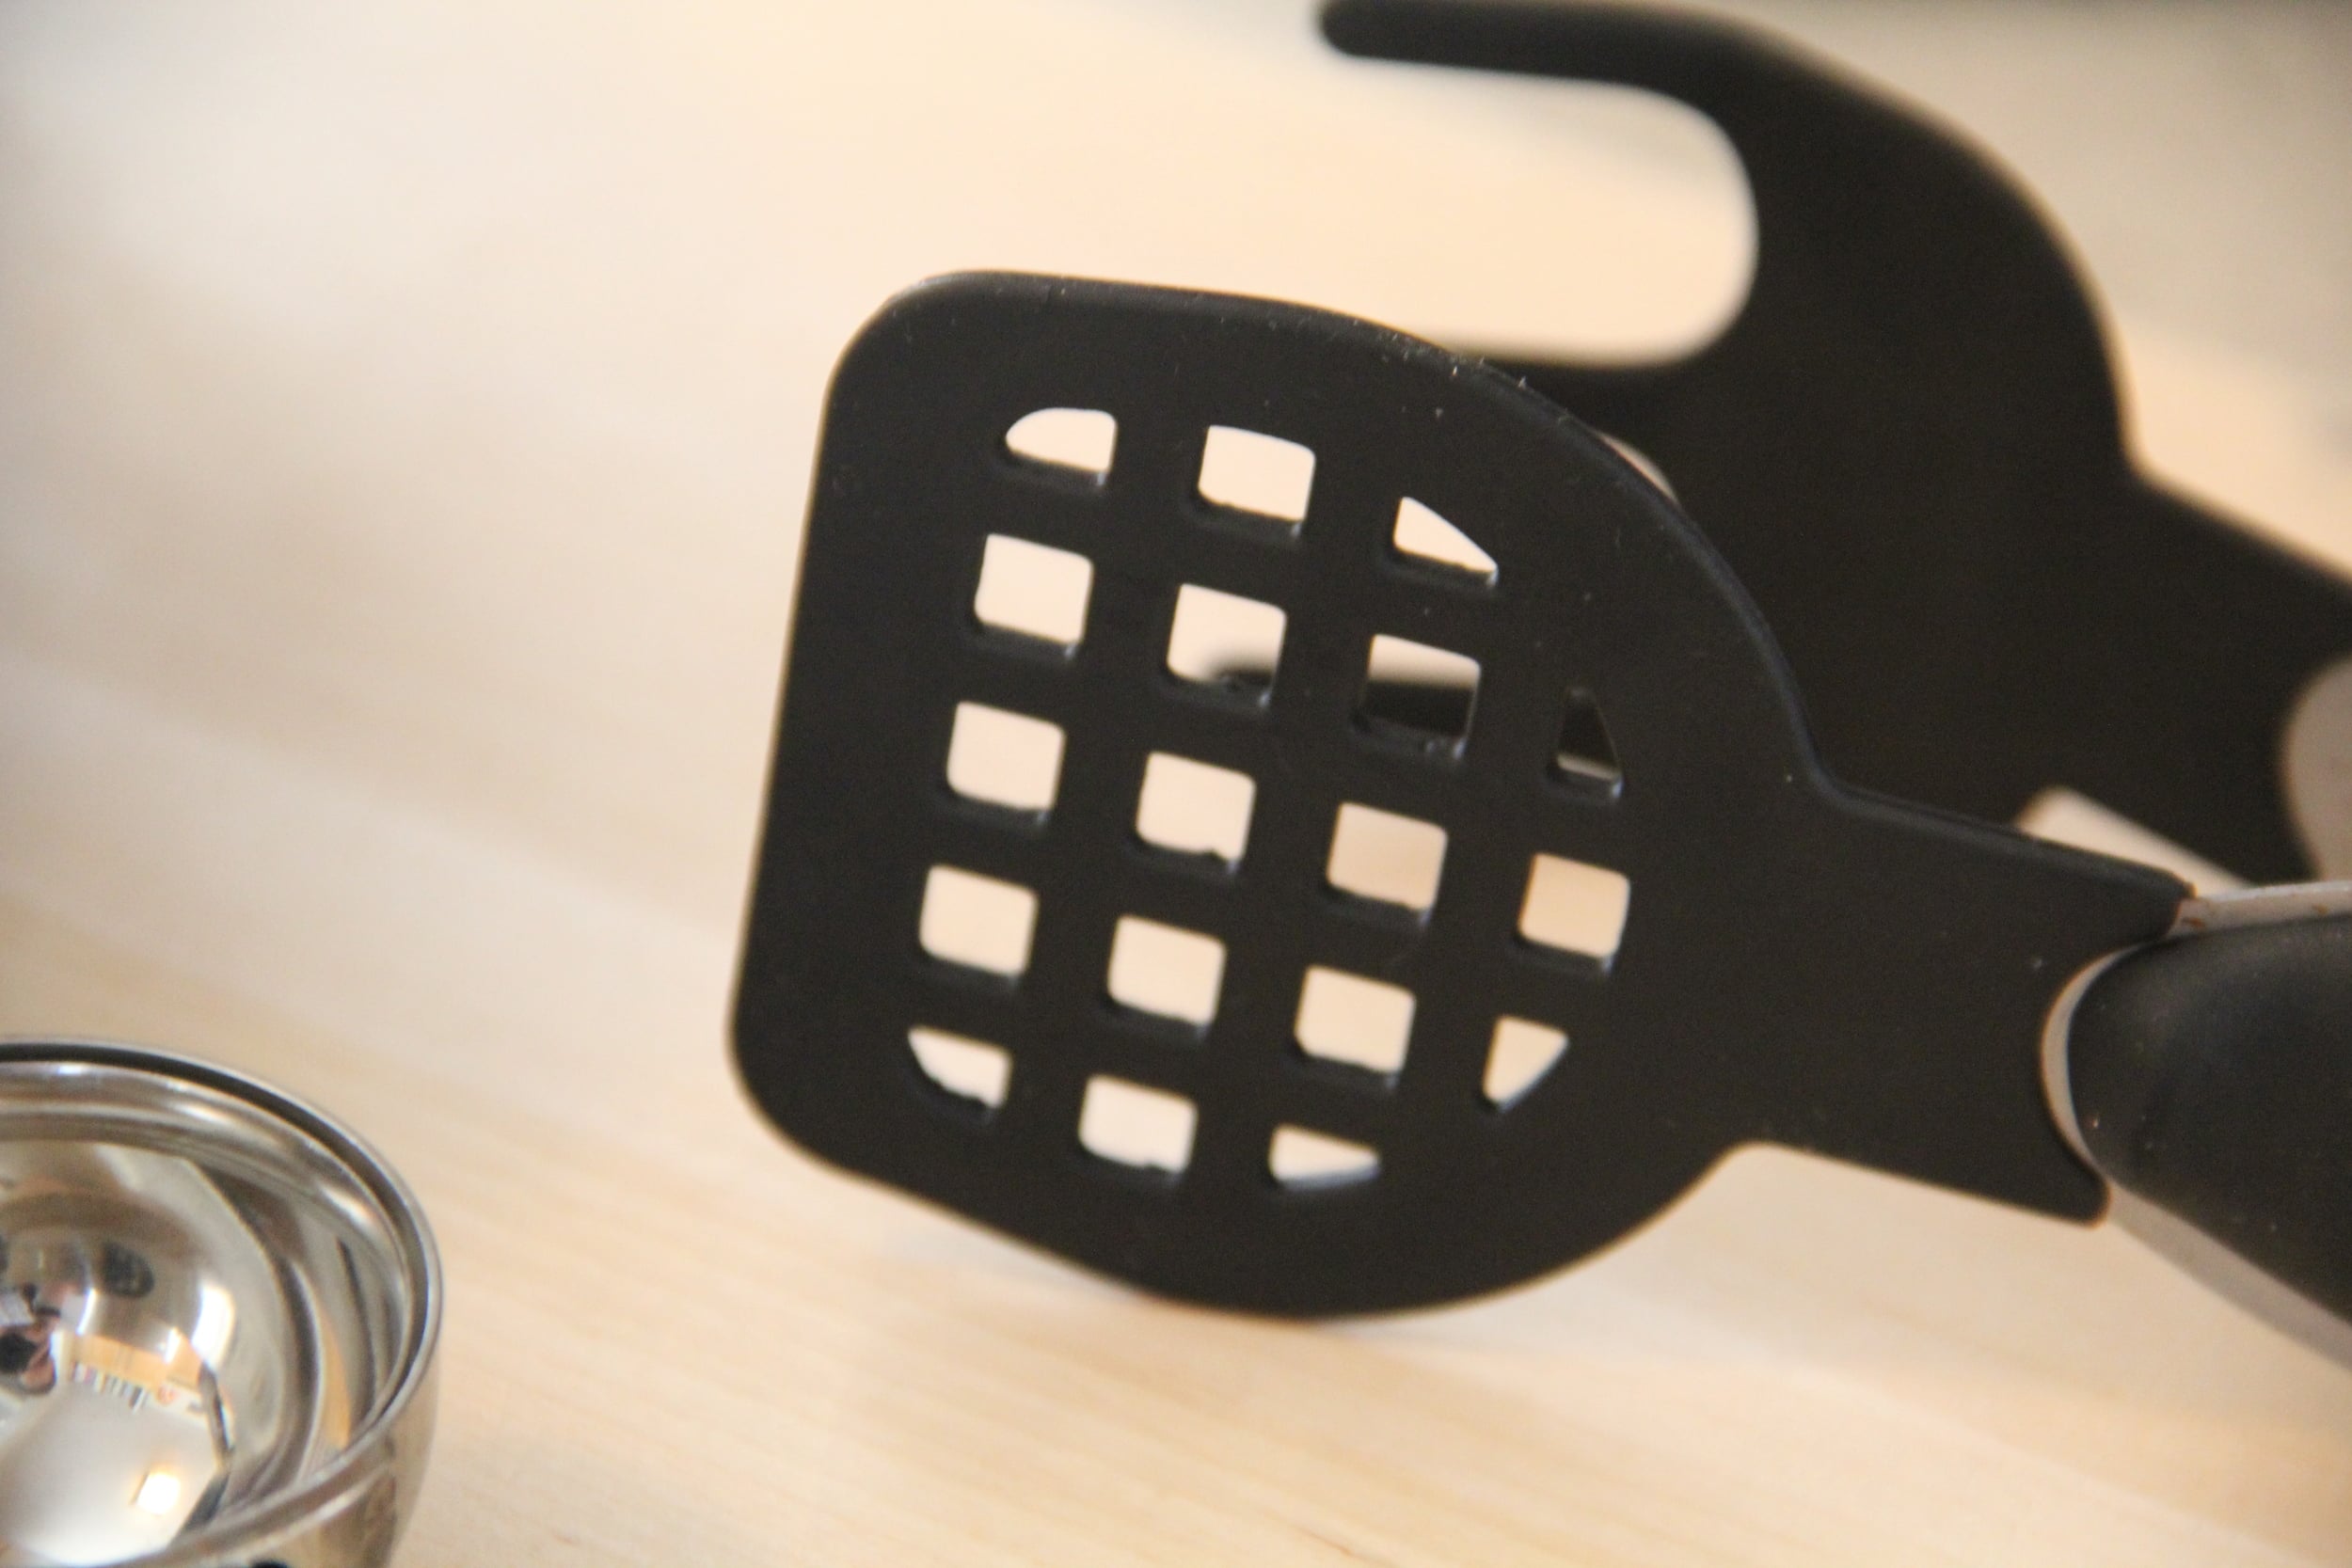
  5. When the cookies are done, carefully remove each cookie from the waffle iron (*I use a small fork, but am extra careful to not scratch the waffle iron surface) and transfer to a cooling rack
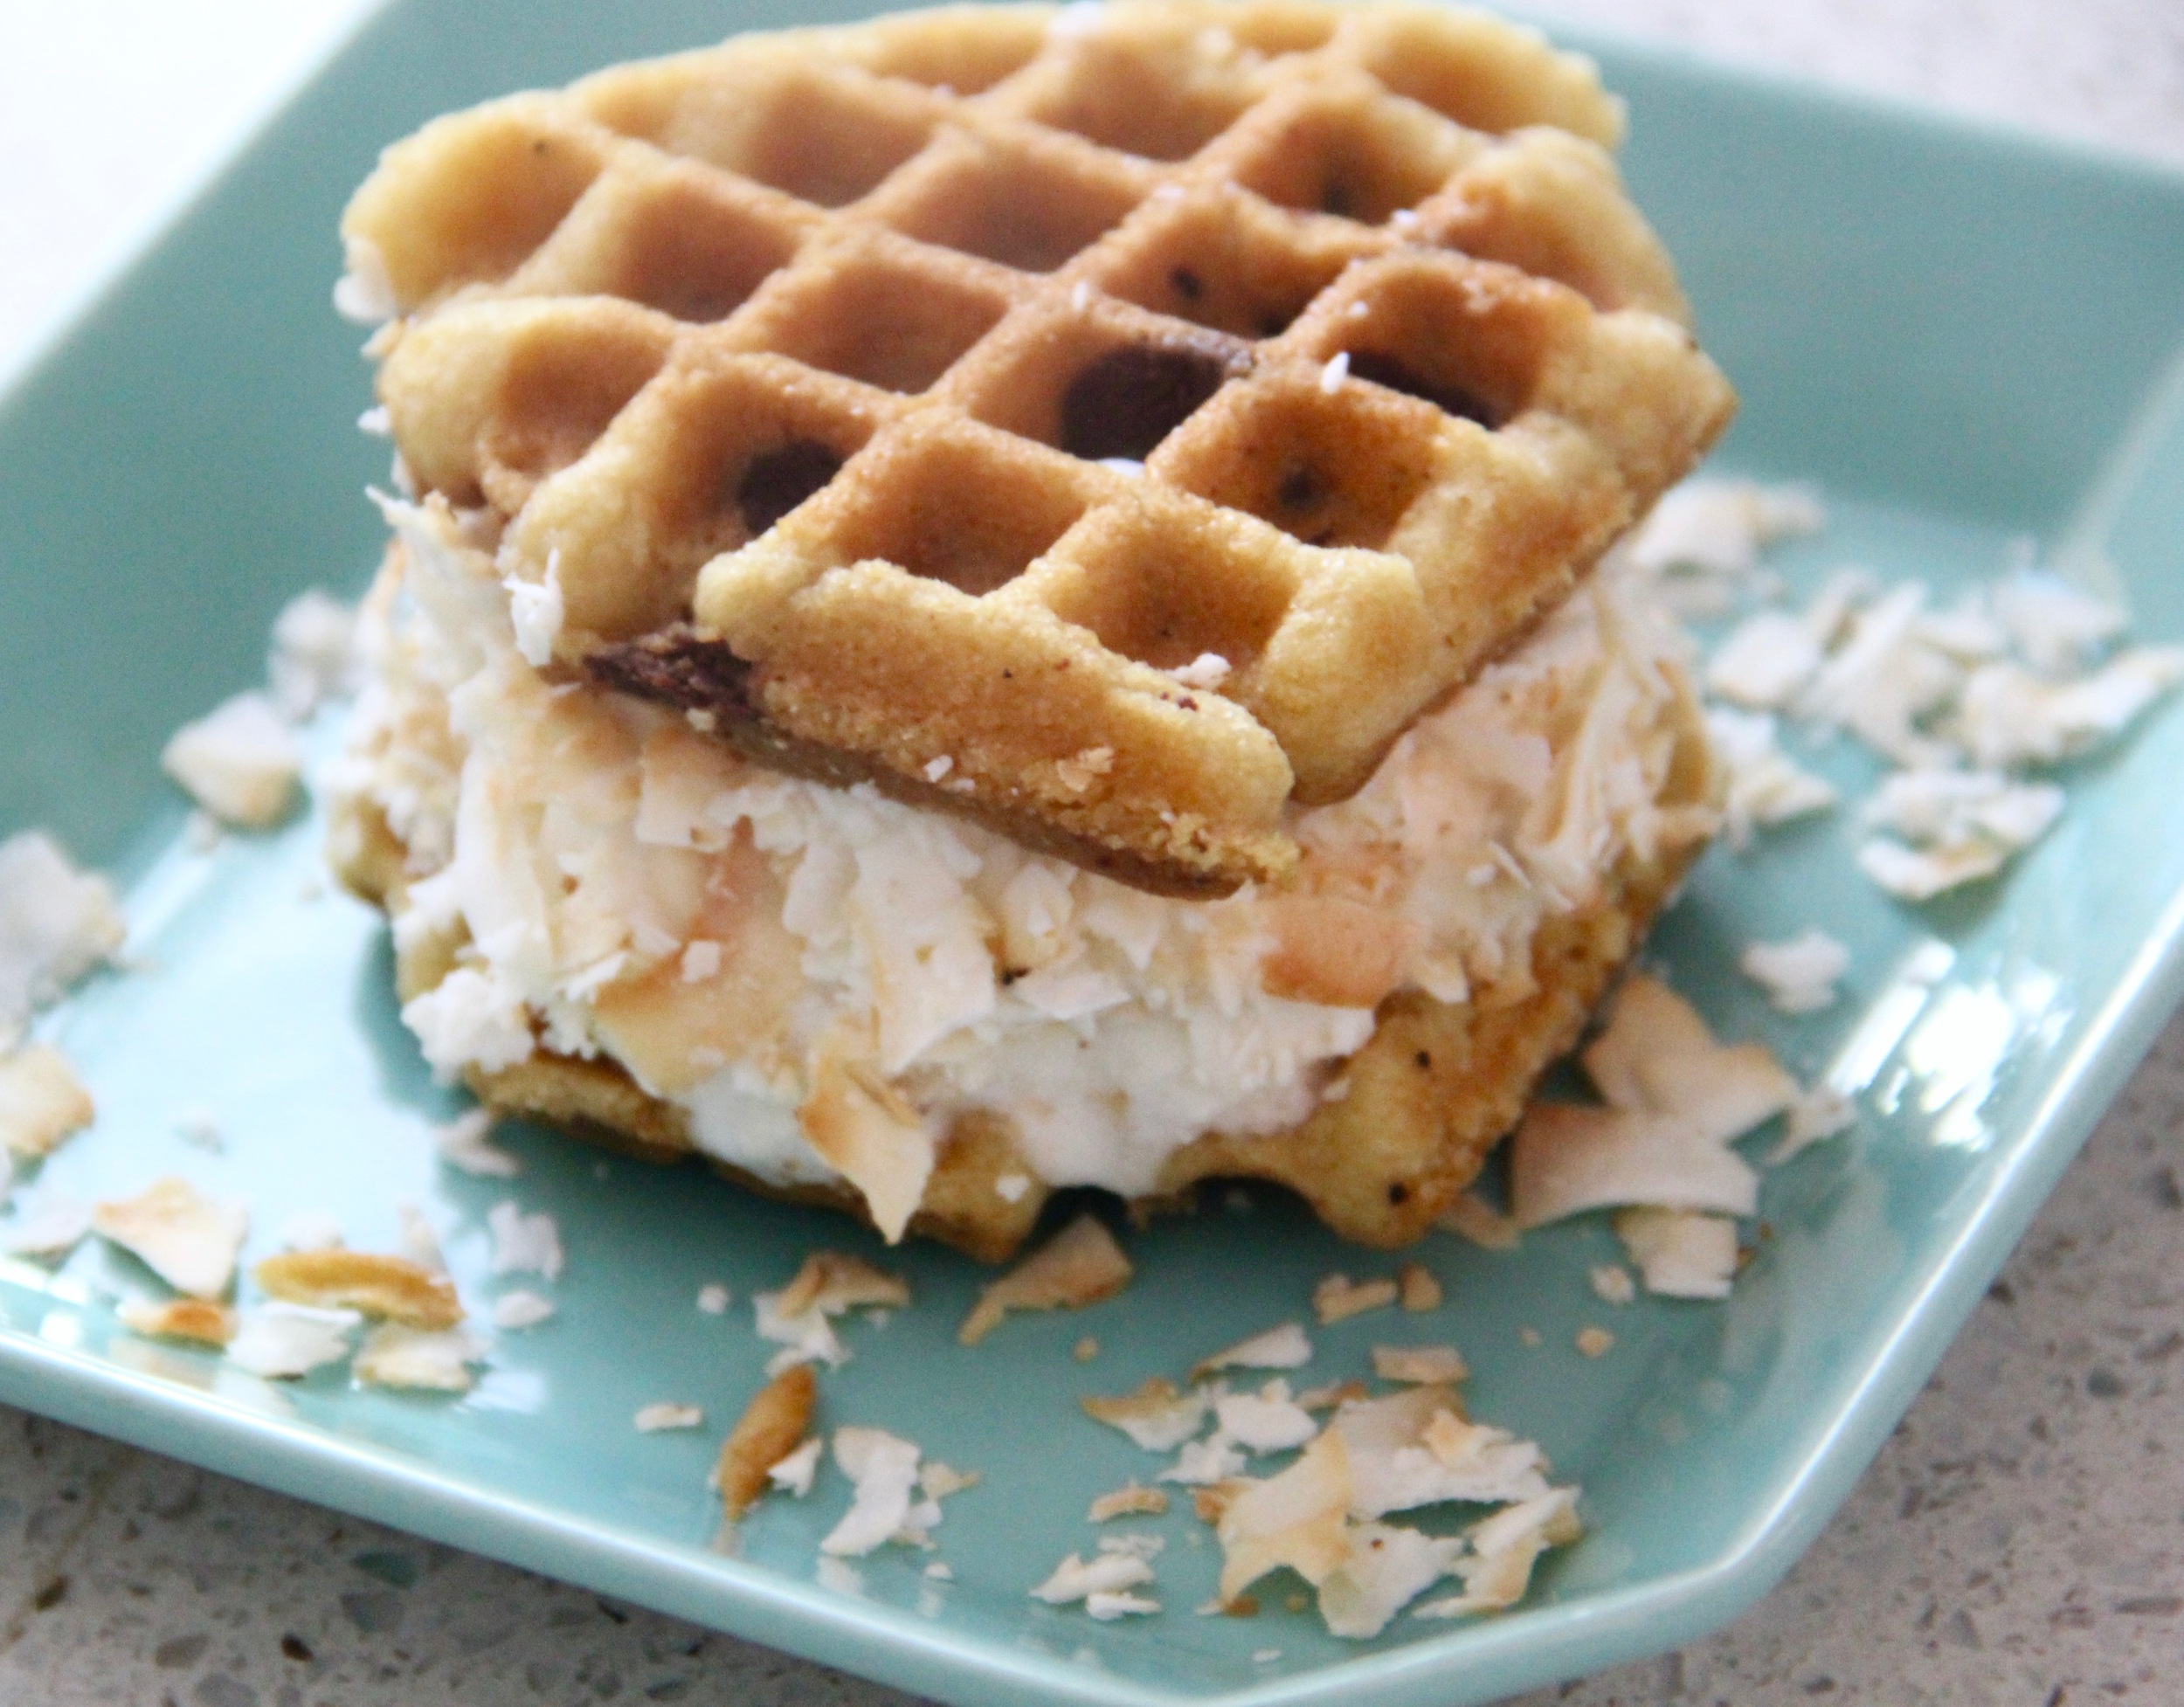
  6. Once cookies are cooled completely, add a scoop of coconut sorbet or gelato and sandwich between a second waffled cookie.
  7. Press the toasted coconut flakes into the exposed sorbet/gelato and then return sandwich to the freezer until you are ready to serve them. 
Ice Cream Sandwich.jpg
In Food and Drink Tags Ice Cream Sandwich, Toasted Coconut, Nestle Toll House, Waffles, All Clad, Sharon's Coconut Sorbet
Comment

January Kitchen Tools

January 13, 2016 Callie Cagney
IMG_5269.JPG

It's the dead of winter and without fail, I find myself craving something warm and delicious for breakfast daily.  While oatmeal is always the healthy breakfast of choice, there are times (especially Saturday mornings) where I can't resist whipping up a batch of delicious homemade waffles to enjoy with my husband while watching TV in our pajamas.  So for today's post (and my list of this month's kitchen tools) I wanted to share my waffle making essentials with you all.  Whether you are making classic, belgian or even Funfetti (pictured above) these tools and tips will help you achieve waffle making perfection.

All Clad Classic Waffle Iron.JPG
IMG_5270.JPG

Waffle Iron

When it comes to selecting a waffle iron, here are a few things to consider: 

  • Shape - Round, Square or Novelty Shaped
  • Style - Belgian or Classic.  Each style of waffle requires a different recipe, and the size of the waffle iron will correlate to the style waffle.  Belgian waffles are thicker and fluffier, so the waffle iron will be larger and often is double the size of a standard iron.  A classic waffle, while still delicious is thinner both in size of the waffle and waffle iron.  
  • Capacity - Waffle irons come in half and whole sizes, so it's important to determine if you are going to be using your waffle iron primarily for single serve use or to feed a family.   
French Toast Waffle 1.JPG
French Toast Waffle 2.JPG

I am all about a classic waffle, so I opted for the All-Clad Classic Round Waffle Maker.  It's user friendly, offers a variety of cooking settings and produces waffles with perfectly browned and crisp exteriors and fluffy soft interiors every time!  This waffle iron is also great for cooking up french toast (pictured above) in a snap with little to no mess!.  

Waffle Tongs.JPG
Waffle Tongs 2.JPG

Waffle Tongs

Waffle tongs are not something you typically think about when you're getting ready to make waffles, but you should.  Reason being, when it comes time to take the waffle off of the iron, people tend to resort to using forks or metal tongs which can and will scratch the nonstick surface of the waffle iron.  Scratches on nonstick metal surfaces will cause your food to stick and ultimately produce an imperfect/damaged product for every use.  These Williams-Sonoma Ultimate Waffle Tongs are great for removing waffles from a waffle iron, cooking paninis and even flipping bacon on a skillet!  Heat resistant, safe to use on most cookware and best of all, dishwasher safe!  In my opinion, every kitchen should be outfitted with a pair of waffle tongs.  

Cookie Scoop.JPG

Cookie Scoop

When it comes to pouring the batter onto the waffle iron, I am all about using my cookie scoop.  Sure, there are plenty of batter dispensing devices on the market (like this one), but in my opinion, they take up a lot of storage space and at the end of the day, really only serves a single purpose.  Using a cookie scoop allows you to create waffles of various sizes and can also be used for pouring cupcake batter and of course the obvious…cookies!!!  The cookie scoop is a fabulous waffle making tool, affordable and of course, its also dishwasher safe!   

Waffles Tara Duggan.jpg

Waffle Book

I received the book, Waffles: Sweet & Savory Recipes for Every Meal by: Tara Duggan, as a gift for our wedding.  I didn't think much of it at first.  It was a nice book about waffles, but I mean how much could they really have to say about one food?  Of course, as soon as I opened the book I immediately ate my words!  This book not only has the most fabulously delicious waffle recipes, but it also teaches you how to go about making waffles from scratch (which has been life changing for me).  For those of you who have never experienced a waffle made from scratch, you are missing out!  They are packed with flavor, moist, fluffy and will put any box mix to shame.  If you have a chance to flip through this book, please do!  It has been a waffle making game changer for me and I think if you have the chance to read it, you will agree!

IMG_5303.JPG
All Clad Stel Waffle Iron and Waffle Tongs.JPG
In Food and Drink Tags Waffles, Williams Sonoma, All Clad, Funfetti, Tongs, Cookie Scoop, Tara Duggan
Comment

November Kitchen Tools

November 6, 2015 Callie Cagney
IMG_2402.JPG

It's hard to believe that Thanksgiving is only a few short weeks away!  Honestly where the heck did October go?  And for that matter, I feel like September flew right by me as well!  Anyway, it is officially time to start immersing in preparations for the holiday season (or as I like to call it, "The Entertaining Olympics!").  

The November kitchen tools featured today are 3 important essentials for anyone hosting Thanksgiving dinner.  While I know that there are plenty of other kitchen tools that are essential for cooking Thanksgiving dinner, these three tools are a great starting point.  **Not to worry!  Throughout the month I will be walking you through my entire preparation process for hosting my own Thanksgiving dinner this year.  Menu planning, food shopping, tablescaping and more, will all be featured on the blog over the coming weeks.  So without further adieu, let's get going on "Operation Thanksgiving Prep!"

Roasting Pan

IMG_2395.JPG
IMG_7480.JPG

Your roasting pan is the vessel that will be responsible for supporting your main Thanksgiving attraction (the turkey) while it cooks, so having a good quality roasting pan with roasting rack is vital!  My roasting pan is the Large Stainless Steel Roaster with Rack from All Clad, and I would highly recommend it. This pan affords you the latitude to cook a vast array of meat/poultry types, from a weeknight roast chicken to a large Thanksgiving turkey.  I love to layer the base of my roasting pan with an assortment of herbs, a delicious mirepoix and even on occasion some potato wedges (aka the ultimate one-pot dish!).  The roasting rack allows the bird to sit above base of herbs and veggies while cooking, which prevents it from getting soggy but allows for the bird to soak up all of the flavors that are rising from below during the cooking process.  This roaster is a common piece of cookware, but oh how it makes such a difference when cooking up a delicious Thanksgiving turkey!

Potato Ricer

IMG_2391.JPG
IMG_2393.JPG
IMG_2394.JPG

Turkey might be the main attraction, but Thanksgiving just isn't the same without mashed potatoes.  I am a huge fan of ricing my potatoes in order to achieve maximum fluffiness when making mashed potatoes.  I absolutely love using my OXO 3-in-1 Adjustable Potato Ricer.  You can adjust there perforation settings on this ricer and all of the pieces come off for easy cleaning.  As if those weren't reasons enough for loving this potato ricer, Cook's Illustrated just awarded the OXO Potato Ricer Runner-up in this year's issue of Cook's All-Time Best Thanksgiving Recipes!  Yes, I totally feel validated with my potato ricer selection.  But in all honesty, it really is a great ricer and an essential tool for cooking Thanksgiving dinner.

Cooking Twine

IMG_9770.JPG
IMG_9785.JPG

Cooking twine is a Thanksgiving prep must have.  Not only do you need to truss your bird before placing it in the oven in order to ensure it cooks evenly, but you also need cooking twine to make your bouquet garni (see this previous post)!  An inexpensive item that is essentially for achieving that perfectly cooked turkey on Thanksgiving. 

IMG_2382.JPG
IMG_2386.JPG
In Food and Drink Tags Thanksgiving, All Clad, Turkey, Twine, Williams-Sonoma, Roasting Pan, OXO Potato Ricer
Comment

Cooking Meat

August 24, 2015 Callie Cagney
Salmon with Mango Salsa.JPG

Over the past few months my husband has been getting more interested in cooking (Yay!).  I think that this is probably in part the result of taking an array of cooking classes for a few date nights over the past couple of months and also because he has wanted to take a larger role in contributing to our Sunday sit down dinners at home.  

Last week while he was in the kitchen cooking up a pork chop and yelling to me across the house to confirm the various cooking steps, it occurred to me that it might be helpful to write a post on my basic tips for cooking meats (chicken, beef, pork and fish).  Today I have compiled a list of what I believe are the essential tips to keep in mind when cooking a protein.  

Roasted Chicken.JPG

Room Temperature

This tip is geared towards chicken, pork and beef.  Before cooking anyone of these proteins, I suggest letting the meat sit outside of the refrigerator for at least an hour.  The reason being, throwing ice cold meat on the grill or into a hot pan will cause it to cook unevenly due to varying temperatures throughout the meat.  For a consistent/even cook throughout the meat, it is important to let your meat come up to just about room temperature.

Season Before Cooking

There are different schools of thought on this tip.  Personally I find that seasoning my pork and beef with salt and pepper 10 minutes before cooking creates a more tender and flavorful end product.  For chicken, the ideal is to season it at least 24 hours prior to cooking, using a technique known as brining.  While this technique is certainly fantastic, it's not something I typically have time to do, so generously salting and peppering poultry prior to cooking works well too.  Taking the time to properly season your meats before cooking will definitely yield a noticable difference.  

Pork Tenderloin.JPG

Thermometer

When I was first learning to cook meats, I would often slice into it the meat while it was cooking to check for doneness…I cringe every time I think about this rookie mistake I used to make for a few reasons.  First, when you hack into meat while it's cooking, all of the juices escape leaving your meat dry.  Second, serving meat that has been hacked up is not very appetizing.  Finally, why the heck didn't I have a meat thermometer!?! Meat thermometers are extremely accurate and will give you a perfectly cooked protein every time.  I am a huge fan of my All Clad Digital Thermometer, because I find that the digital read is more accurate than the dial.  In addition to my meat thermometer, I have my Joy of Cooking Cookbook permanently bookmarked on the USDA Recommended Cooking Temperatures Page, which is so helpful and something I would recommend having readily available in your own kitchen.  Thanks to the thermometer and Joy of Cooking USDA Meat Guide, I have perfectly cooked meat every time that doesn't look like it was Freddie Kruger's latest victim.  

IMG_7033.JPG

Searing and Finishing

When I am cooking a pork or beef protein, I use the following method to ensure the flavors and juices are locked in and the meat is cooked evenly throughout.  Here is a breakdown of my go-to method:

Salmon Searing.JPG
Searing Pork.JPG
  1. Pre-heat oven to 450 degrees fahrenheit
  2. Heat oven safe pan on medium-high heat
  3. When pan is hot and oil is flaccid, add season protein and let it sear/brown until the side that is in direct contact wih the pan naturally releases from the pan
  4. When it naturally releases, flip to the next side and repeat browning until all sides are seared
  5. While still in the pan, place browned meat directly into the oven to finish cooking, checking intermittently with the meat thermometer.  
  6. When the meat has reached the desired internal temperature (even a degree or two below), remove from oven and lightly cover with foil to allow the meat to rest for approximately 10 minutes.

**Fish works well with the sear, but is more delicate so it will take less time and typically doesn't need to be finished in the oven.   

Which oil to use?

I have found that when cooking a beef or pork, which require a higher heat, canola oil works best (since it has one of the highest smoke points).  For fish, olive oil is great because it requires a lower cooking temperature.  When roasting  a chicken or any type of poultry, I am all about the melted butter because of the flavor.  

Steak.JPG

I really do credit these tips/suggestions/guidelines for all of my meat cooking success.   These are great concepts to remember the next time you are cooking a protein and will really make a difference with flavor and presentation of your finished product.  For any questions not covered in today's post, don't hesitate to e-mail me at redefiningdomestics@gmail.com.  


In Food and Drink Tags Salmon, Pork Tenderloin, Chicken, All Clad, Joy of Cooking, Beef
Comment

Caring for Cookware

June 3, 2015 Callie Cagney
FullSizeRender-7.jpg

When I started my first job after graduate school, one of the first purchases  I made for myself was a decent set of pots and pans.  It was a 10 piece set of stainless steel cookware for $148.99, which was a fantastic deal.  In addition to the price being reasonable, I am so glad I had that first set to practice on (both cooking and cleaning/care) before we invested in a nice set of cookware. While damaging any pan is never the ideal, it's much easier to move on from a less expensive pan than a really nice pan.  

IMG_5213.JPG

When it came time to purchase a nice set of cookware, I will admit that I did spend a slightly excessive amount of time researching the different types of cookware available.  I wanted to find a line of cookware that best complimented my lifestyle and cooking frequency.   High end cookware is not cheap, so whatever I ended up purchasing need to last a lifetime (or close to it).  

Throughout my search process, I learned a lot about the products and even more about what was required to care for each type/line of cookware.  It has been two years since we purchased our cookware, I cook quite often and our cookware still looks like new.  Below I have compiled a list of my best tips and resources for caring for 4 of the most common types of cookware.  Properly caring for cookware requires explanations with a bit more granularity, so this post is a little longer than most but definitely a great resource.  

Stainless Steel 

FullSizeRender-8.jpg
FullSizeRender-7.jpg
IMG_5237.JPG

Stainless Steel is probably the most commonly used type of cookware.  It is durable, easy to use and fairly low maintenance to maintain.  There are many different types of stainless steel cookware to choose from (ex. 3 ply, 5 ply, brushed, copper core, etc).  For all forms of stainless steel, I have found Bar Keepers Friend (BKF) to be the best cleanser and polisher. BKF comes in two forms, liquid and powder.  I prefer the BKF Soft Scrub (liquid version), as it tends to be less abrasive.  BKF not only cleanses and polishes stainless steel, but it is equally as effective on copper!  Since I have the All Clad Copper Core line of pots and pans which is consists of both copper and stainless steel in each piece of cookware,  BKF has been the most effective and efficient cleanser for my cookware.  In addition to using BFK, I have also found All Clad's Product Use & Care Manual to be an invaluable resource.

Cast Iron & Enamel Cookware

In addition to my set of All Clad pans, I also have a few pieces of Le Creuset enamel cast iron cookware.  I love to use my Le Creuset Dutch Oven for making soups and stews, my grill pan does an excellent job with cooking various meats and my braising dish creates the most flavorful and delicious entrees that are always cooked to perfection.  

FullSizeRender-8.jpg
IMG_5252.JPG

When it comes to care for Enamel/Cast Iron Cookware, my favorite cleanser is thanks to a suggestion I had received from my friend Kelly.  I had been battling the stubborn bacon grease brown stain in the bottom of my enamel braising dish for days.  My struggle had randomly come up one day in a conversation with Kelly, who suggested I fill the piece of cookware with hot water, add a 1/4-1/2 scoop of powder OxiClean and let the piece soak for a few hours.  Wouldn't you know, it worked like a charm!  After a few hours of soaking, I dumped the oxiclean water, then washed the piece of Le Creuset with soapy water and a nylon scrub brush, and voila!  The cookware was back to looking pristine!  Since OxiClean is my preferred method for cleaning Le Creuset, I keep a small tub of it underneath my kitchen sink for easy access. (*Note-This is the only type of cookware you should ever allow to soak in water).  

Copper

Who doesn't love the look of copper cookware?  Gorgeous is an adjective that comes to mind when I think of copper cookware.  In addition to being beautiful in appearance, copper is an excellent heat conductor, evenly and quickly distributing heat throughout a pan, which is why chefs love to use copper cookware.  With that said, there are two reasons why copper is not the most common type of cookware used.  The first reason is that because copper is a precious metal, it is the most expensive type cookware on the market today.  The second reason is that copper cookware is extremely high maintenace.  It tarnishes easily and requires polishing constantly.  

FullSizeRender-7.jpg
Wrights Copper Cream.jpg

On my recent trip to San Francisco, I had the opportunity to experience cooking with Mauviel Copper Cookware at my sister's house.  All I can say is that it certainly lives up to it's reputation in every way.  There was one morning when I used the small skillet to make eggs and the pan cooked the eggs beautifully!  After I had let the pan cool I went to clean it and saw that the entire copper side had been tarnished from a single use!  My sister keeps her copper in perfect condition and when I opened her cleaning closet I saw how she achieved copper perfection.  Inside her closet was a stack of Wright's Copper Cream (Wright's also makes a fabulous Silver Cream).  This copper cream is affordable, non-abrasive and very effective.  In addition to Wright's, I have found BKF and even Twinkle to be great copper cleaners.  

Teflon/Non-Stick

If the truth be known, I only have one piece of teflon/nonstick anodized cookware. The reason being, this particular type of cookware can only endure a maximum temperature of 450 degrees fahrenheit (which can be very limiting for someone who cooks frequently).  My biggest tips when caring for Teflon/Nonstick cookware are:

Teflon.jpg
  • Never use metal cooking tools on the surface of Teflon/Nonstick cookware.  Metal cooking utensils will scratch the surface, thus compromising the integrity and effectiveness of the non-stick component.
  • Hand wash with dish soap, water and a nylon brush.  This is a non-stick surface, therefore, you shouldn't require cleansers for advanced stains. Simple soap and water will adequately cleanse your cookware.   

Cookware Do's and Dont's

FullSizeRender-7.jpg
IMG_5170.JPG
  • Do- Your research!  Each type of cookware requires different types/levels of care and maintenance.  If you don't think you are up to the task of polishing your cookware after each use, Copper might not be the best option for you.
  • Do- Handwash your cookware thoroughly after each use.
  • Do- Use either vegetable cellulose sponges, nylon wool or nylon scrub brushes to assist in cleaning your cookware.
  • Do- Use wooden, plastic and silicone cooking utensils when cooking.  If possible, avoid using metal cooking utensils, as they can scratch/damage the surface of your cookware.  
  • Do- Dry your cookware thoroughly after washing to prevent water spots and rusting.
  • Don't- Put your hot pan under running water right after use.  Allow your pan to cool completely before cleaning it to avoid warping the pan. 
  • Don't- Soak your stainless steel cookware in water.  Soaking your pans in water can lead to pitting damage that is permanent.
  • Don't- Put your pan in the dishwasher.  Even if the instructions say "Dishwasher Safe," you are always better off hand washing your cookware to preserve its integrity and increase the longevity.  
  • Don't- use steel wool to clean a stubborn stain out of any pan.  While you may succeed at removing the stain, you will scratch/damage the pan's interior which could affect future cooking.

As I have mentioned in this post, cookware is not an inexpensive purchase so it is important to make sure you select a set that can fit your lifestyle.  If you want a low maintenance set of cookware, I would recommend Cast Iron/Enamel or Teflon.  However, if you don't mind a little extra cleaning, then maybe stainless steel would be the best choice for you.  My goal with this post is to equip you with the knowledge to care for whatever type of cookware you select or may already own.  If you have any questions regarding the information in this post or care tips beyond this post, you can always contact me at redefiningdomestics@gmail.com.  I am always happy to answer any questions you might have regarding all things domestic!

In Decorate Tags All Clad, Copper, Cleaning, Le Creuset, Pots and Pans, Cleaning Products, Mauviel
Comment

Subscribe to the Redefining Domestics Blog:

Thank you!

Categories:

  • Decorate (64)
  • Entertain (71)
  • Food and Drink (103)


Latest Posts by Category:

Featured
IMG_1993.JPG
Entertain
Pinterest Worthy Halloween DIYs
Entertain
Entertain
Featured
IMG_8787.jpg
Decorate
How to Hang a Lighting Fixture
Decorate
Decorate
Featured
IMG_1694.JPG
Food and Drink
A Healthy Recipe for Homemade Granola
Food and Drink
Food and Drink

Instagram 

http://instagram.com/calliecagney

View fullsize We are lucky to have you in our sphere Chris Kalna!❤️ #happyfathersday #girldad #cookiebaking #suttonbutton #lovethem
View fullsize National Puppy Day with my two toddlers❤️ #suttonbutton #jolene #nationalpuppyday #jojosbathtubfomo😂
View fullsize Bibbidi Bobbidi Boo, she’s 2! Happy Birthday Sweet Girl💙 #suttonbutton #halloween #cinderella #happybirthday #shestwo!
View fullsize Fourth of July Vacay is already off to a fun start❤️💙⛱ #fourthofjuly #mountains #thesetwo #ggccsummer2019
View fullsize This little girl turned 1 on Halloween! Sutton, you are pure joy! Happy Birthday sweet girl! #suttonbutton #happybirthday #halloweenbaby #birthdaycake #diy #beaufortbonnet
View fullsize Our first 4th of July as a trio❤️💙 #happyfourth #familyphoto #skr #suttonbutton #vacation #northcarolina
View fullsize First day of vacation with these two loves💙 #thecutest #vacation #july4th #mountains #sKr #suttonbutton #beachingit #waterbaby
View fullsize Happy First Father’s Day to this stud muffin! You bring a lot of joy and sports watching to our lives. The Ladies Kalna are lucky to have you!❤️ #Fathersday2018 #chrissums #sKr #socute #luckyus #moreusopenplease
View fullsize Girlfriends kicking off MDW together💕🐳🛁 #suttonandmadden #mdw #littlebesties #bathtime #toocute
View fullsize Baby’s first Christmas tree 🎄 #deckthehalls #sKr #christmastree #happysunday
View fullsize Baby sKr’s jammie game is on point🙌🏻❤️ #thingstodo #retailtherapy #stillpregnant #petiteplume #potterybarnkids #babyclothes #toocute #babygirl #pajamaparty
View fullsize My husband and I joke about Baby K’s “master suite.” Clearly we’re both struggling with a case of bedroom envy😂 #stillpregnant #babynursery #iviebaby #glitterguide #mypotterybarn #serenaandlily #babygirl #skr #projectnursery

Pinterest

http://www.pinterest.com/calliecagney/

Follow Callie Cagney's board Home Decorating on Pinterest.
Welcome RSS

© 2016 Redefining Domestics. All Rights Reserved.