• Welcome
  • Entertain
  • Decorate
  • Food & Drink
  • About
  • Contact
Menu

Redefining Domestics

Street Address
Washington, DC
Phone Number

Practical applications for turning your house into a home.   

Redefining Domestics

  • Welcome
  • Entertain
  • Decorate
  • Food & Drink
  • About
  • Contact

How to Hang a Lighting Fixture

October 14, 2016 Callie Cagney
IMG_8787.jpg

I go through peaks and valleys when it comes to home improvement projects.  Typically my husband and I budget for one major home project a year, last year we added a new butlers pantry (see this post) and this year we built a wall upstairs to create a defined second bedroom (see below).  

IMG_1571.JPG

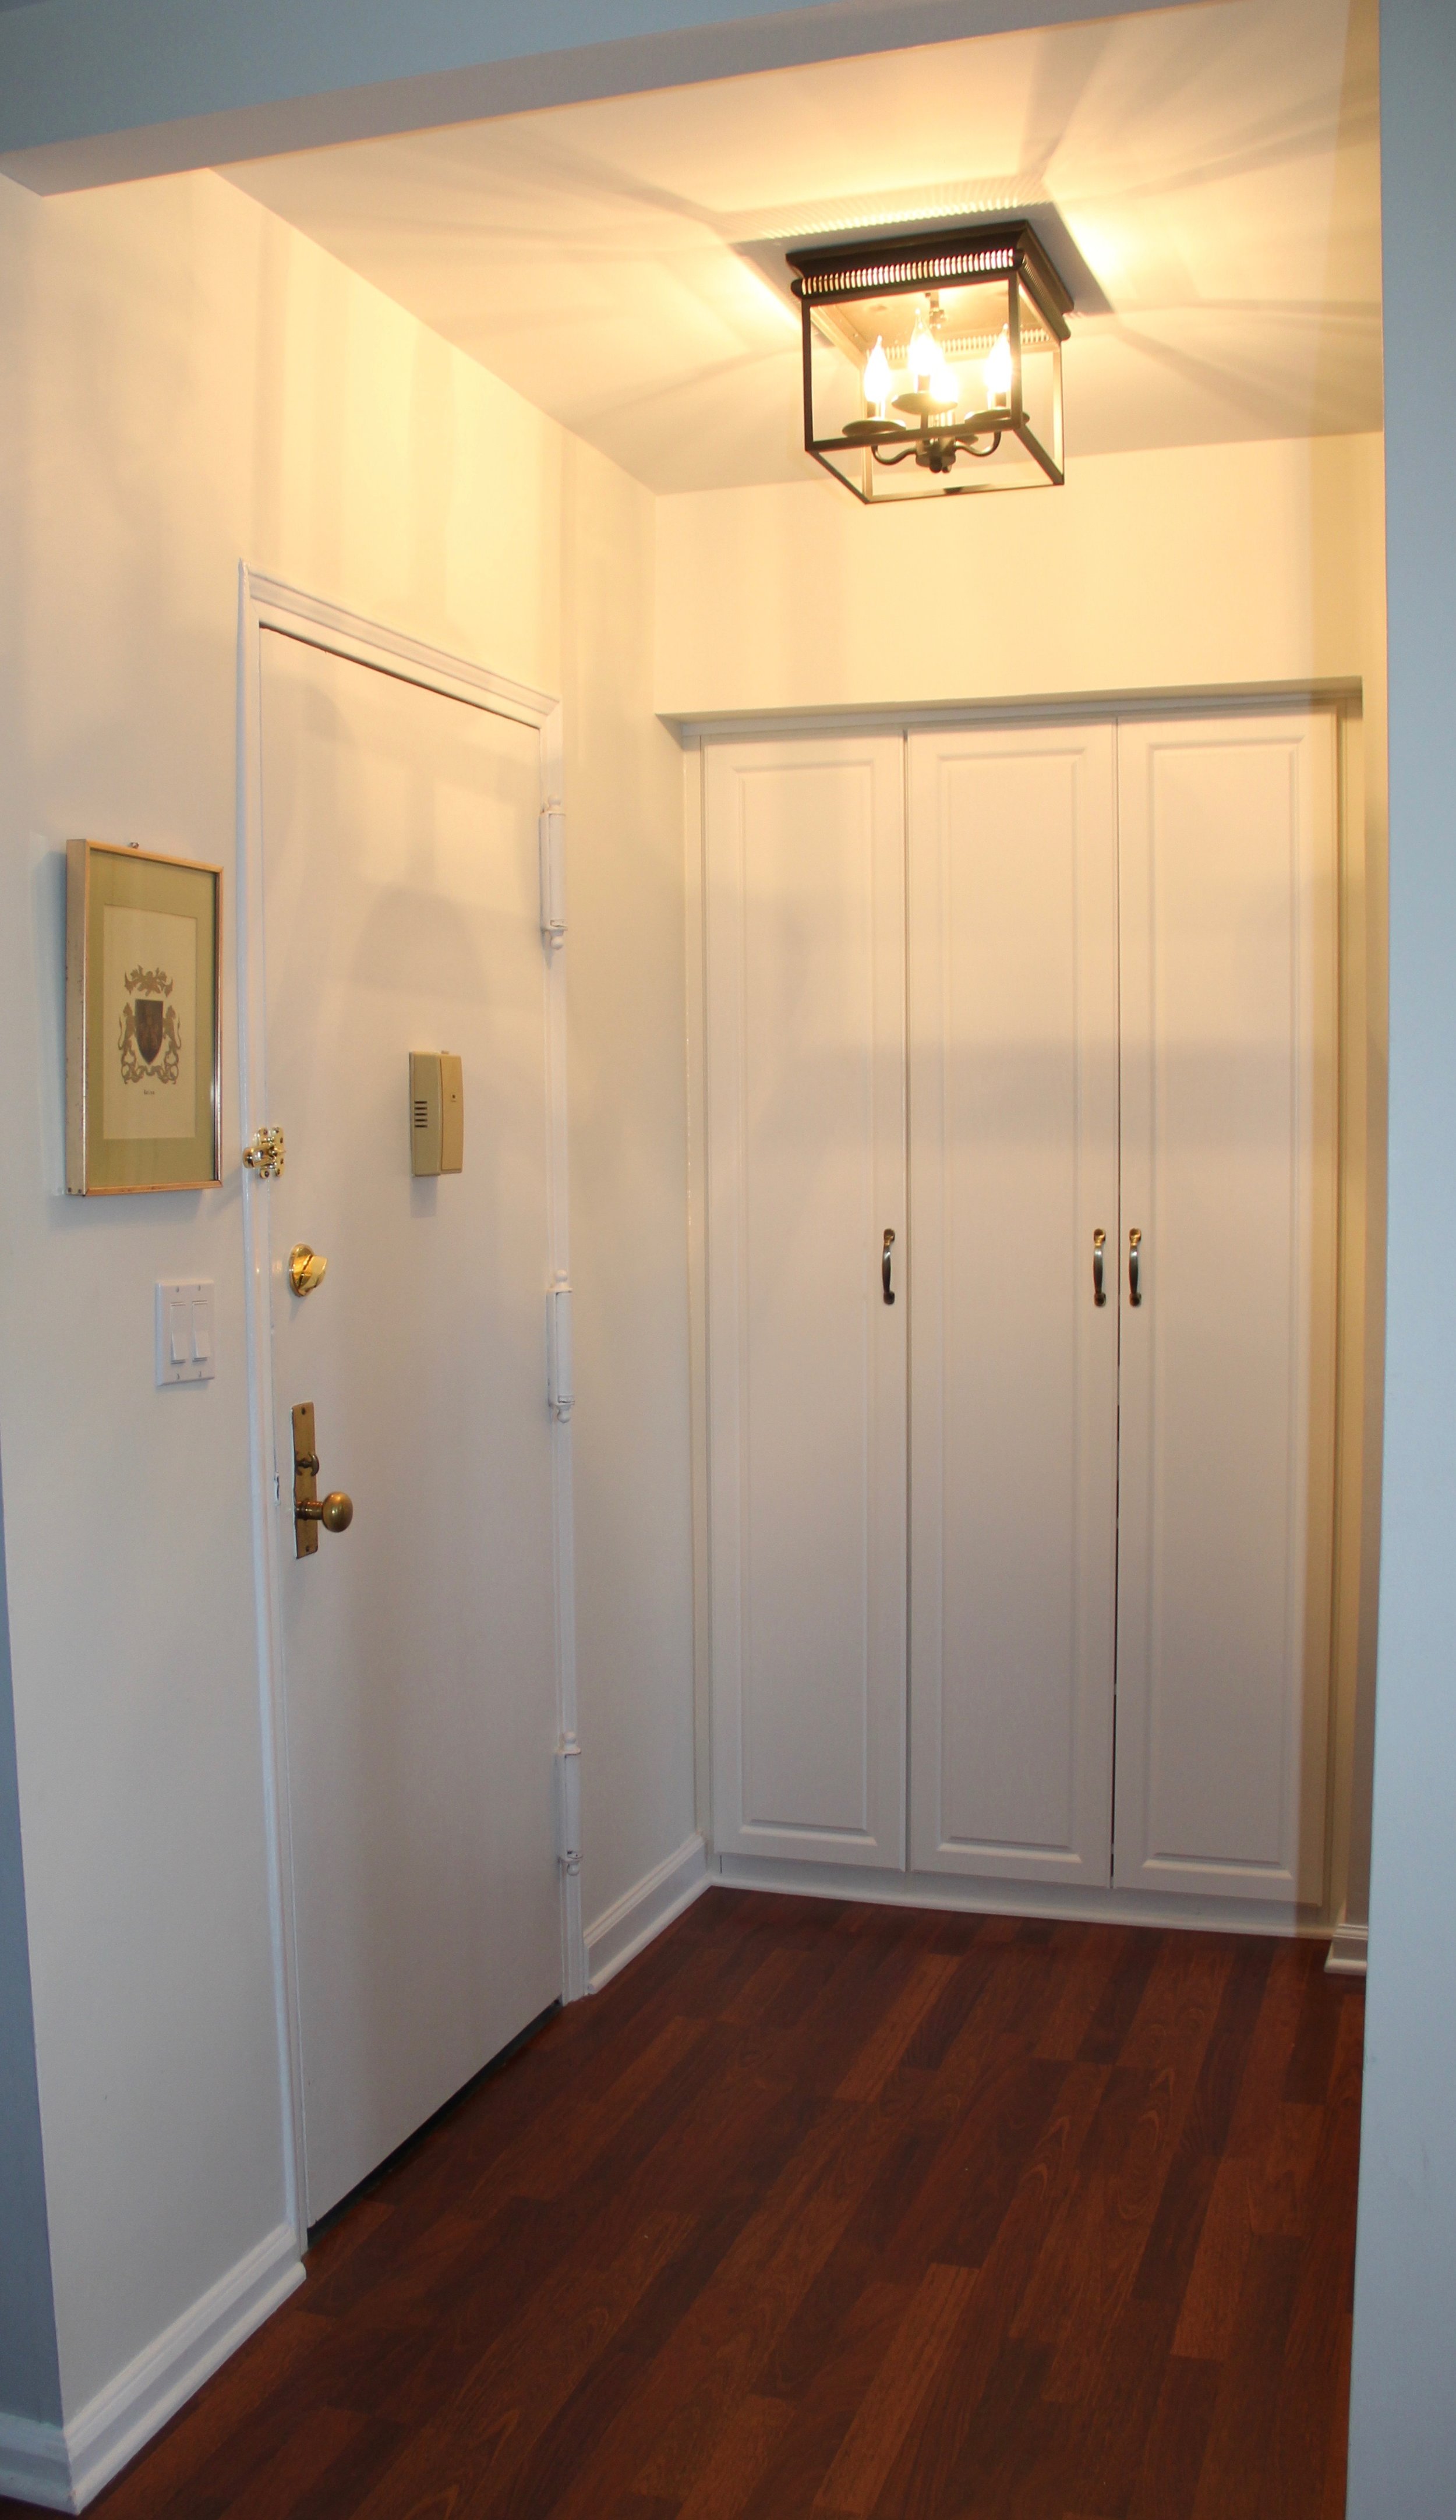
In between big projects I try to focus on little updates that I can do myself, like painting or hanging window treatments, to keep the home improvement momentum going while saving money on outsourcing these simple projects to professionals.  Over the past few months I had finally hit my limit with 3 lighting fixtures in my house that we had inherited from the previous owner.  The closet light in our bedroom and the sconce on our staircase were both bathroom light fixtures that had been repurposed for spaces other than the bathroom, and the fixture over the front door to our house was actually a garage light that emitted a florescent purple/white color when illuminated.  

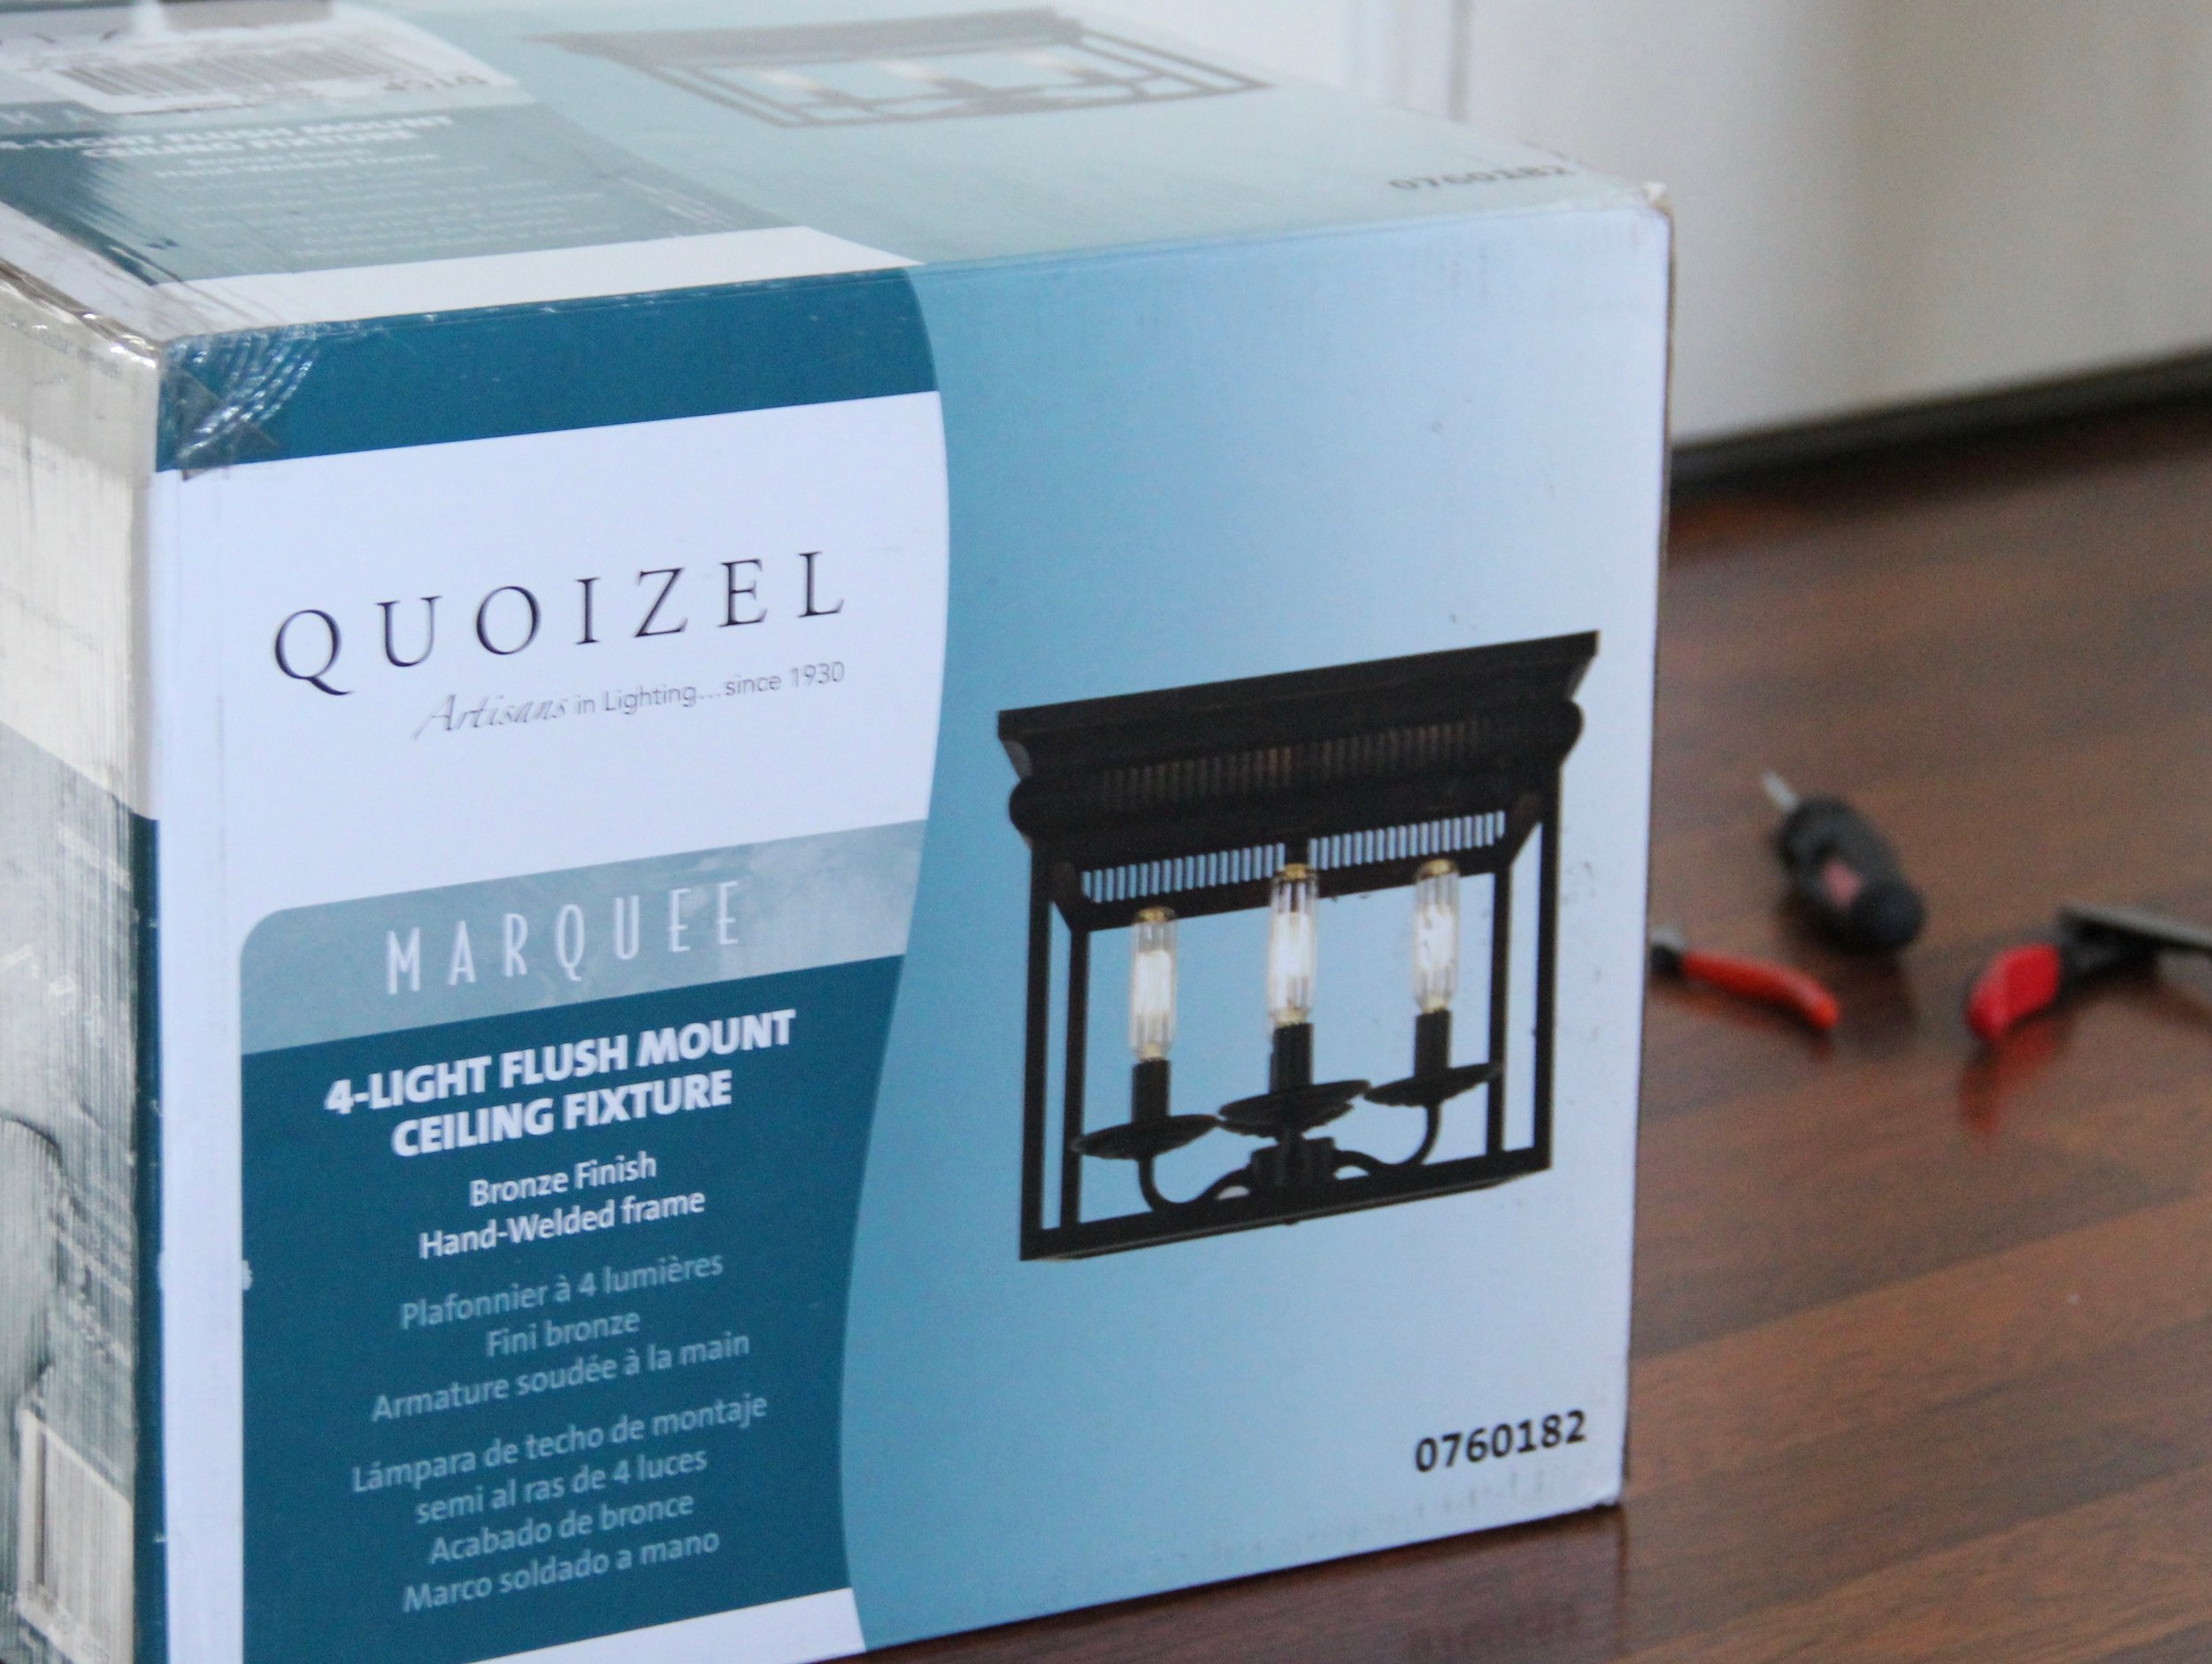
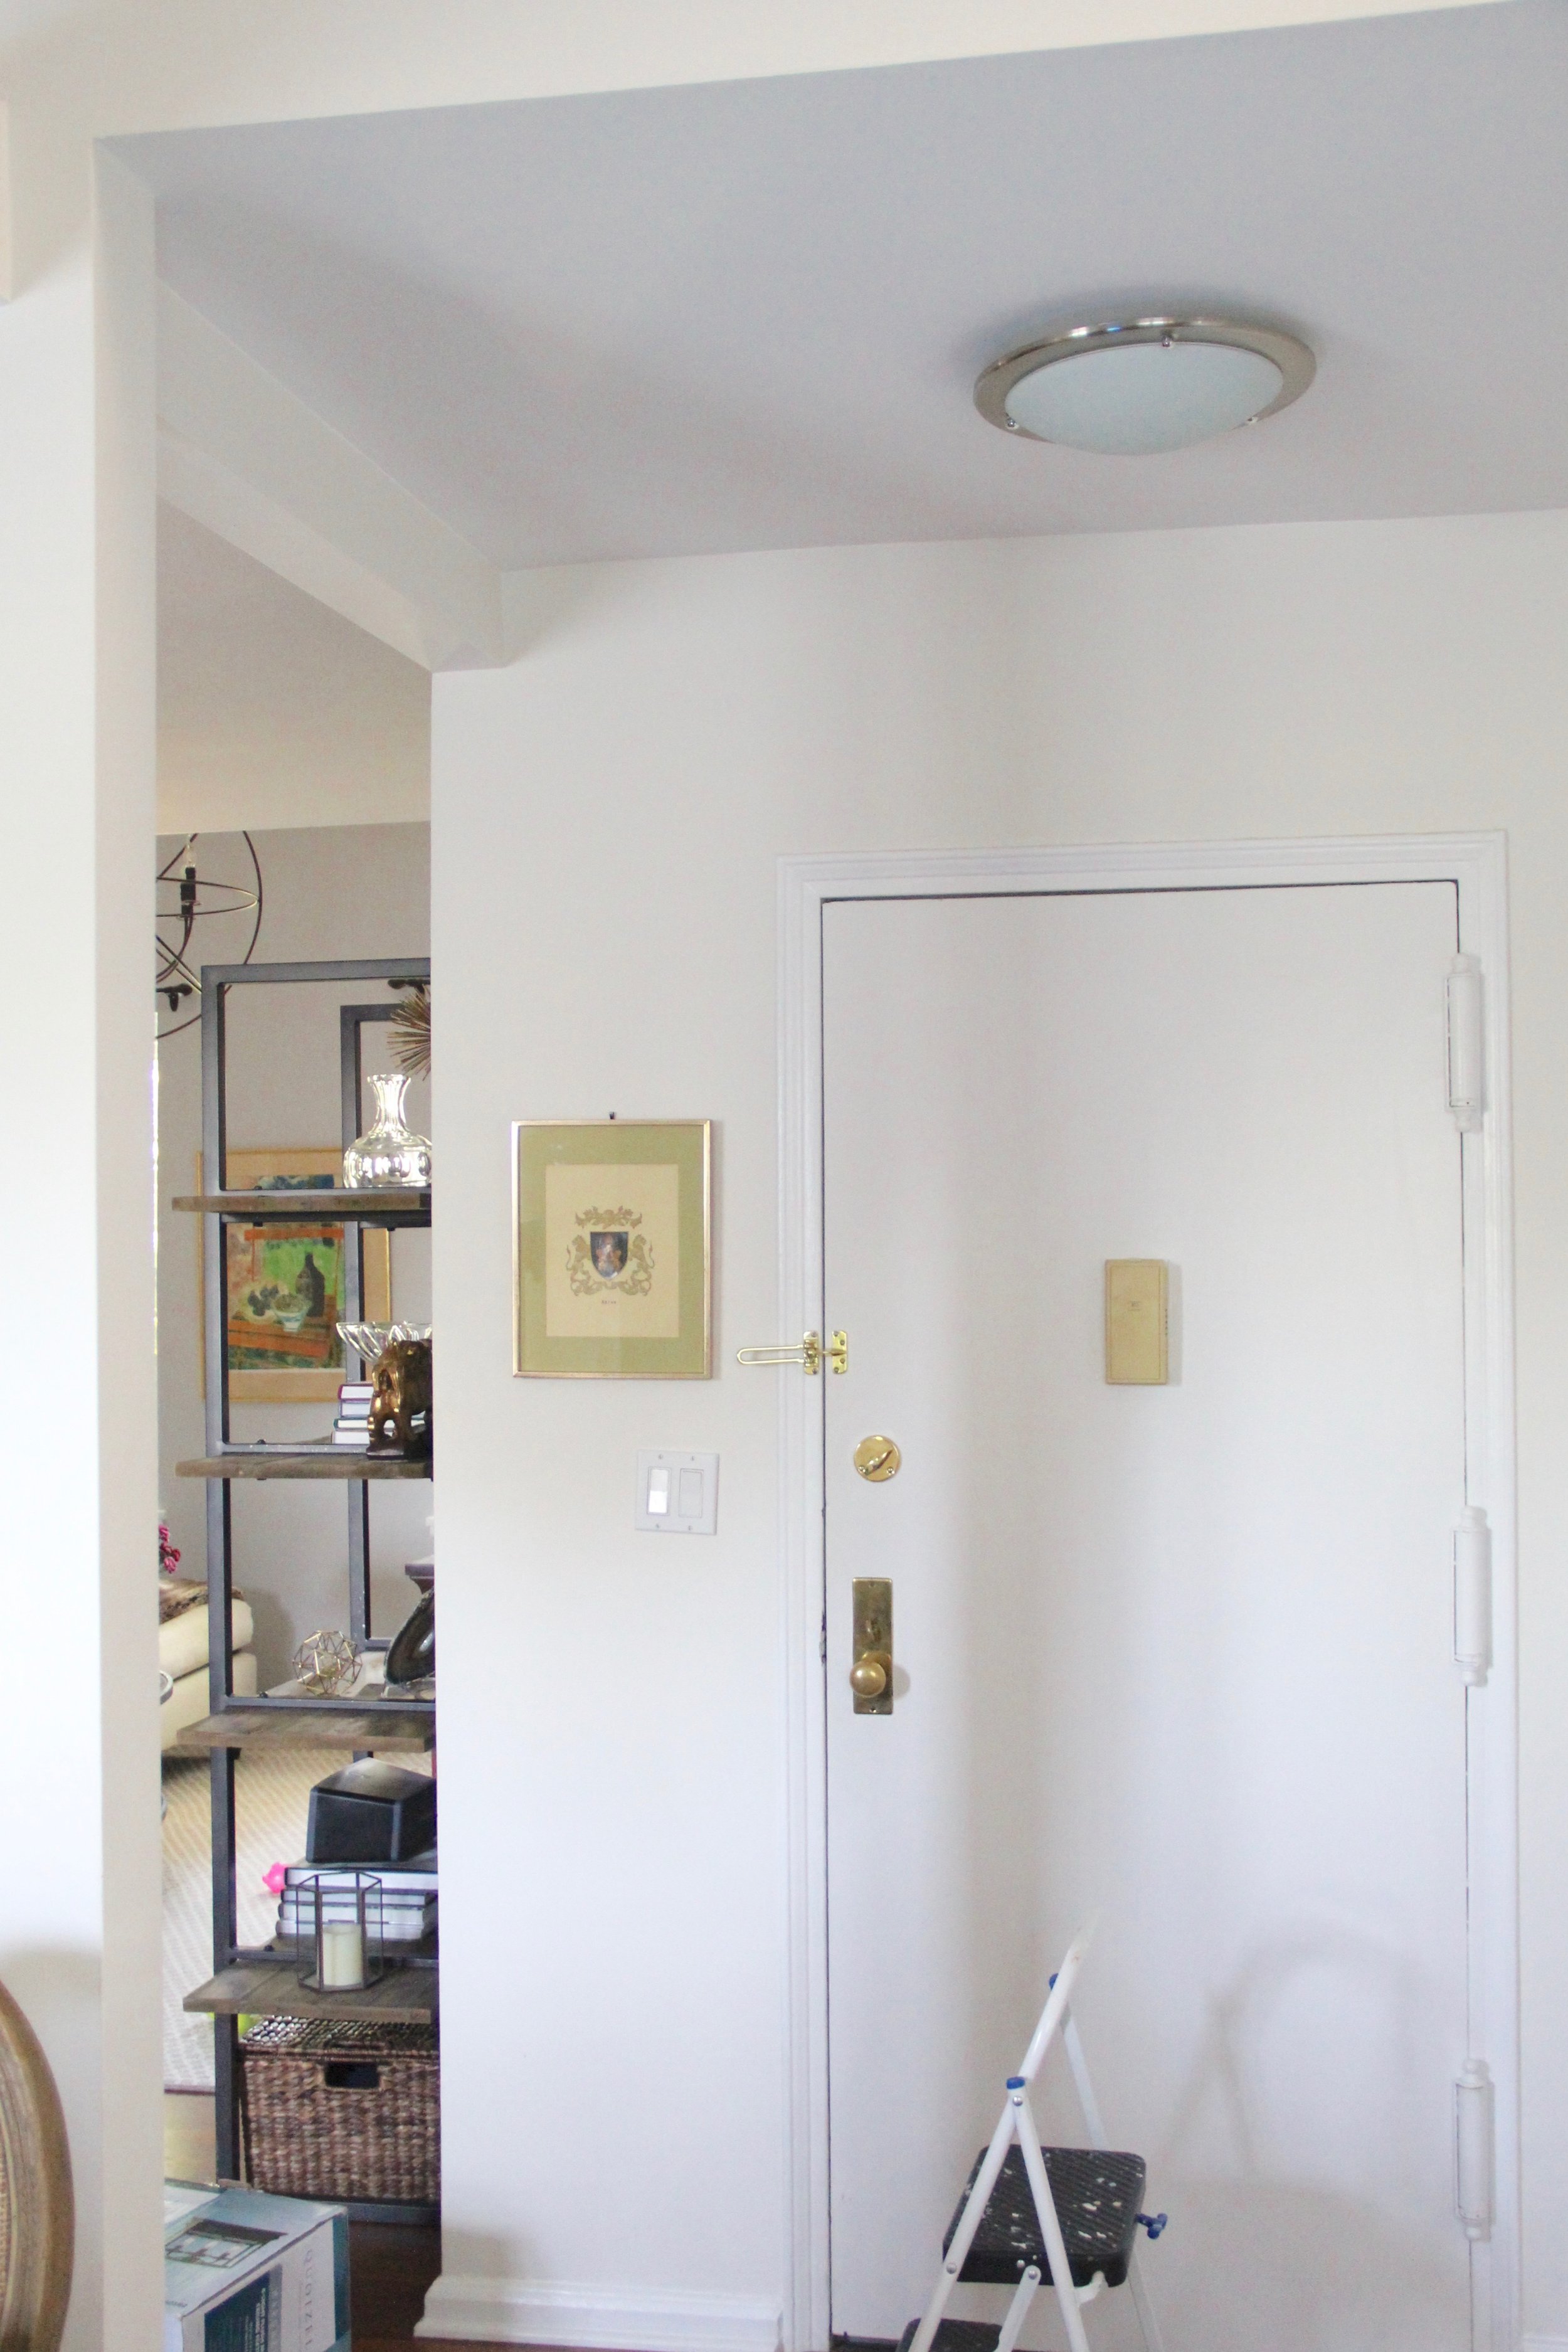
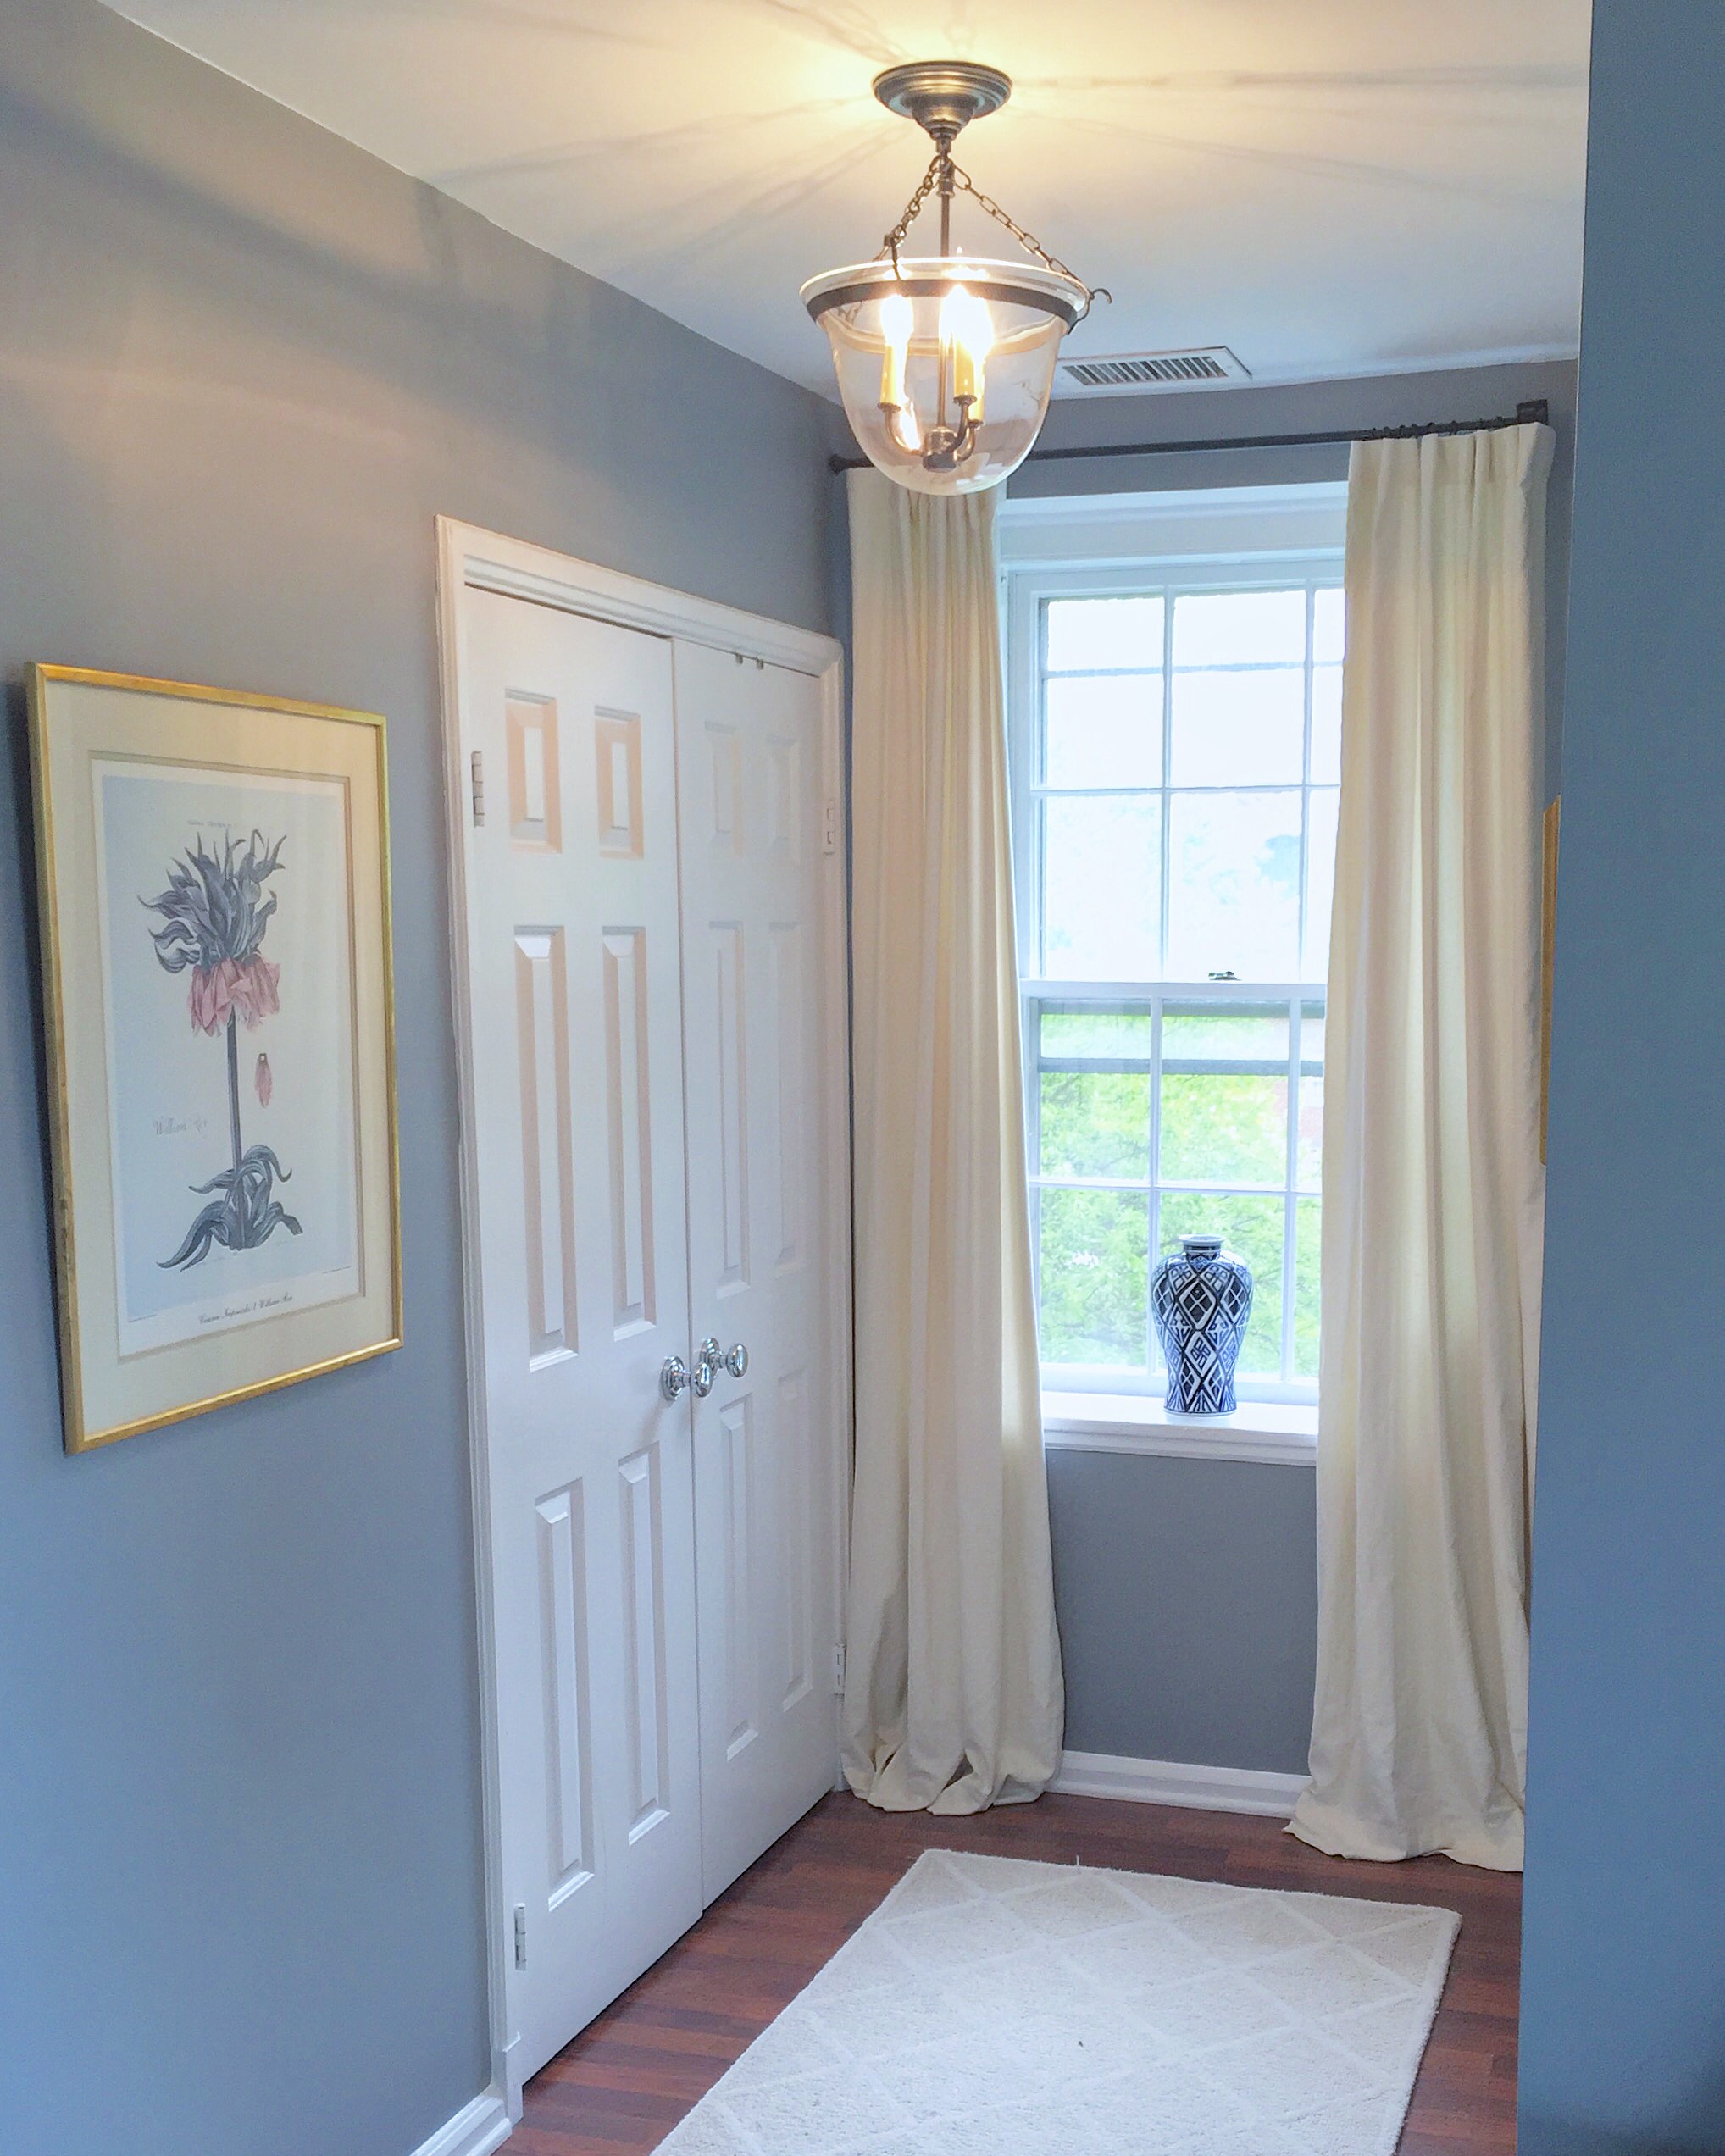
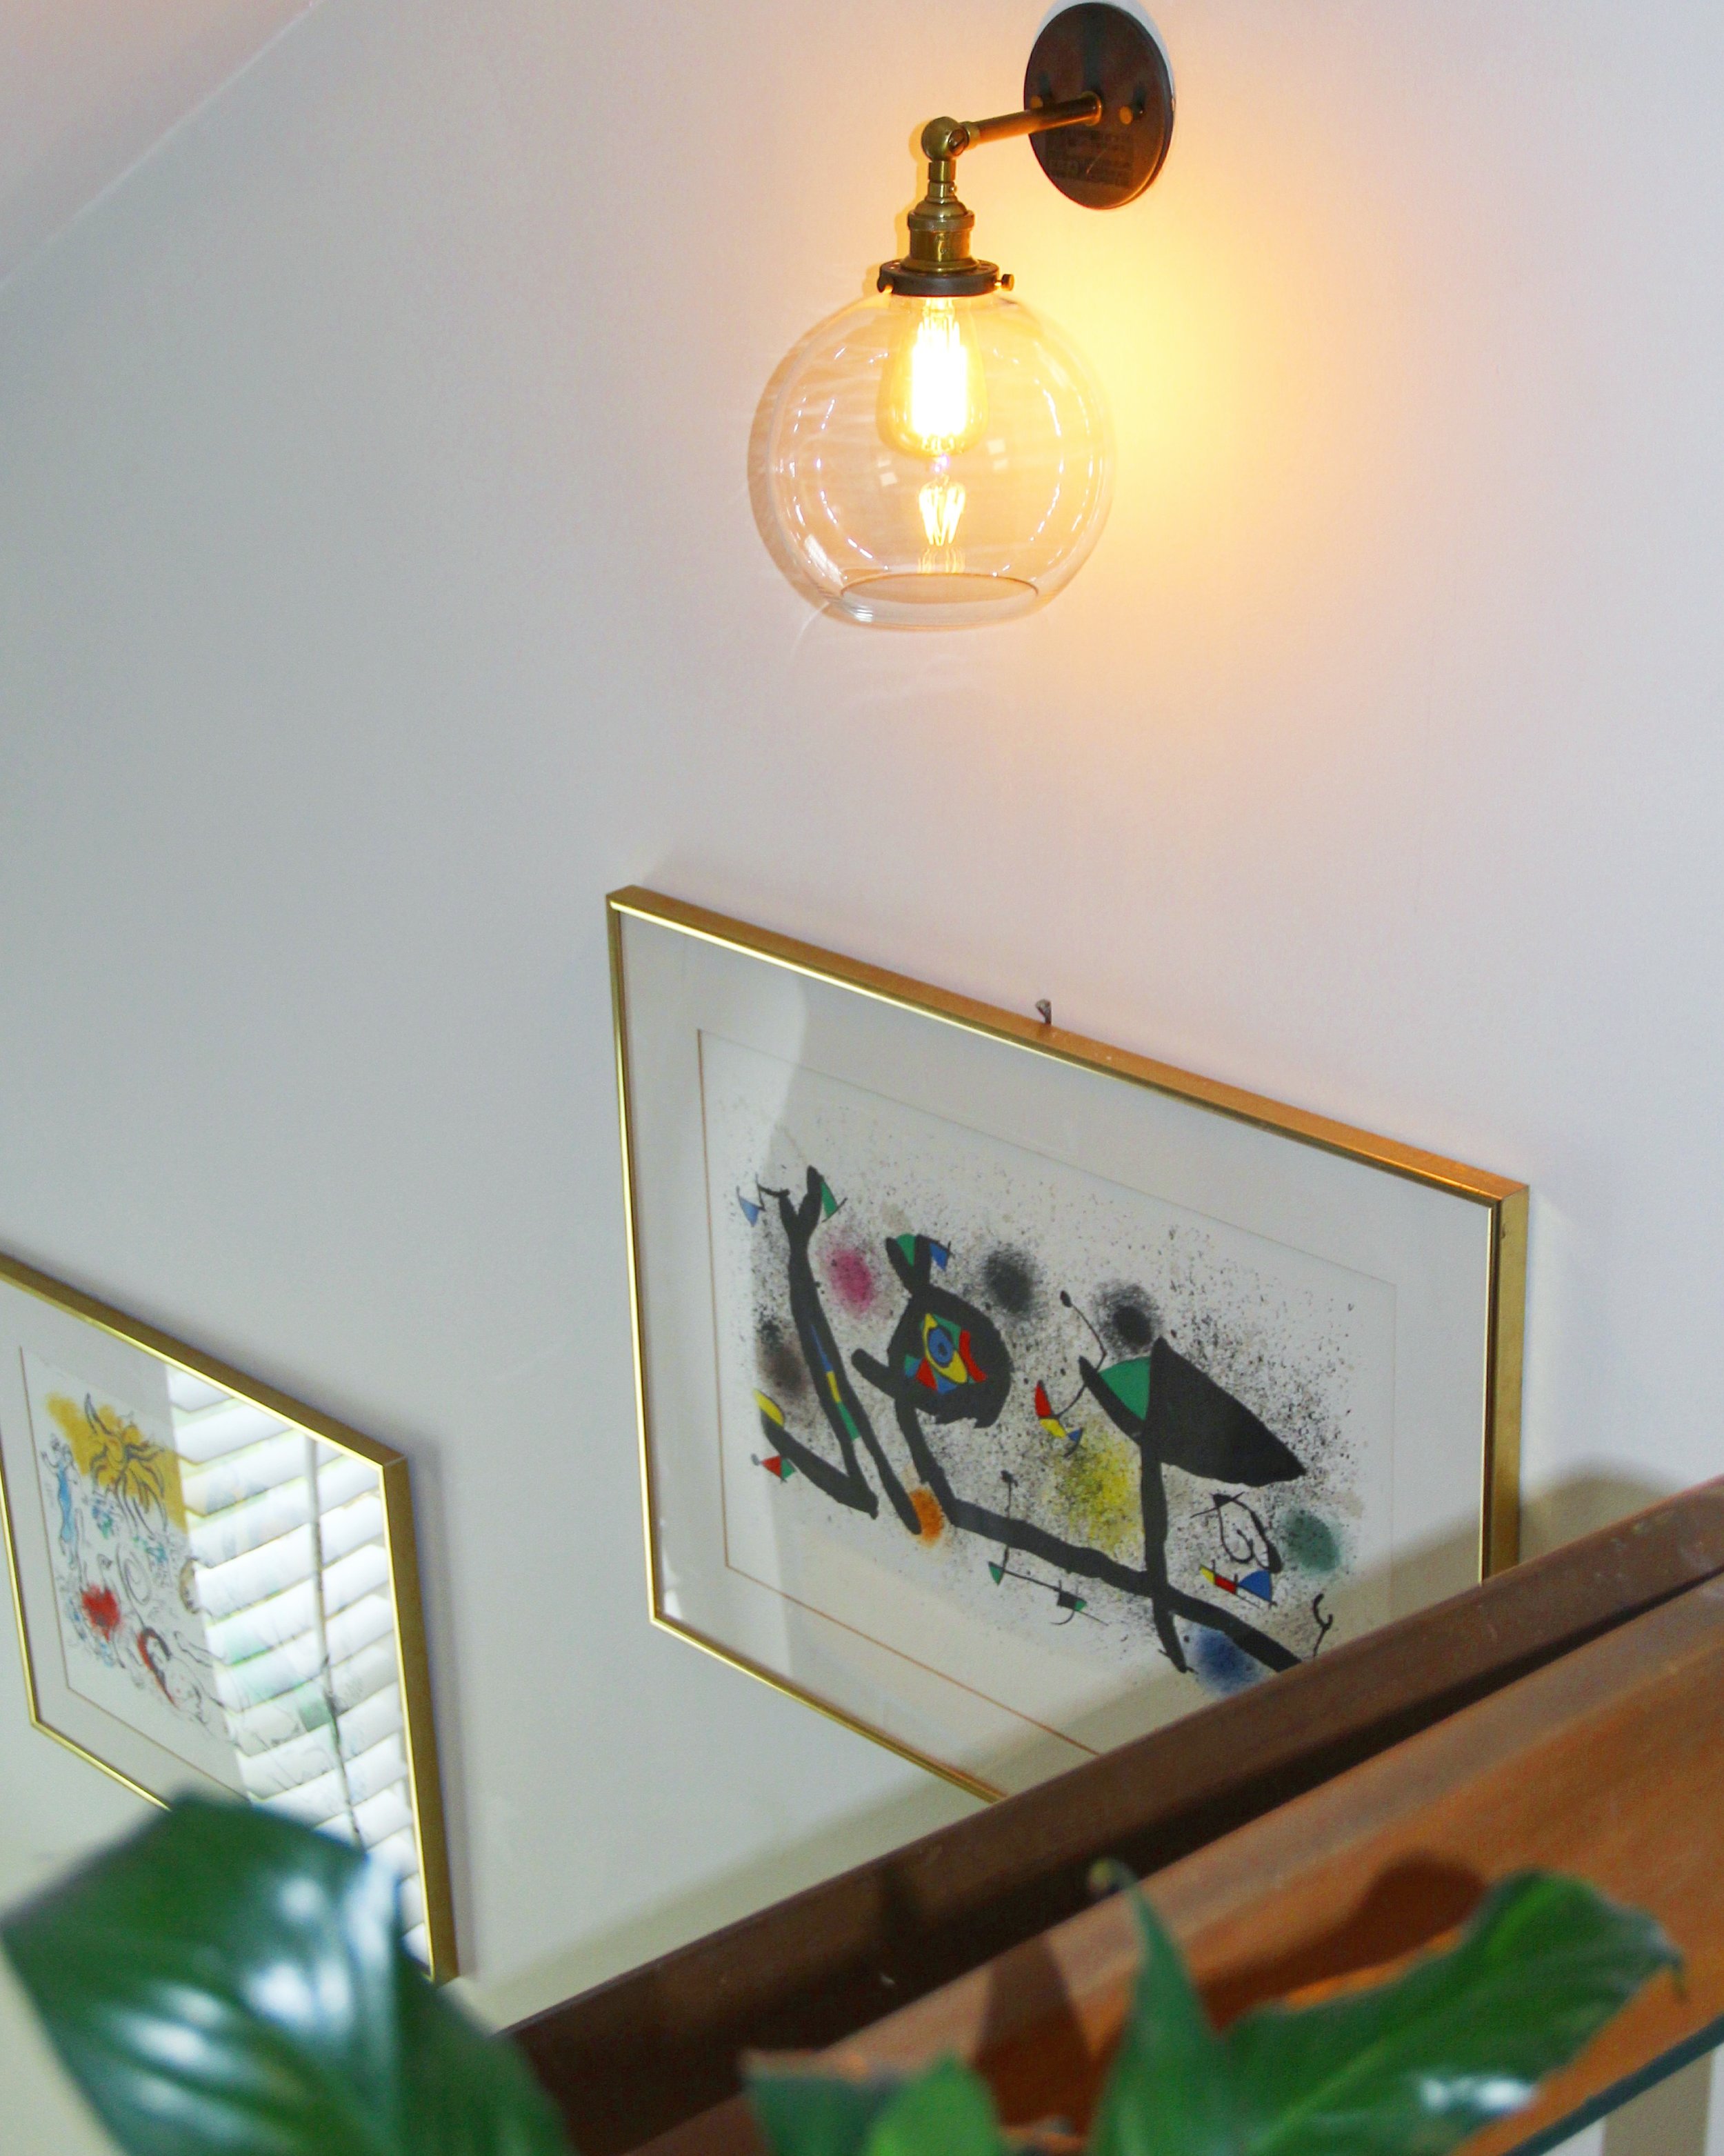
I started small with this DIY lighting project by tackling the bedroom light first.  After watching endless youtube videos (like this one) and how to articles (here and here), I successfully hung this semi-flushmount lighting fixture from Pottery Barn in our bedroom.  The satisfaction of hanging the light myself was beyond words and of course instantly gave me an itch to want to replace the rest of my unsightly fixtures as soon as possible.  I went on to tackle replacing our stairway wall sconce with this Restoration Hardware fixture and finished out my lighting project by replacing our entryway light with this piece from Lowes Home Improvement.  

I decided to document my final lighting installation and share it with you all today for a few reasons:

  • I've learned throughout this process that replacing a lighting fixture follows a basic formula.  Once you know/understand the formula it's fairly quick and simple to tackle this project yourself.
  • You can save some serious money doing this yourself as opposed to having to call an electrician to do this simple task for you.
  • It's really empowering knowing how to do something like this.  I know it can appear intimidating at first glance, but after teaching myself how to do this I am really proud and amazed at what I am capable of accomplishing.  
IMG_9880.JPG
IMG_0438.JPG

What you will need... 

  • Screwdriver (philips and/or flathead depending on the fixture)
  • Wire Strippers (wire cutters or a utility knife work just fine)
  • Needle Nose Pliers (helpful for twisting wires together)

Instructions 

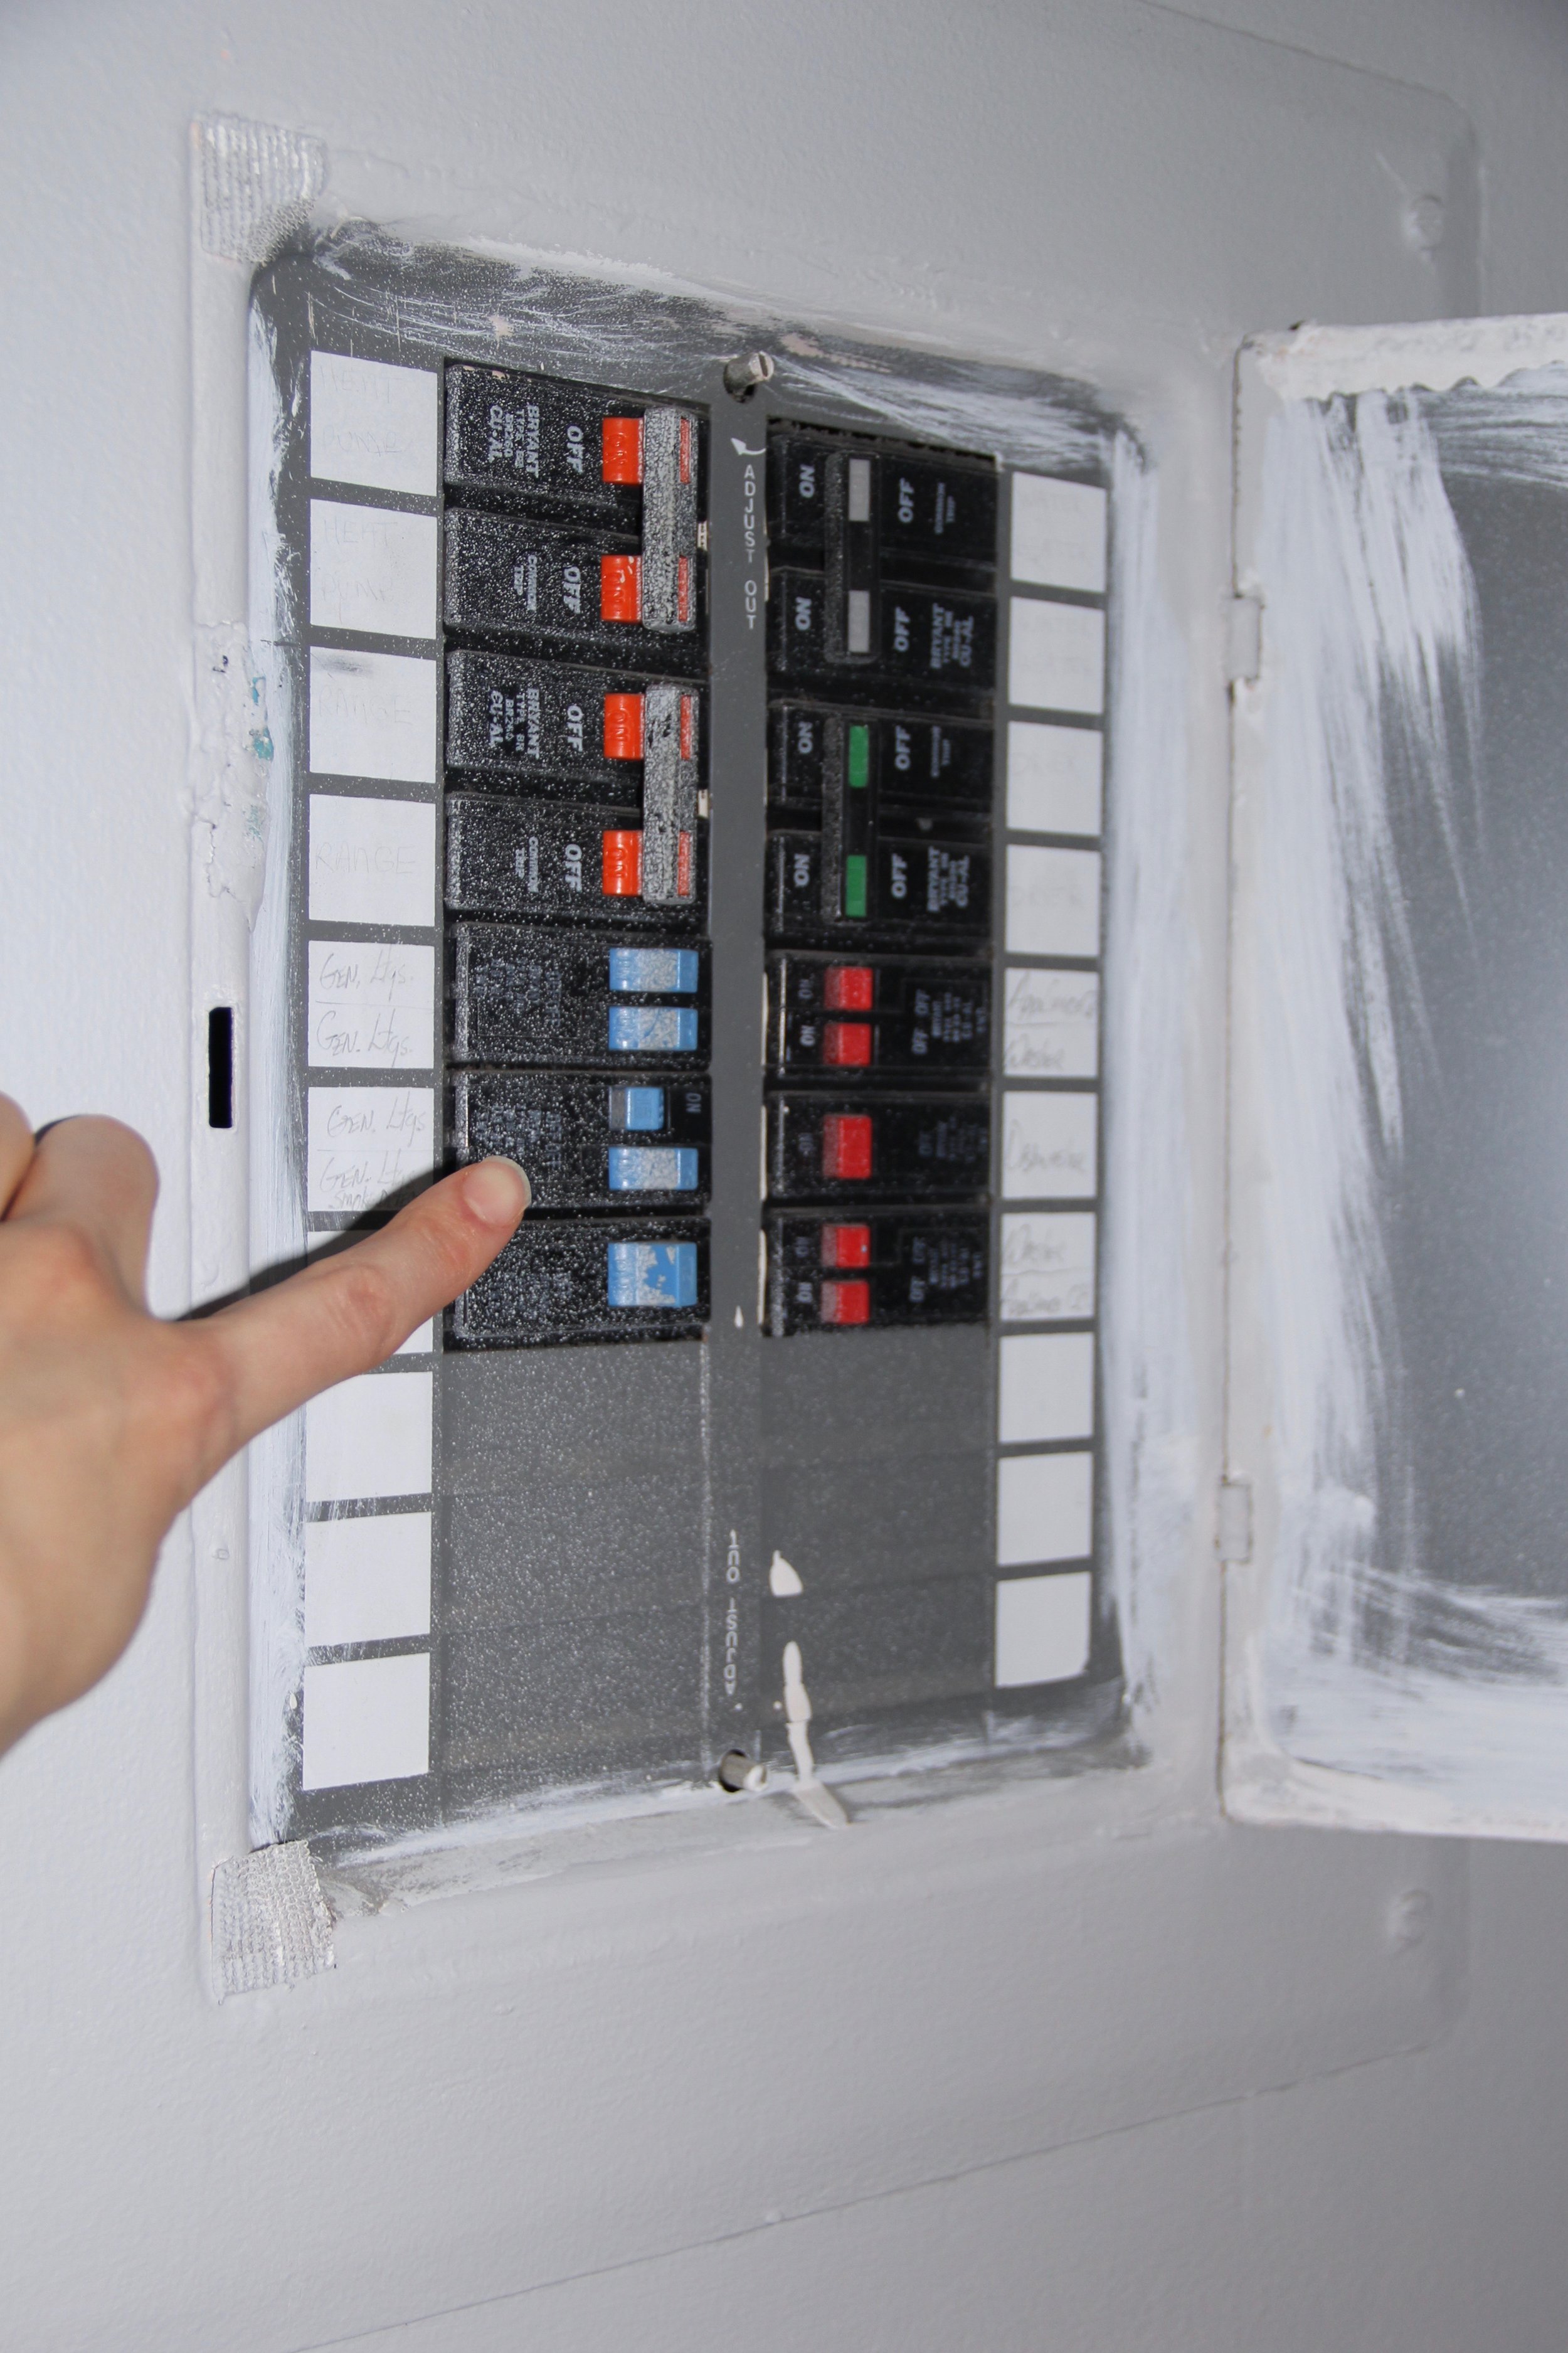
  1. Start by turning off electricity to the light socket by flipping the appropriate switch in your electrical box.  Electricians would refer to this as "turning the breaker off at the fuse panel."
  2. See this guide for how to remove an existing lighting fixture
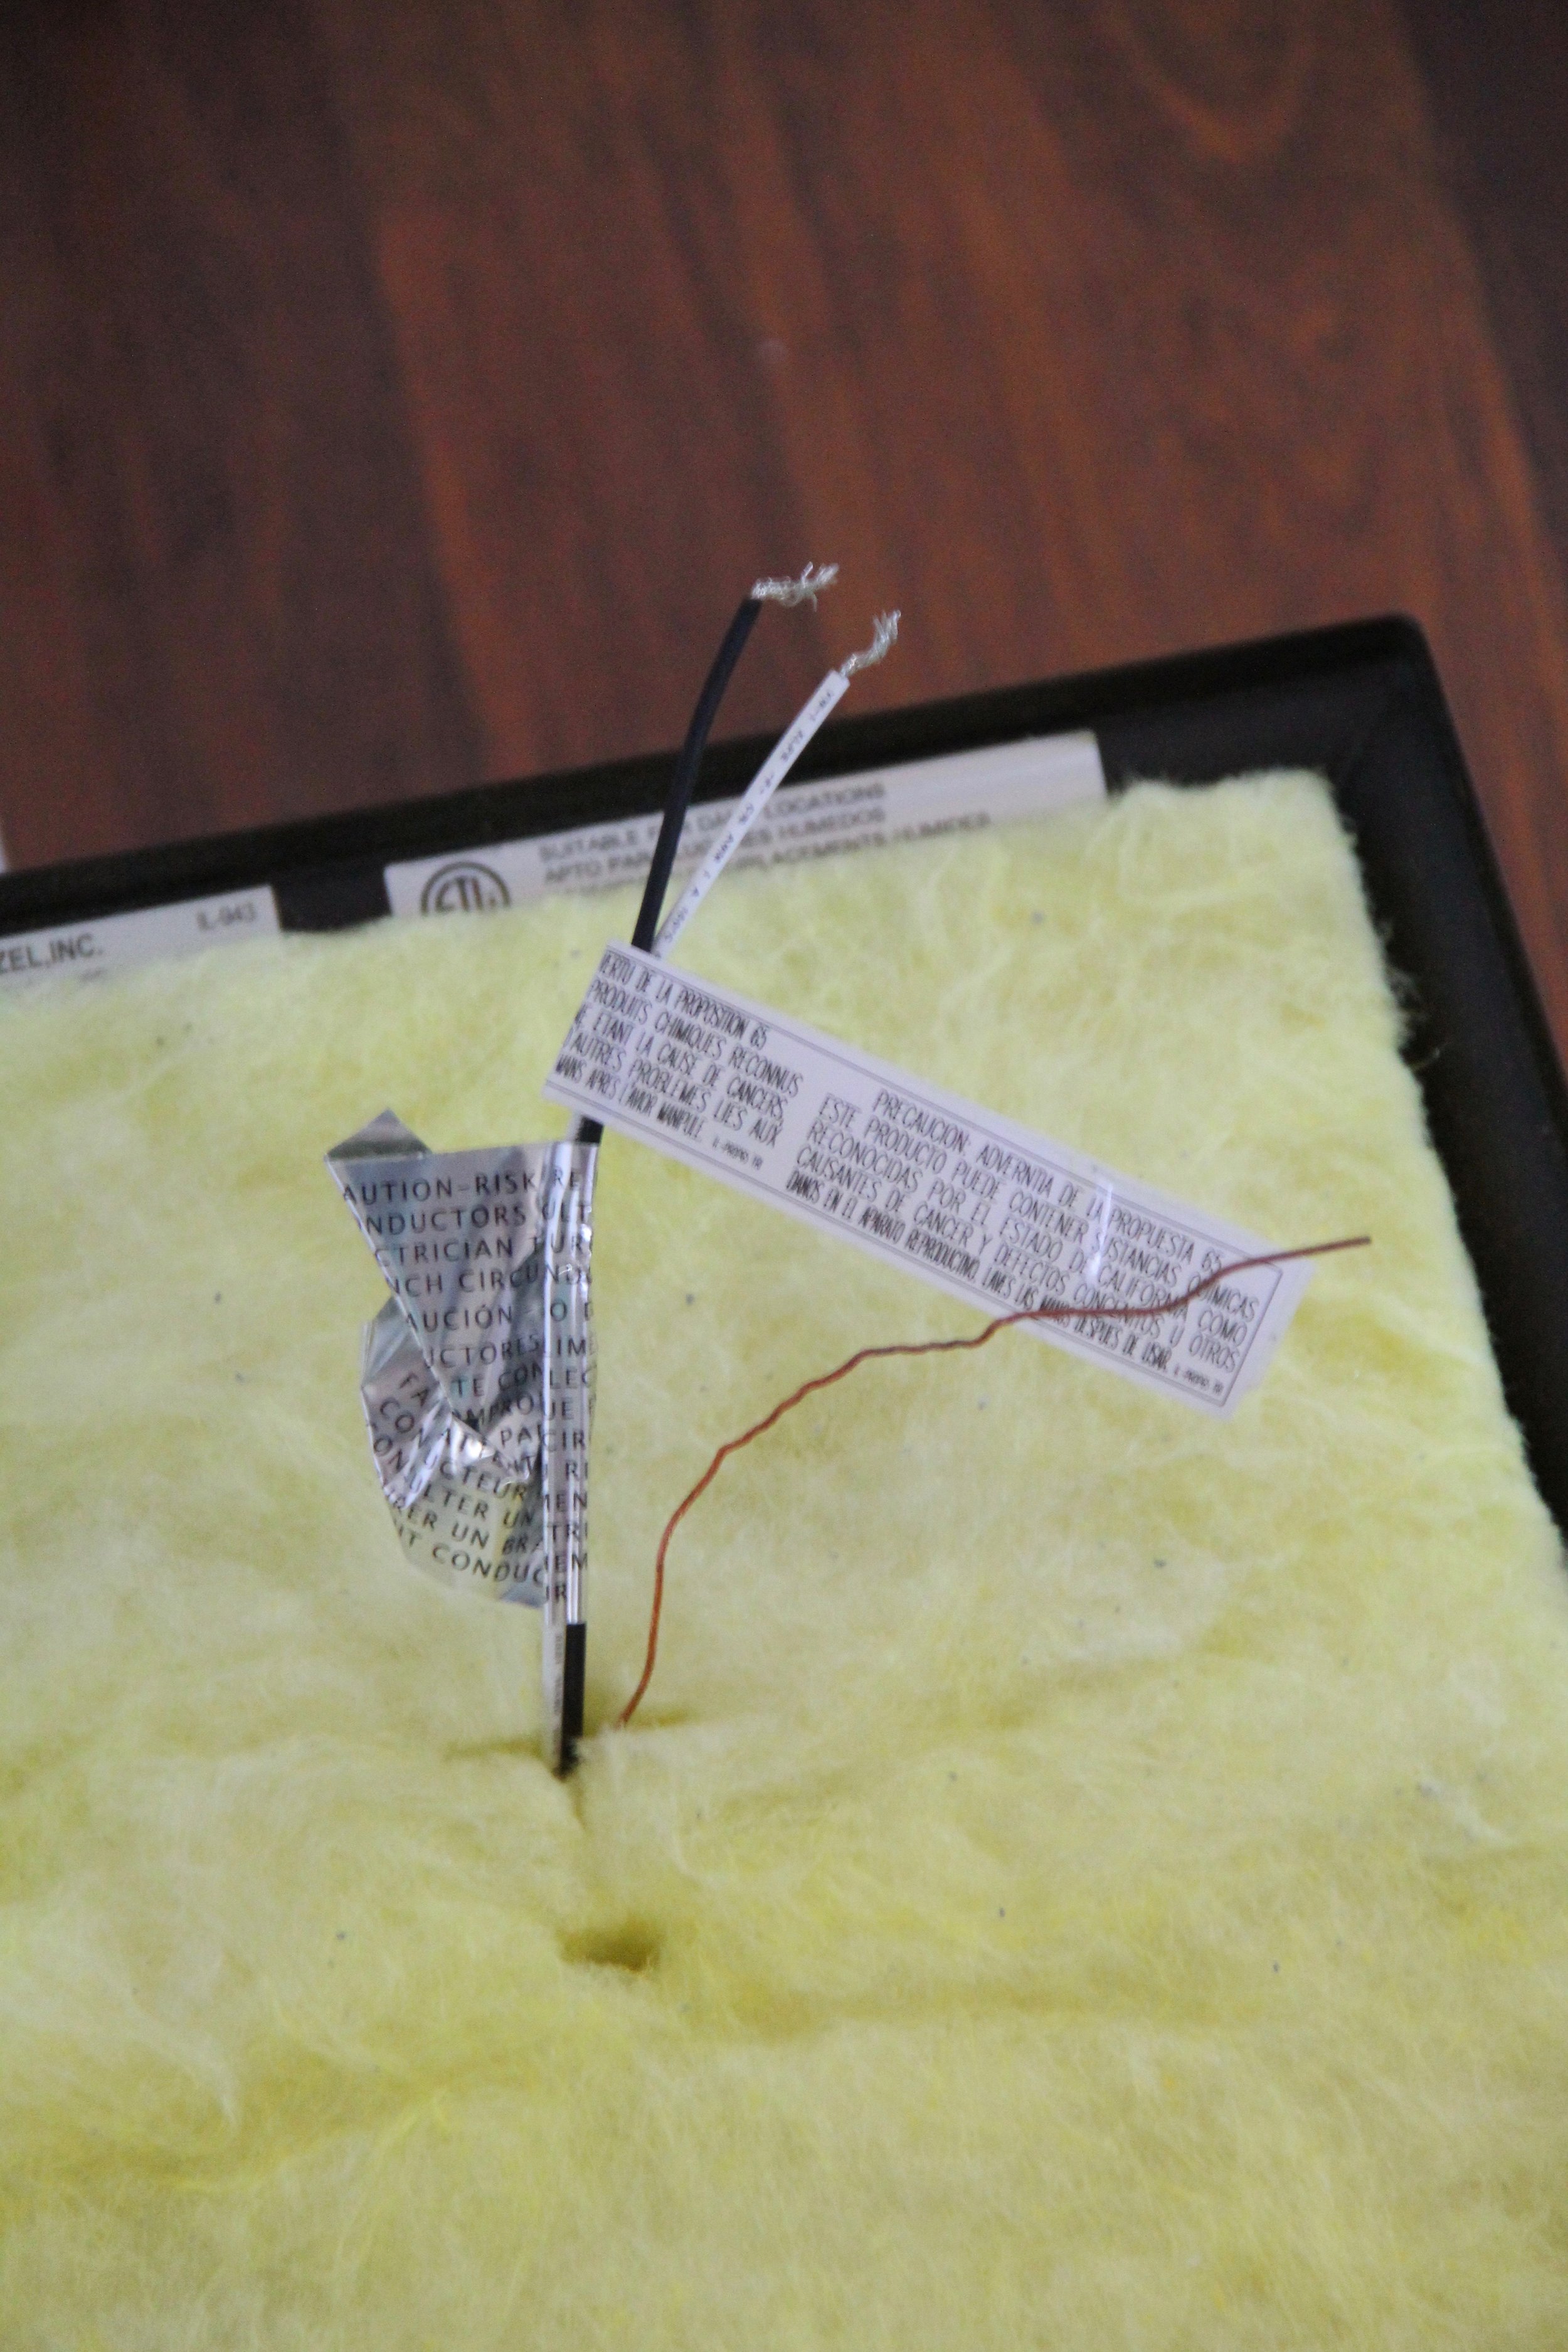
  3. Remove the new fixture from the box and make sure to read the installation instructions carefully (as there may be slight variations in the process, but overall it's the same formula)
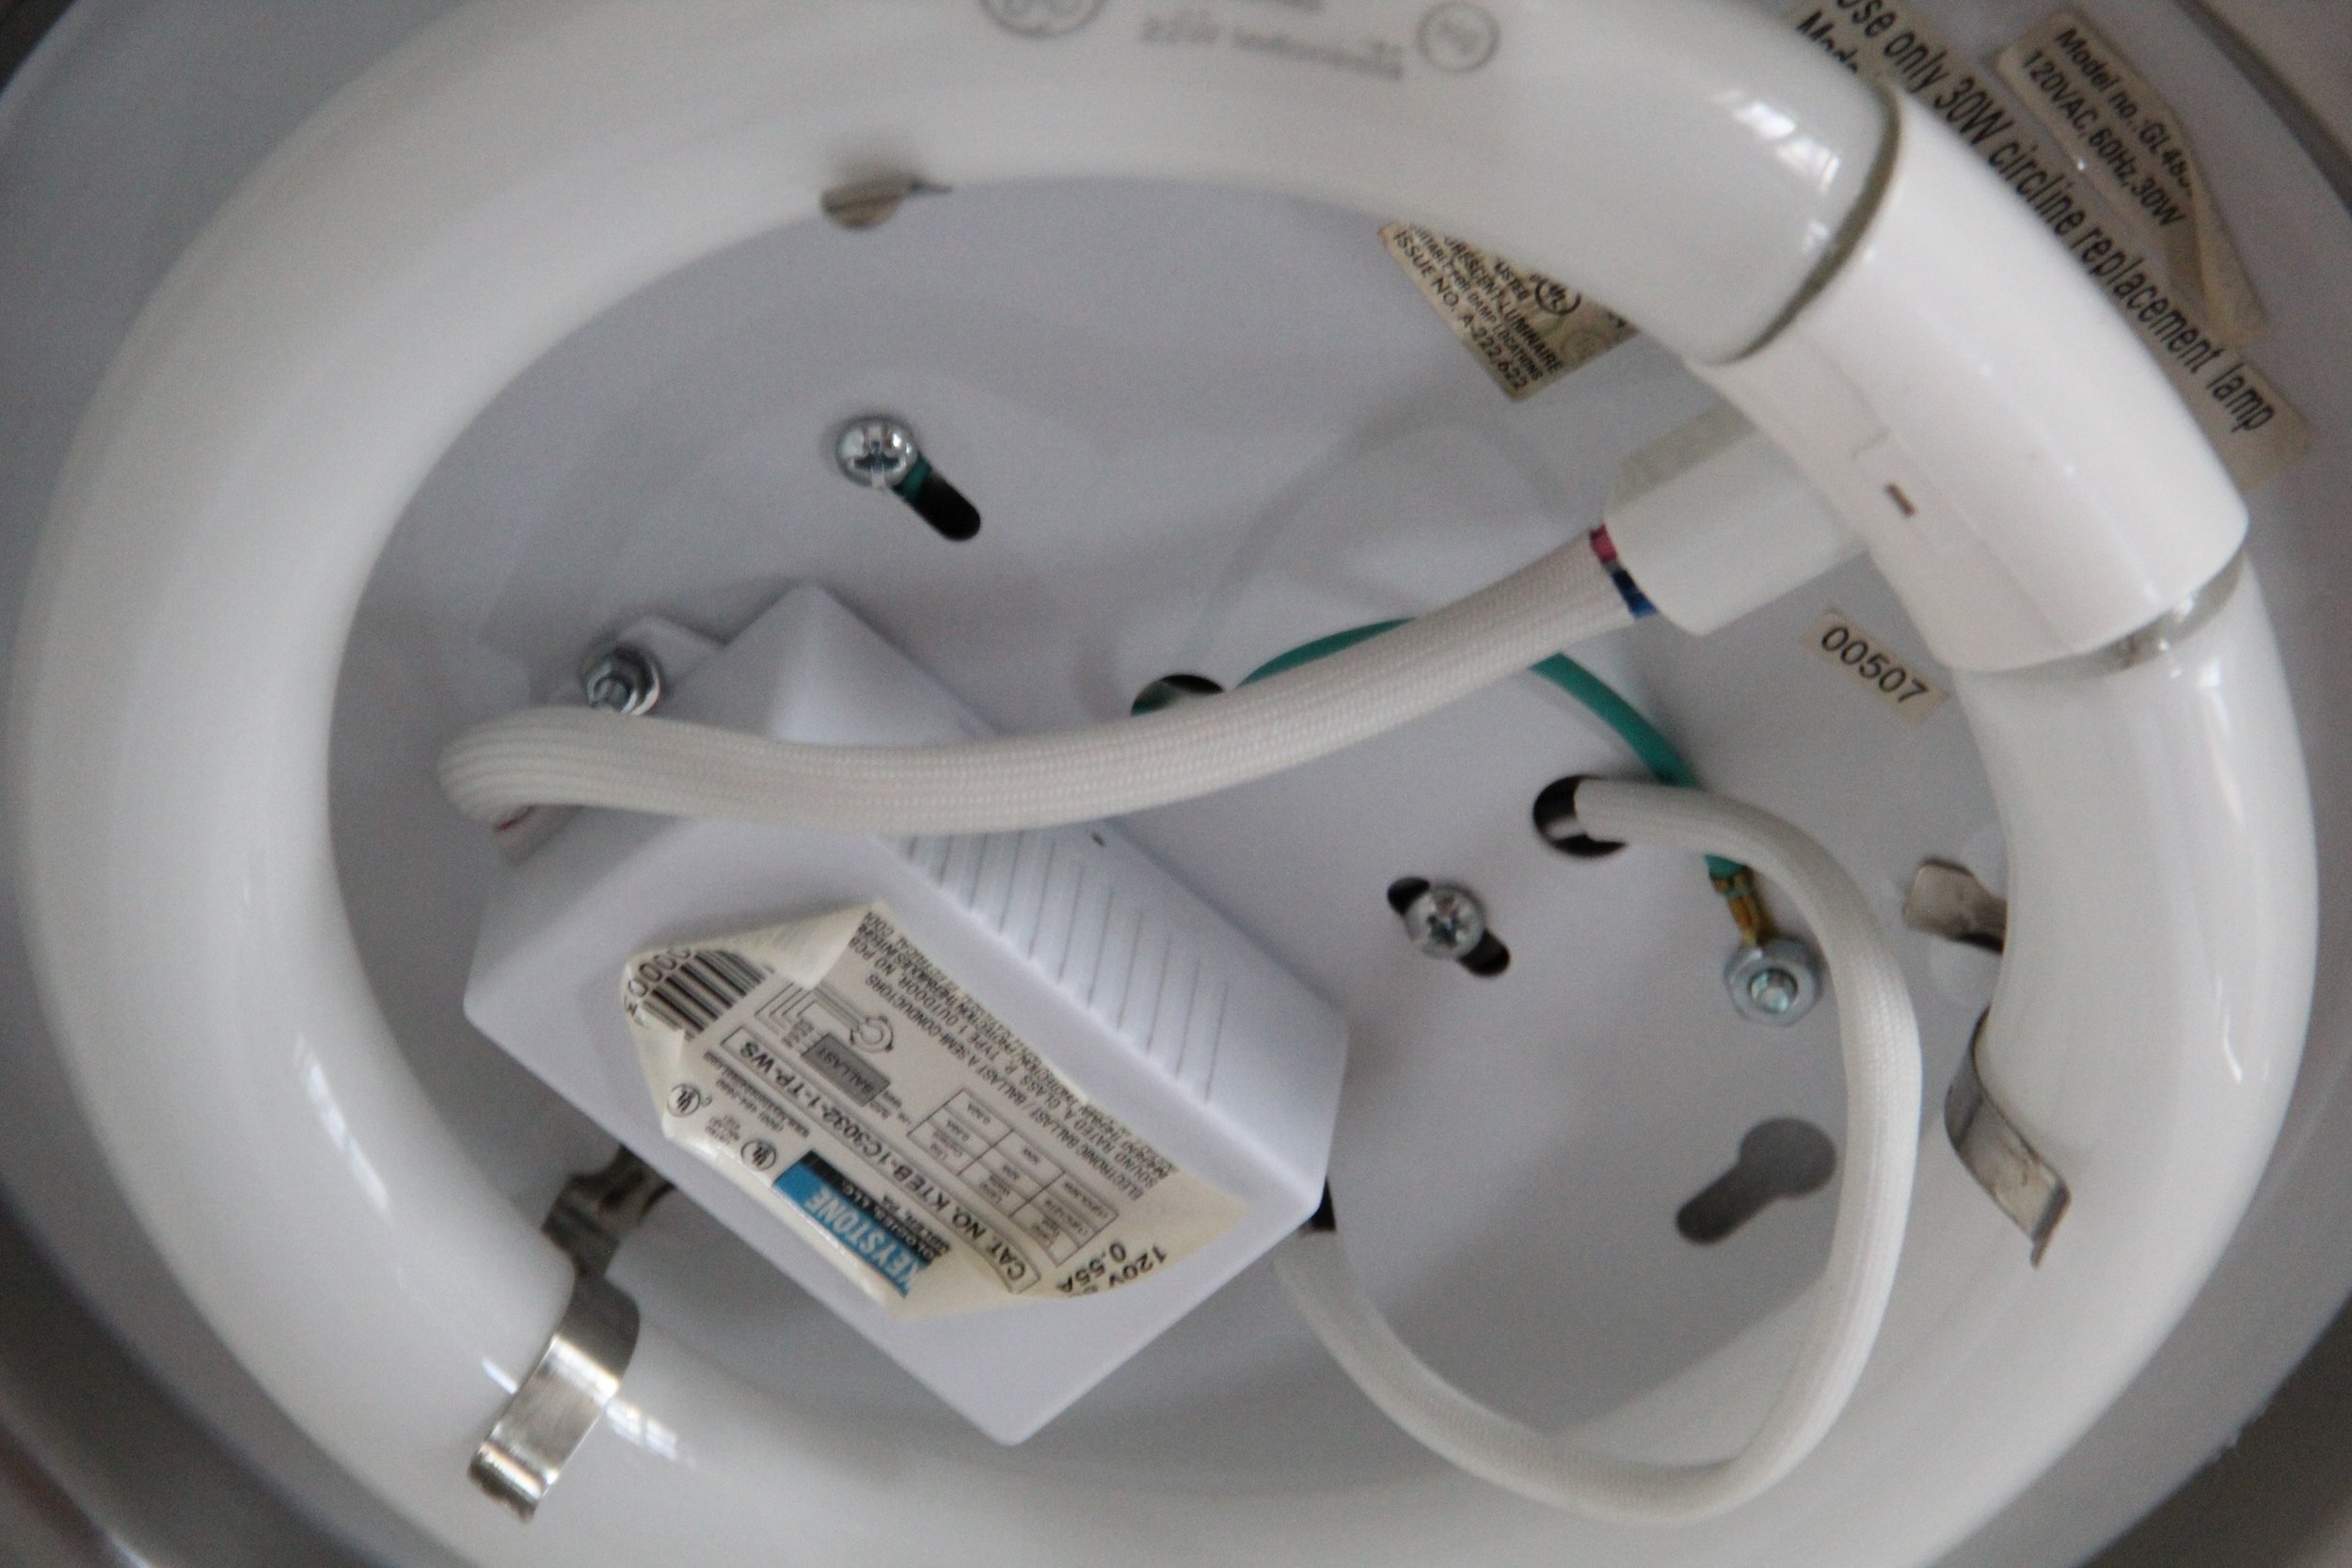
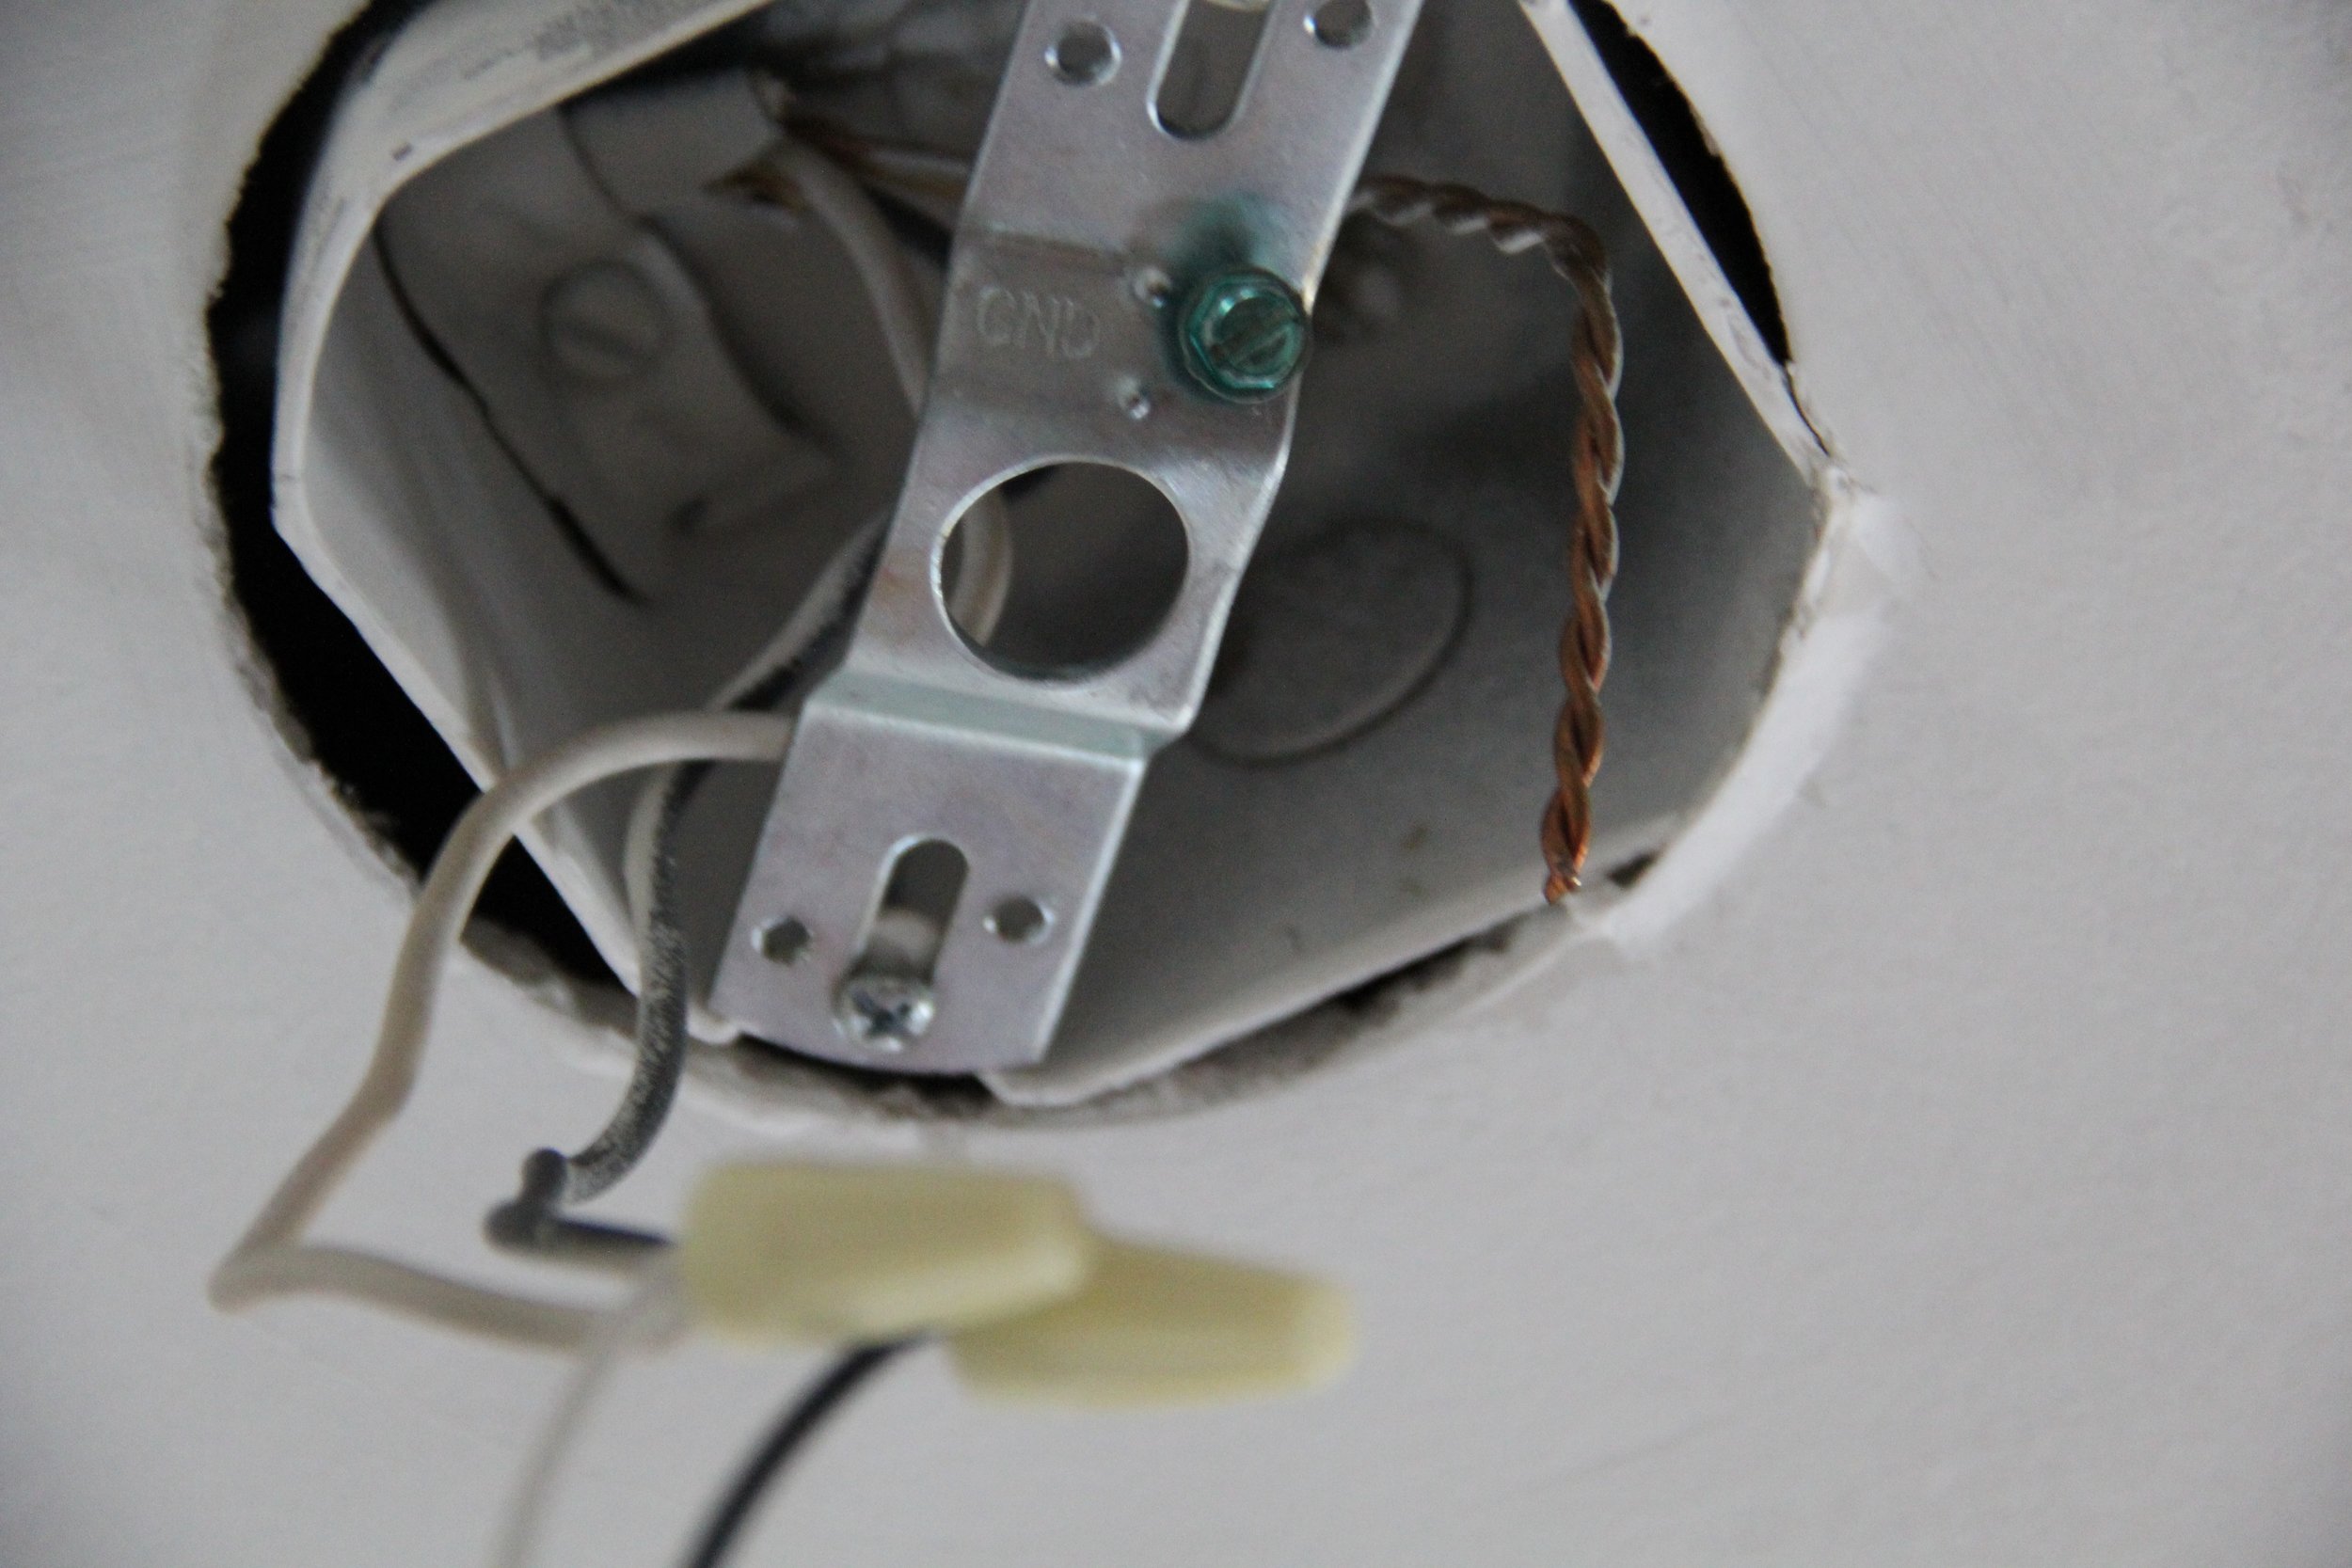
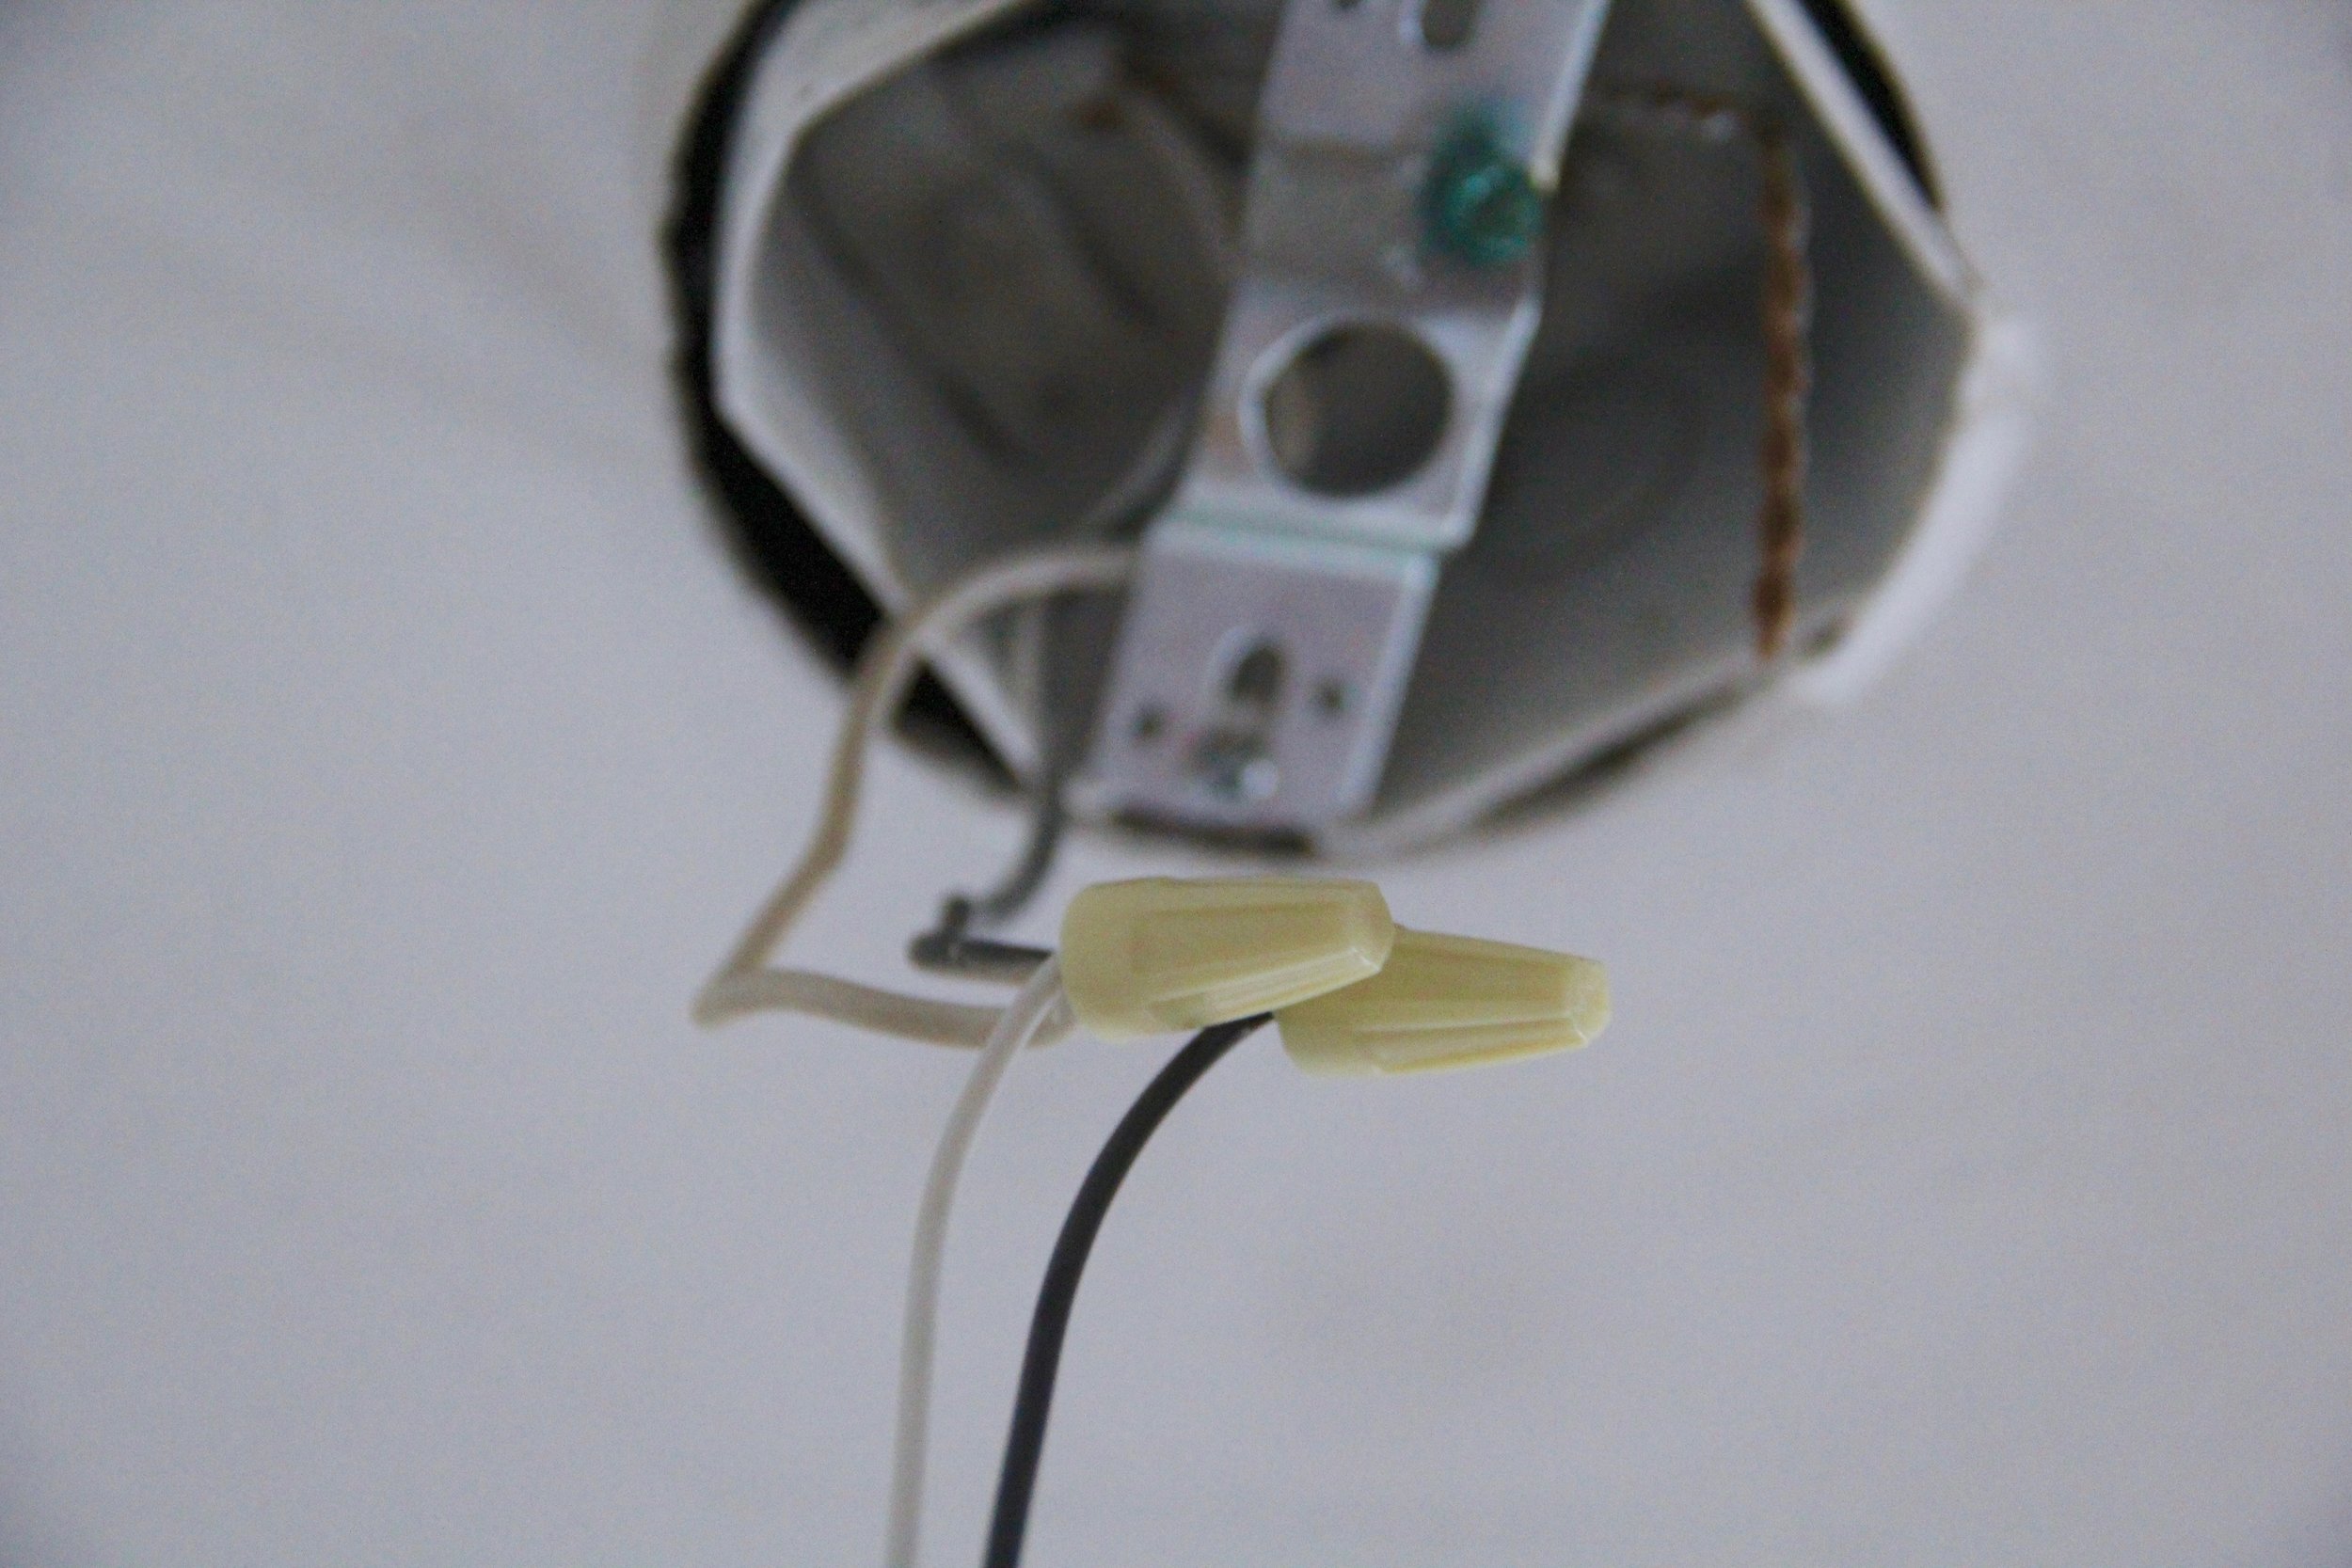
  4. With the old lighting fixture removed you will notice that there are 3 wires in the lighting fixture socket - A Black Wire, A White Wire and a Copper Wire.  Make sure that these wires remain accessible once you install the new metal lighting mount (provided in the new lighting fixture box)
  5. To attach the new fixture, connect the following:
    1. Twist the ends of the fixture black wire and the socket black wire together and then secure with an electrical wire cap.
    2. Twist the ends of the fixture white wire and the socket white wire together and then secure with an electrical wire cap.
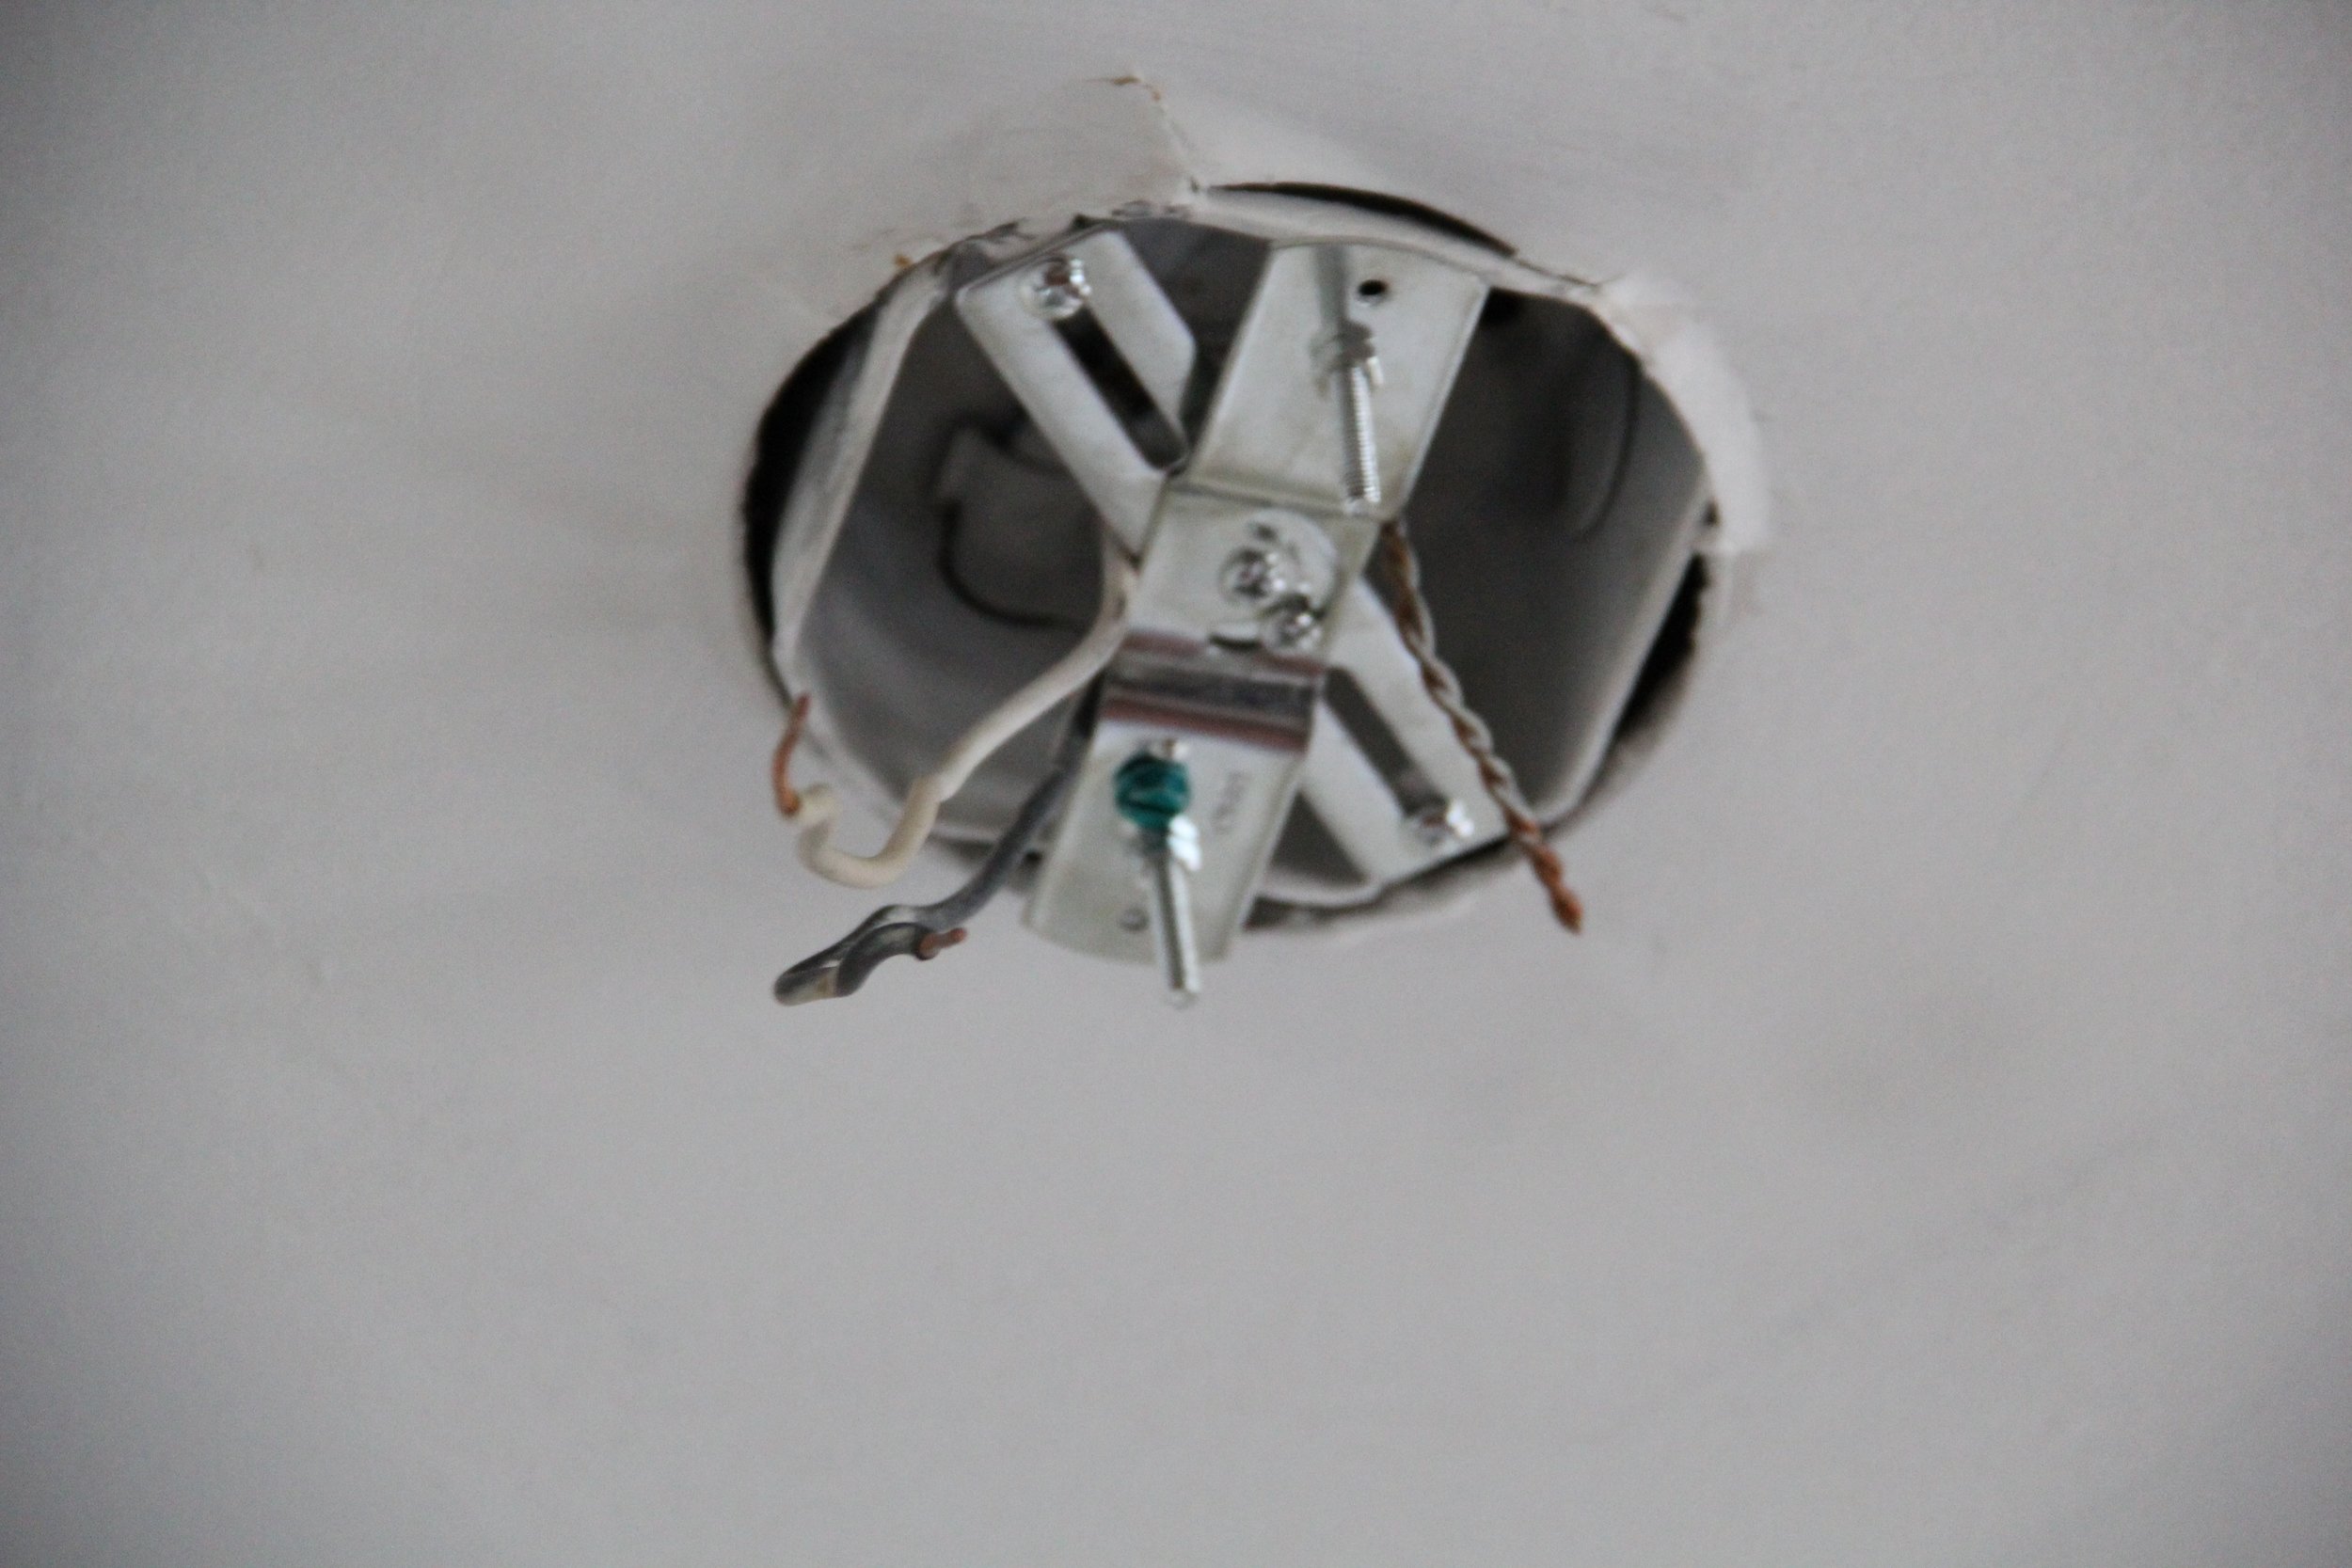
    3. For the copper wire, sometimes both the socket and fixture have copper wires to connect together, but in the event that only the fixture has a copper wire, secure it around the flathead bolt located towards the mid-center of the metal lighting mount. 
  6. Once the wires have been secured, screw the bolts into the lighting fixture, connecting them to the metal mount (make sure to tighten the bolts so that the fixture feels secure).
  7. Once the fixture is secured, install/attach any remaining assembly components of the fixture (including the light bulbs).
  8. Flip the power to the fixture in your electrical box back on and then confirm that the fixture is working by flipping on the designated lighting switch.  
IMG_8683.jpg
IMG_8689.jpg
IMG_8710.jpg
IMG_8699.jpg
IMG_8724.jpg
IMG_8727.jpg
IMG_8729.jpg
IMG_8745.jpg
IMG_8756.jpg
IMG_8776.jpg
IMG_8764.jpg
IMG_8786.jpg
In Decorate Tags DIY, Lighting, Home Improvement, Flushmount, Ceiling Light
Comment

Breakfast Parfait Bites

October 13, 2016 Callie Cagney
IMG_1441.JPG

As you all may recall from this previous post, I recently had the privilege of being part of a select group to receive a preview of the latest product launch from 34 Degrees - Vanilla and Chocolate Crisps!  Boy did I have fun creating all sorts of delicious dessert bites using both the vanilla and chocolate crisps.  However, after taking time to think about it I realized that the pairing options didn't have to be limited to just dessert.  Why not use these crisps to make a delicious and healthy breakfast treat?!? This recipe for Greek Yogurt Parfait Bites is super easy to make, healthy and delicious.  Definitely a crowd pleaser and an absolute must try.  See below for recipe details. 

IMG_8523.jpg
IMG_8506.jpg

Ingredients

  • 34 Degrees Vanilla Crisps
  • Greek Yogurt (I prefer plain, but vanilla works too)
  • Honey Almond Flax Granola (or similar)
  • Fresh Blueberries
  • Good Quality Honey
IMG_8507.jpg
IMG_8509.jpg

Instructions

  1. Arrange 34 Degrees Vanilla Crisps on a serving platter
  2. Spoon about a tablespoon of greek yogurt onto each crisp
  3. Top each dollop of yogurt with about a teaspoon of granola
  4. Place 3-4 Fresh Blueberries (Blackberries and Raspberries work well too!)
  5. Finish each parfait bite with a light drizzle of gourmet honey
  6. Serve and enjoy!
IMG_8520.jpg
In Food and Drink Tags 34 Degrees Vanilla Crisps, Breakfast, Recipe, DIY, Healthy, Blue Ridge Apiaries
Comment

Cleaning Your Refrigerator

August 12, 2016 Callie Cagney
IMG_8158.jpg
IMG_8180.jpg

Chefs always seem to talk about the stand mixer being the work horse of kitchen appliances.  While it certainly is a work horse, I would have to say that the refrigerator is really the ultimate work horse appliance in the kitchen.  When you take a moment to think about it, the refrigerator is the only appliance that never shuts off.  It's constantly in work mode keeping food cold or frozen in an effort to maximize the longevity of your groceries.  Being that this is such a critical kitchen appliance, it is important to keep this appliance in tip top shape so that your perishables are optimally stored.  For today's post, I am sharing my list of go-to cleaning supplies as well as my schedule for properly maintaining my fridge.  I know this may not be a top of mind cleaning chore, but when you stop to really think about the actual importance of the refrigerator in your home, I think you may gain an appreciation for the value of today's post. 

IMG_8146.jpg
IMG_8150.jpg

Refrigerator Cleaning Supplies

  • Weiman's Stainless Steel Cleaner (I prefer the Spray, but wipes are fine to use too)
  • Spray Bottle filled with equal parts Water and Distilled Vinegar
  • Rubber Gloves
  • Baking Soda Fridge Pack
  • Mild Dish Detergent
  • Paper Towels and/or Cleaning Rags
  • Vacuum 
IMG_8165.jpg
IMG_8189.jpg
IMG_1027.JPG

Suggested Cleaning Schedule

  • Weekly
    • Wipe up any/all food spills
    • Clean out any food that is past its prime/expired
    • Polish Stainless Steel Exterior (if applicable) using a polish like Weimans
    • For refrigerators with a non-stainless steel exterior, clean using a mixture of distilled vinegar and water
  • Monthly
    • Remove all food from fridge, clean all shelves and interior walls using distilled vinegar and water (*odors tend to absorb into soap detergents, so using a mixture of water and vinegar will not only disinfect but it will also prevent unwanted food odors from lingering)
    • Check expiration dates on all refrigerated condiments and discard any that are past their prime
    • Remove and clean exterior base grate on refrigerated with a mild detergent and water
    • Pull refrigerator away from the wall to vacuum any dust/debris that may have accumulated behind the appliance
    • Replace Baking Soda Fridge Pack (*baking soda will help to eat up any food odors and keep your fridge odorless)
  • Additional Fridge Cleaning Resources
    • Apartment Therapy
    • Real Simple
    • Martha Stewart
IMG_8179.jpg
In Decorate Tags Cleaning Products, Cleaning, DIY, Homekeeping, Organize
Comment

Making Cheese Markers

July 29, 2016 Callie Cagney
IMG_8001.jpg

Cheesescapes are a fabulous no-fuss menu item for any cocktail party.  There are endless ways to assemble and serve a delicious cheese platter and you can always count on a cheeseboard to be a crowd pleaser.  

While there is no doubt that I love to serve and enjoy a good cheesescape from time to time, my one frustration would be the constant need for explaining a cheeseboard to guests before dining.  Sure there are the obvious cheeses like blue, brie and classic cheddar, that a guest can usually identify.  However, for the majority of cheeses, I find myself giving multiple explanations in a given evening to my guests, which can be extremely challenging to keep up with while hosting a party.  

I know that there are all sorts of cheese markers available for purchase, however my issue with store bought cheese markers is that most come pre-labeled with the four most common cheese types (ex. gouda, brie, etc.) since they are mass produced.  After spending some time researching on both Etsy and Pinterest, I realized that it wouldn't be so hard to make my own cheese markers and it would give me the ability to more accurately label the cheeses I serve to guests.  

This is an inexpensive and extremely easy DIY that I absolutely adore!  Here is how I went about creating my own custom cheese markers:  

IMG_7972.jpg

Here is what you will need:

  • Toothpicks
  • Glue
  • Adhesive Kraft Banner Labels (like these)
  • Glitter
  • Metallic Pens and/or Fine-Tipped Markers
  • Fine-Tipped Pen
IMG_7958.jpg
IMG_7960.jpg
IMG_7963.jpg
IMG_0897.JPG
IMG_7965.jpg
IMG_7998.jpg

Instructions

  1. Peel off an adhesive banner sticker from the sticker sheet 
  2. Fold the banner sticker in half matching and sticking only the two ends of the sticker together
  3. Place the end of the toothpick (about 1/4 inch) through the center loop of the banner sticker and press it against the center most point of the sticker 
  4. Press the remainder of the sticker opening together to create the cheese flag
  5. Apply a thin line of craft glue along the cut side of the sticker
  6. Gently dip the glue-lined end of the cheese flag into the jar of glitter, making sure to gently tap off any excess glitter before placing the flag down to dry on a paper towel
  7. Once dry, write the name of the cheese and milk type on the flag using a fine tipped pen
  8. Place flag into its designated cheese and serve
IMG_7989.jpg
In Entertain Tags DIY, Cheesescape, Cheeseboard, Cypress Grove, Virginia Chutney Co., 34 Degrees, Cocktail Party Decor, Cocktail Party Ideas
Comment

Creating a Professional Looking Floral Centerpiece at Home

July 15, 2016 Callie Cagney
IMG_7841.jpg

One thing I absolutely love and cannot live without is my morning routine.  I wake up, have coffee/breakfast, tidy the house and hit the gym for a long run while watching none other than my fave Good Morning America anchor, Robin Roberts.  While my husband is adamant about tracking the major world issues in the morning on FOX and Bloomberg, I really have no interest in being all serious news all the time.  I need more of a mix when starting my day, which is probably why I love watching shows like Good Morning America where you can get a rundown of the major world events, local weather, sports highlights (at a really high level), health news, recipes and lighter bits of information (ex. Steals and Deals with Tori and even a heads up on holidays like National Selfie Day).  

So why am I rambling on about Good Morning America?  Well it just so happens that the show was the inspiration for today's blog post!  We all know that I have a serious flower habit and I find myself swooning over the floral arrangements on Good Morning America pretty much every morning.  Fortunately, it recently occurred to me that I could probably replicate those gorgeous centerpieces myself!  I spent some time studying the flowers in the show's footage and then paid a visit to my local flower supply store.  Lo and behold!  All of the pieces for creating those gorgeous arrangements were pretty easy to track down and fairly inexpensive.  I am sure you are thinking I'm crazy for saying that as you're looking at an arrangement filled with 36 roses.  My secret to affordable roses??  Safeway (my local grocery store)!  Currently they are selling 18 roses for $12.99, so I paid around $26 for the 36 stems, which is a pretty incredible deal.  

My attempt at replicating a gorgeous Good Morning America worthy arrangement was a huge success and I am so excited to share this super easy and oh so beautiful DIY with you all today!  See below for all of the details on how I went about creating this floral stunner. 

IMG_7848.jpg
IMG_7802.jpg

Here's what you will need...

  • 8in x 4in Glass Cylinder Vase
  • Oasis/Floral Foam
  • 1-2 Long and Malleable Jungle Leaves
  • 36 Roses or Similar Flower (ex. Carnations)
  • Sheers (I use clean kitchen scissors)
IMG_7805.jpg
IMG_7811.jpg
IMG_7818.jpg
IMG_7828.jpg
IMG_7822.jpg
IMG_7830.jpg

Instructions

  1. Make sure you have washed and dried your flower vase before starting
  2. Take your jungle leaf and cut it lengthwise along the spine of the leave on both sides to create two leave strips
  3. Line the interior of your vase with each leaf half, making sure to place the freshly cut side down 
  4. Place a 6.5-7inch long piece of oasis in the center of the bowl and fill the bowl with tap water, making sure to have the water saturating the entire piece of oasis as it fills the vase to about the halfway mark.  
  5. I also like to poke holes in my oasis with a bamboo skewer to ensure that water saturates the oasis all the way to the center and also to reduce the level of resistance when inserting the flower stems.
  6. Remove leaves from roses and cut the stems under standing water and on a diagonal.  I would recommend trimming and arranging each flower one at a time to reduce the freshly cut stem's exposure to air.  **Stems that are overexposed to air will die faster, so going one at a time will help to increase the overall longevity of your blooms.   
  7. Start arranging the bottom perimeter first.  These stems can be cut the shortest as they are being placed closest to the water.
  8. Once you have completed arranging a row of flowers along the perimeter, repeat the process for the next level up.  Noting that with each tier, your stems should be cut slightly longer.  
  9. When all flowers have been arranged, you can tweak the layers to ensure that they are even and no holes have been missed.   
  10. This arrangement is great for a dining table, because the low profile of the arrangement won't obstruct your view of fellow dinner guests. 
IMG_7837.jpg
In Decorate Tags Flower Arranging, DIY, Oasis, Jungle Leaves, Dining Room Centerpiece, Centerpiece
Comment
Older Posts →

Subscribe to the Redefining Domestics Blog:

Thank you!

Categories:

  • Decorate (64)
  • Entertain (71)
  • Food and Drink (103)


Latest Posts by Category:

Featured
IMG_1993.JPG
Entertain
Pinterest Worthy Halloween DIYs
Entertain
Entertain
Featured
IMG_8787.jpg
Decorate
How to Hang a Lighting Fixture
Decorate
Decorate
Featured
IMG_1694.JPG
Food and Drink
A Healthy Recipe for Homemade Granola
Food and Drink
Food and Drink

Instagram 

http://instagram.com/calliecagney

View fullsize We are lucky to have you in our sphere Chris Kalna!❤️ #happyfathersday #girldad #cookiebaking #suttonbutton #lovethem
View fullsize National Puppy Day with my two toddlers❤️ #suttonbutton #jolene #nationalpuppyday #jojosbathtubfomo😂
View fullsize Bibbidi Bobbidi Boo, she’s 2! Happy Birthday Sweet Girl💙 #suttonbutton #halloween #cinderella #happybirthday #shestwo!
View fullsize Fourth of July Vacay is already off to a fun start❤️💙⛱ #fourthofjuly #mountains #thesetwo #ggccsummer2019
View fullsize This little girl turned 1 on Halloween! Sutton, you are pure joy! Happy Birthday sweet girl! #suttonbutton #happybirthday #halloweenbaby #birthdaycake #diy #beaufortbonnet
View fullsize Our first 4th of July as a trio❤️💙 #happyfourth #familyphoto #skr #suttonbutton #vacation #northcarolina
View fullsize First day of vacation with these two loves💙 #thecutest #vacation #july4th #mountains #sKr #suttonbutton #beachingit #waterbaby
View fullsize Happy First Father’s Day to this stud muffin! You bring a lot of joy and sports watching to our lives. The Ladies Kalna are lucky to have you!❤️ #Fathersday2018 #chrissums #sKr #socute #luckyus #moreusopenplease
View fullsize Girlfriends kicking off MDW together💕🐳🛁 #suttonandmadden #mdw #littlebesties #bathtime #toocute
View fullsize Baby’s first Christmas tree 🎄 #deckthehalls #sKr #christmastree #happysunday
View fullsize Baby sKr’s jammie game is on point🙌🏻❤️ #thingstodo #retailtherapy #stillpregnant #petiteplume #potterybarnkids #babyclothes #toocute #babygirl #pajamaparty
View fullsize My husband and I joke about Baby K’s “master suite.” Clearly we’re both struggling with a case of bedroom envy😂 #stillpregnant #babynursery #iviebaby #glitterguide #mypotterybarn #serenaandlily #babygirl #skr #projectnursery

Pinterest

http://www.pinterest.com/calliecagney/

Follow Callie Cagney's board Home Decorating on Pinterest.
Welcome RSS

© 2016 Redefining Domestics. All Rights Reserved.